Nicodemus:
would you care to post up some WIP and some step by step that you've done on them.. perhaps even some color selections and techniques..
two_heads_talking
I took very few WIP photos, and seeing as everything is now done it's unfortunate as I guess there was a lot of fiddly bits that required thought.
Here's what I'm able to comment on:
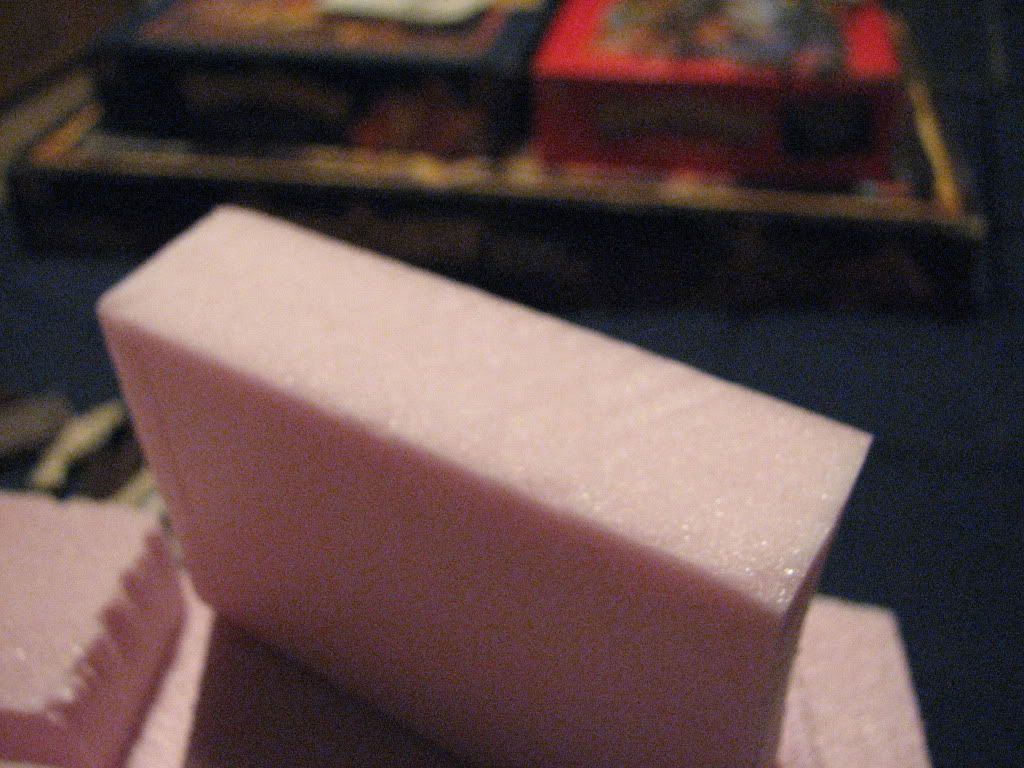
I used 1" thick extruded polystyrene (pink insulation foam) purchased for $15CDN from Home Depot. You can't get much cheaper when you consider you can get
almost all of the WHQ board sections from a single sheet.
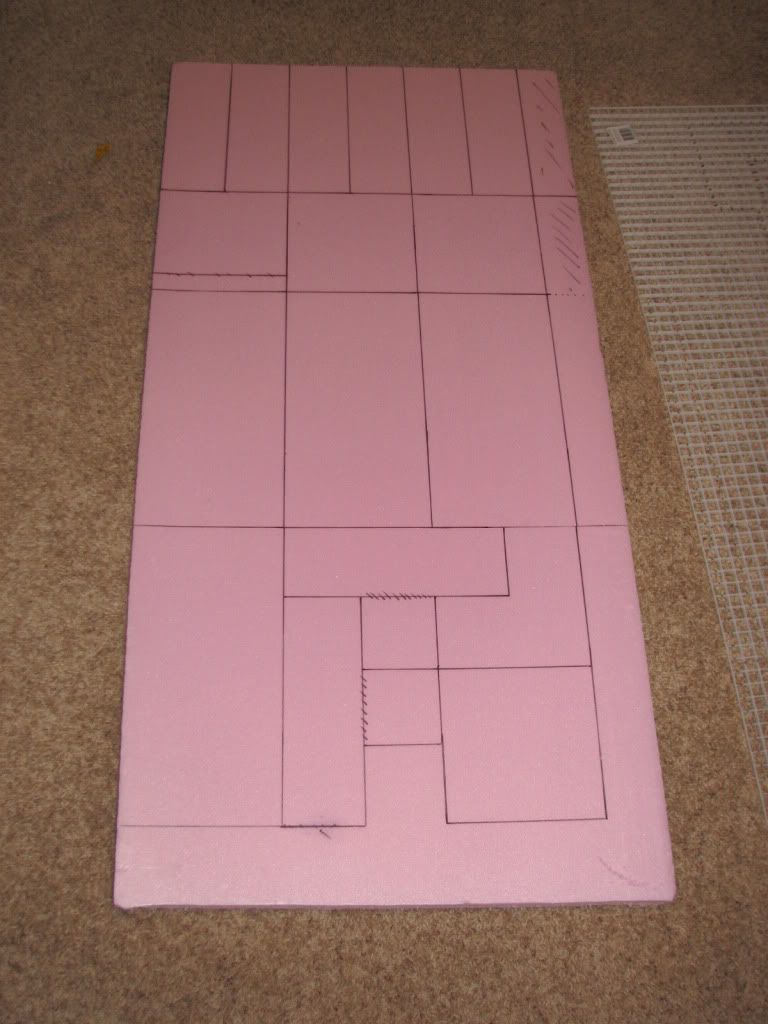
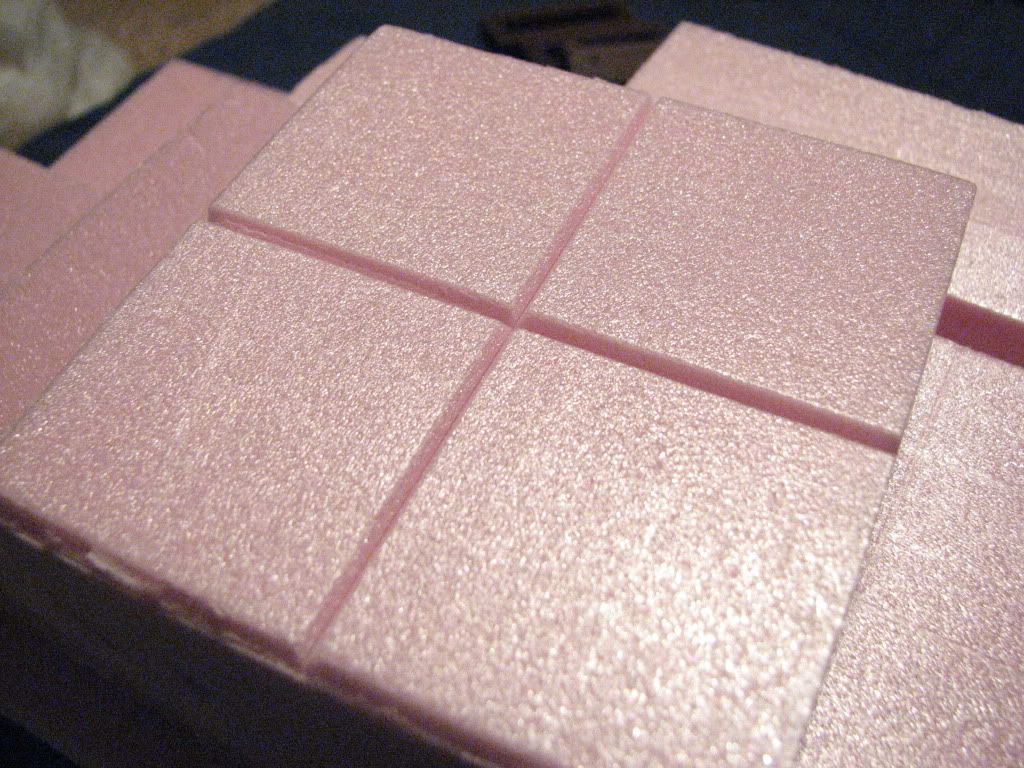
I should also note here that the squares on the cardboard tiles in WHQ are ~30mm, while this works perfectly well, I decided I wanted squares that were a little larger ~45mm - the thinking was that I wanted more room between miniatures and I also prefer to have dice on the board indicating how many Wounds each Monster has remaining (WHQ came with tiny wee dice, but just not enough of them, so we use the size of dice that come with BFSP). In any event using smaller squares means smaller tiles and uses less foam.
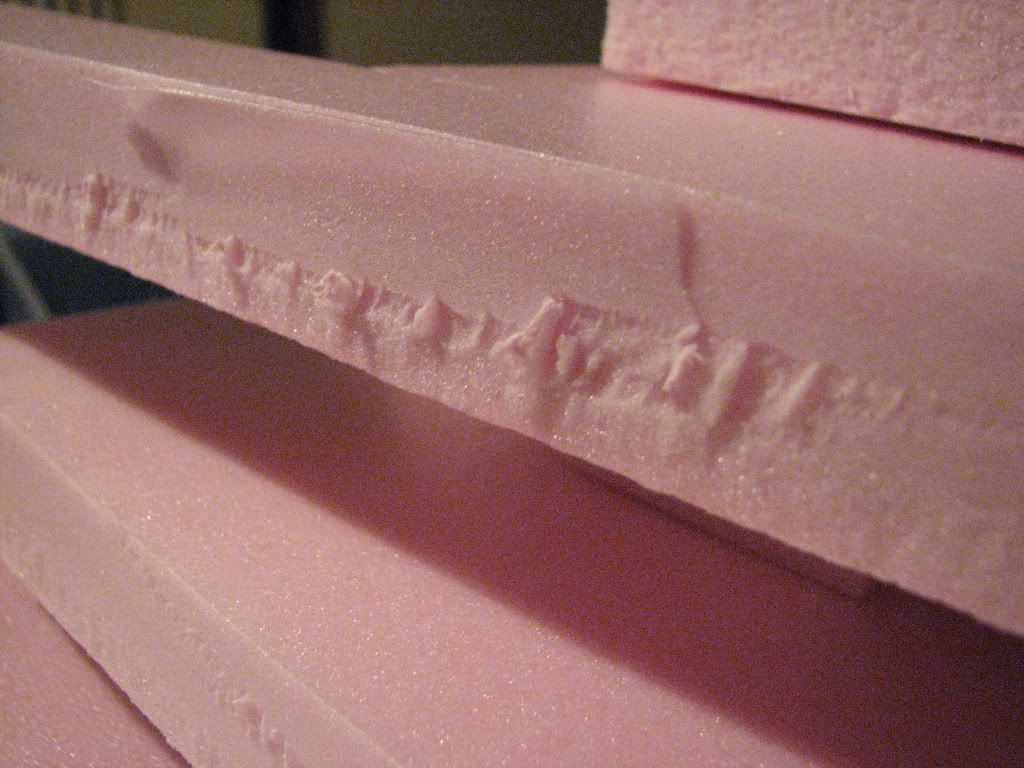
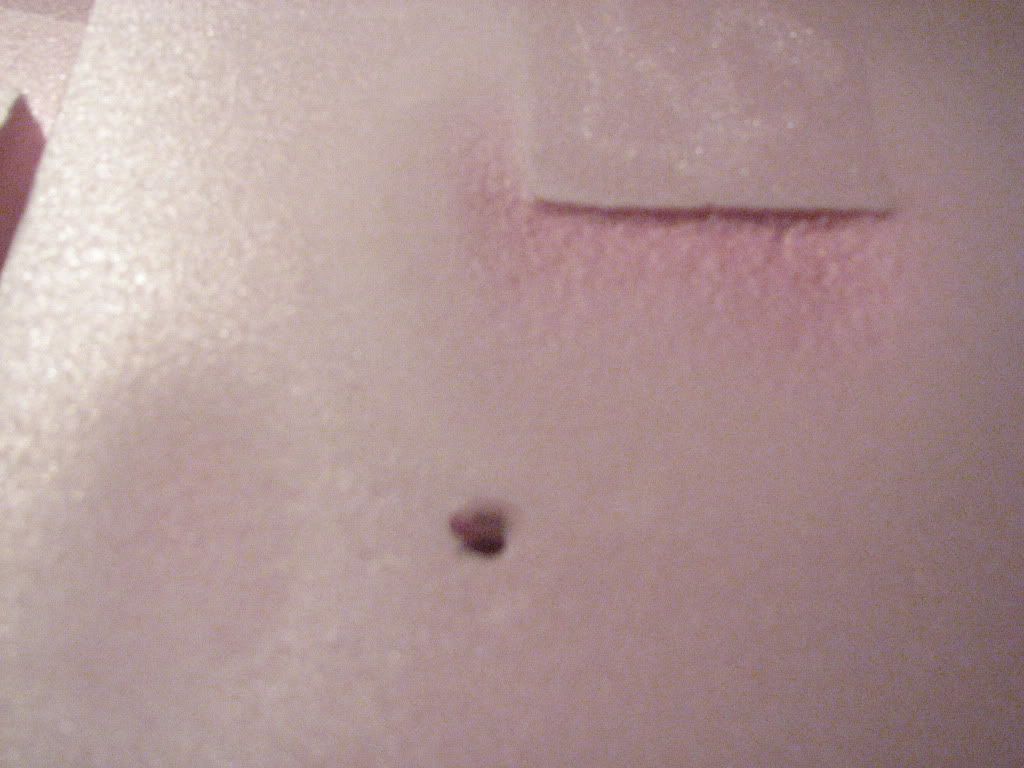
For cutting you need a straight edge/ruler to guide your cuts and a
sharp box cutter or X-acto blade (if you care). Here's the difference between cutting with a fresh new blade and the old blade that had been used to cut out most of the board sections:
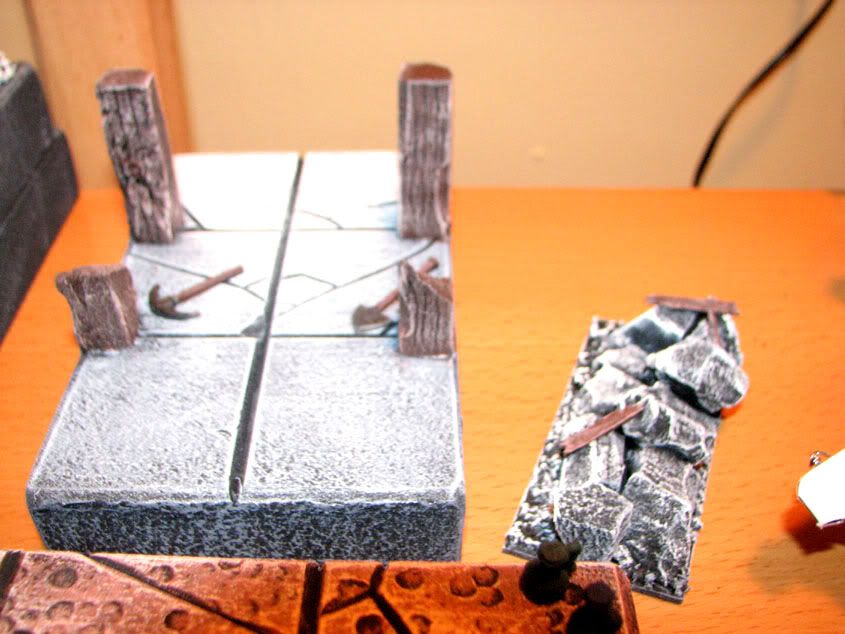
For making your tiles/square there are two options I used. The first (and by far easiest) option is to make cuts in the foam. You want to mark off your grid of squares, remember that mine are 45 mm (actually they're measured at 1 3/4").
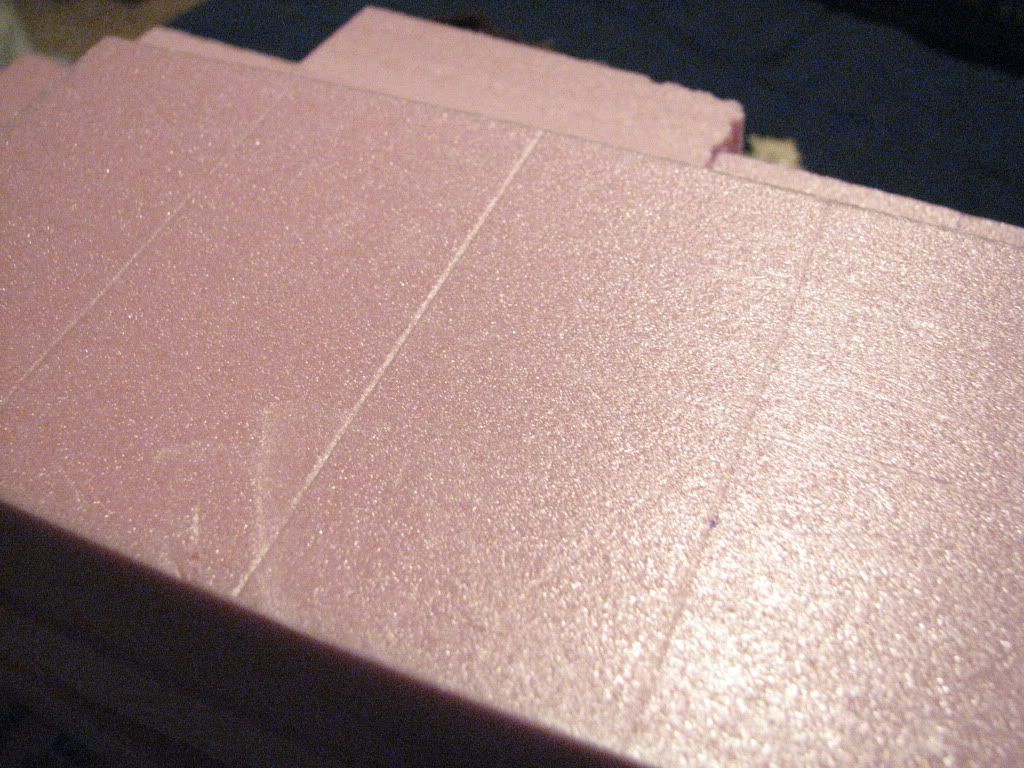
With your straight edge and using your good (read: sharp) blade make a cut at ~45 degrees, and slightly off-centre from where the lines are, and do this on both sides so that you end up cutting out a V-shaped trough.
Again, if you try to do this with a blade that might seem sharp but has had some use this is the result:
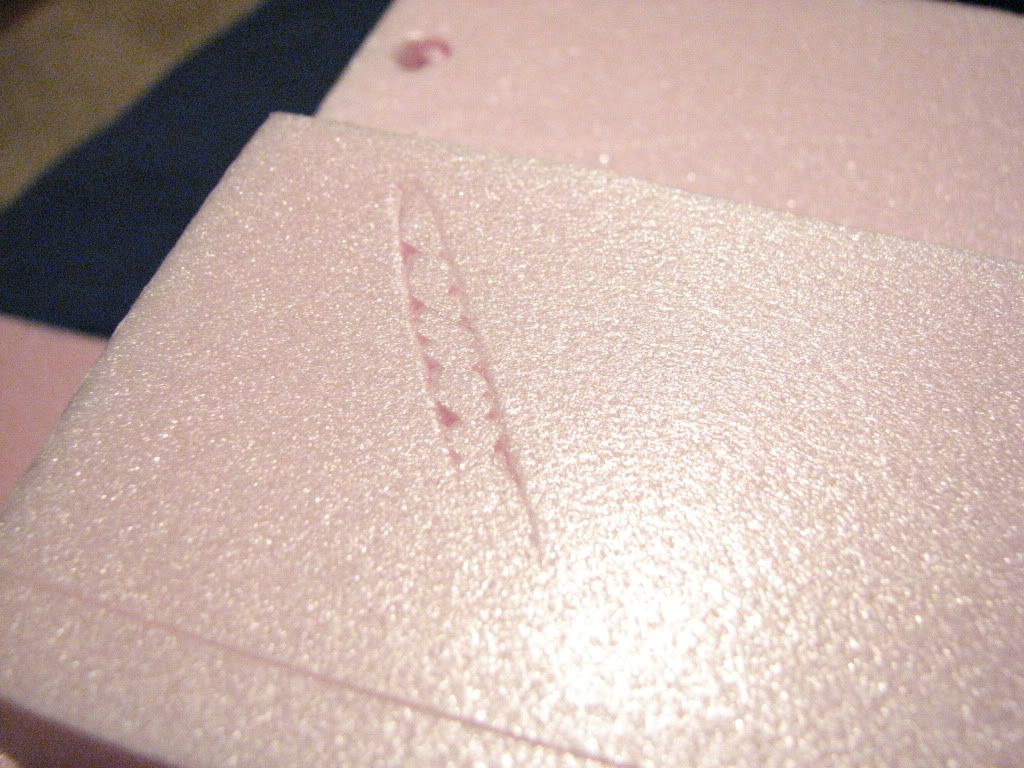
You can see the less sharp blade results in pulling instead of nice cuts and you'll have to start digging and tearing these bits out. This can be OK if you really do want rougher cuts (maybe it's an ancient and weathered ziggurat you're making?)
Your other option for making squares is to cut out plasticard (you can get this at most hobby shops for a few $). Here the squares are each cut out and then using my box cutter I shaved off the edges of the squares to give them a rougher look, and also cut some grooves in them. You'll need to experiment with this. I believe the thickness I used was 0.3mm plasticard - each square is somewhat flexible but doesn't bed too easily while cutting notches, etc. In general this works great and you will want to make bigger cuts and gouges than you might initially think.
 Cautionary note you need to think about:
 Keep in mind that you will have to spray primer on the plastic tiles, and most primers aren't compatible with foam, they will disintegrate and eat away at the foam. While that might be a cool effect for a Nurgle theme, in general it'll make you sad (or angry). So spray primer on your carved up tiles
first then glue them down to the base. I use a hot glue gun for this and a modest amount of glue. Too much and the tiles will be quite raised, too little and they won't necessarily stick over time.
As you can see from the photos the surface of the foam is relatively pristine. This might be OK if you want a new-looking model, maybe a throne room, for example. If it's a dungeon your surface probably needs cracks, chips or other features in it and this is the time to do it... and it's all up to you. In general you can get decent chips and cracks in the floor by doing freehand cutting by the same method you used for delineating the squares above. Real chips and 'chunks missing' will require you to make a new small incisions with a blade to get the shape started and then just tear it out with your fingers and don't be too careful, you probably want it to look like natural breakage as opposed to an attack by disgruntled stone cutters.
The last step here if you want it (I recommend it) is to sand all the sides and edges of your boards with medium-to-fine grit sand paper. This will smooth off the edges and also let you round off corners. Alternatively, if you have a hot wire or hot knife you could have been using that all along to sculpt the outer edges of the board sections. For further texturing go get a rough-edged rock from the yard or park if you don't have a yard (put it back though if it's a BIG rock from the park). Using the rough surface of the rock and a little pressure you can press it into the clean, flat and pristine surface of the board to give it a more natural look. Make sure you move the rock around and use different edges and angles. For a couple of my board sections I also used the heads of a fistful of nails to get some interesting indentations. The rock I used was from an ancient ruin from where my wife and I... hmm, never mind. I'll keep that to myself ;) Sufficed to say I didn't put my rock back... tisk tisk.
Once this is all done you can now prime your foam.
Again, don't use spray primer,
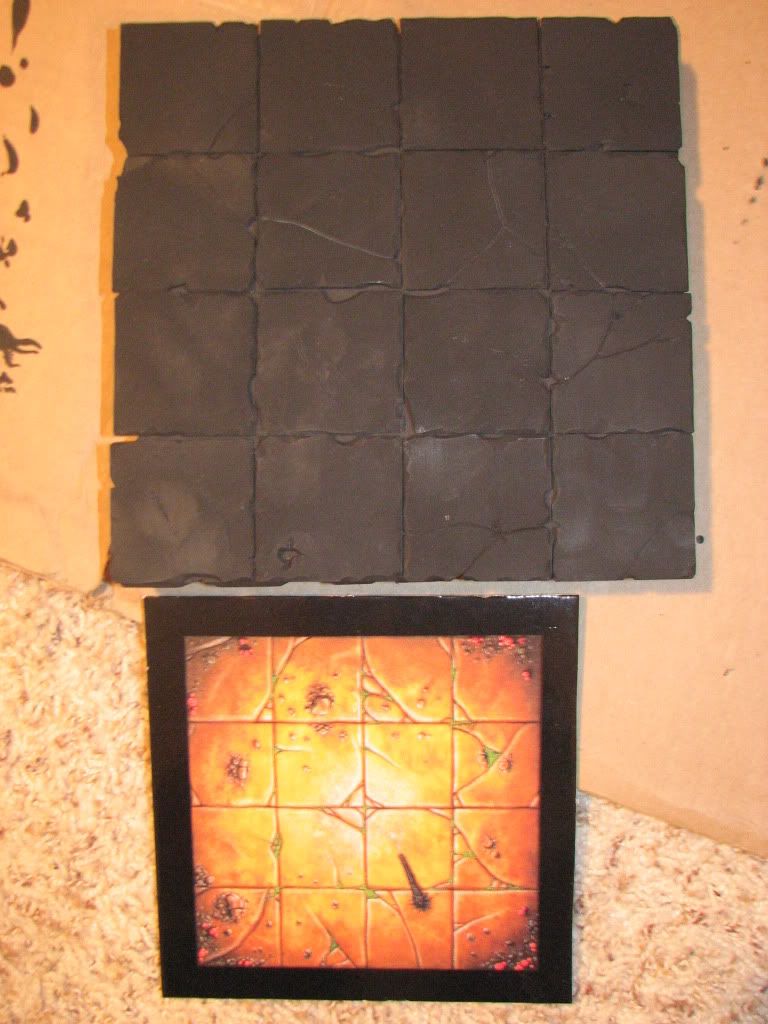
unless you know it's safe for foam. Krylon does make a spray primer (I think with the name H2O on the can), and that's safe for foam. Save yourself the trouble here and get some black acrylic paint, you're going to need it anyway for painting your tiles later. I got a medium-sized bottle for $6 which has lasted me through priming ALL of the WHQ tiles, and it was also used for darkening colours.
My method, is to paint the edges of the board all around first with a good thick application of black acrylic paint. Then lay the board section down and give it a thick application of acrylic paint down along the grooves between the squares and in any cracks or edges. Lastly and using loads of paint you can gently apply the paint to the top surface. Try to get an even coat and don't press too hard with the brush or else you'll just be moving paint around at this stage.
Once it's totally dry apply a second coat. You will need it, but you'll also find the second coat goes on much more smoothly. Here's a finished example.
It's also at this stage that you can start gluing down any extra bits that required spray primer, such as plasticard tiles, etc.
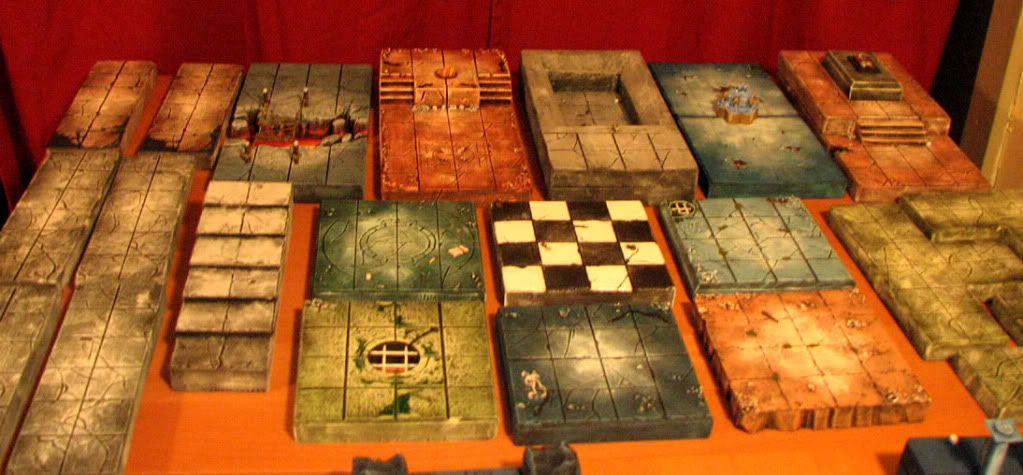
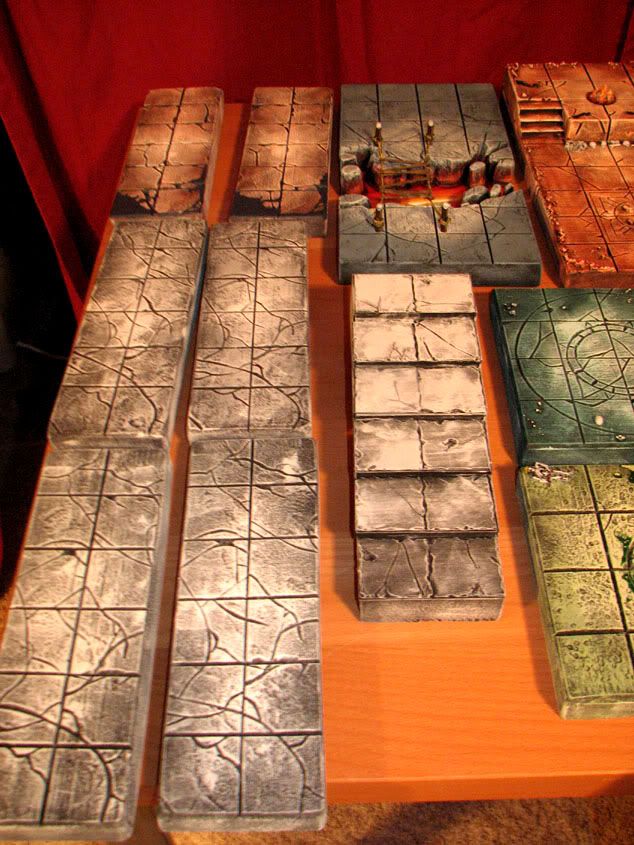
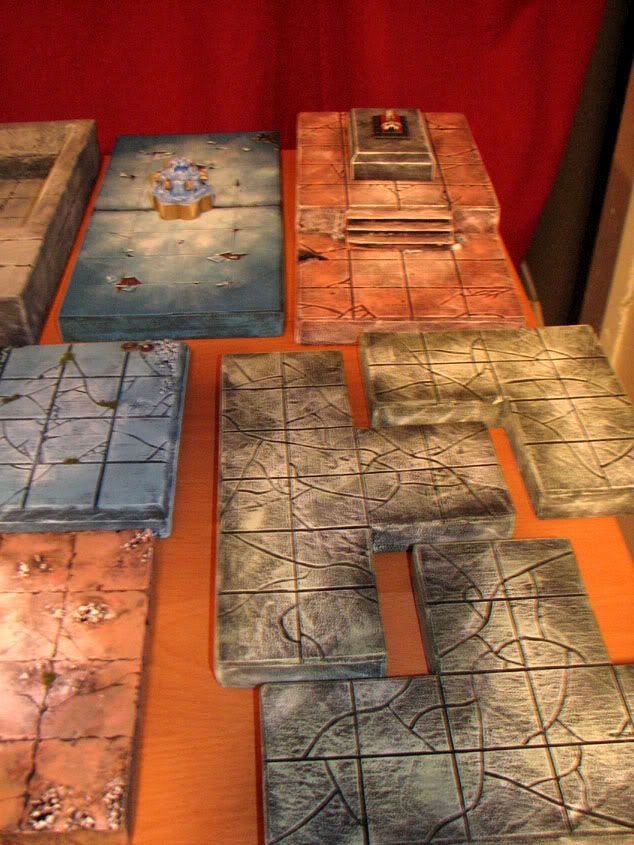
Here's the various stages:
Rough layout of board sections
note the board section at the bottom that's at an odd angle
Assembly of all the various bits that are going to make the finished tile
Primed plastic bits and painted foam bits (floor tiles primed too, but not shown)

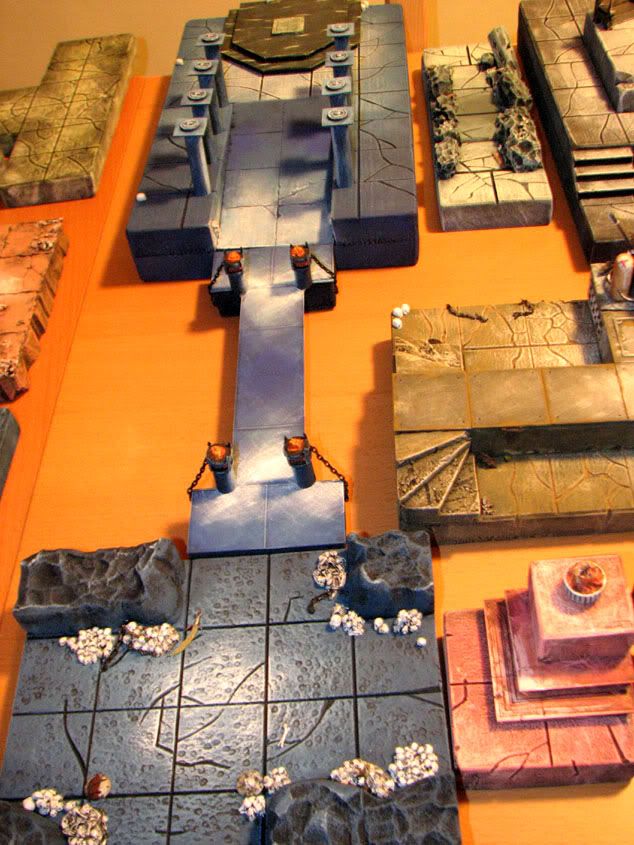
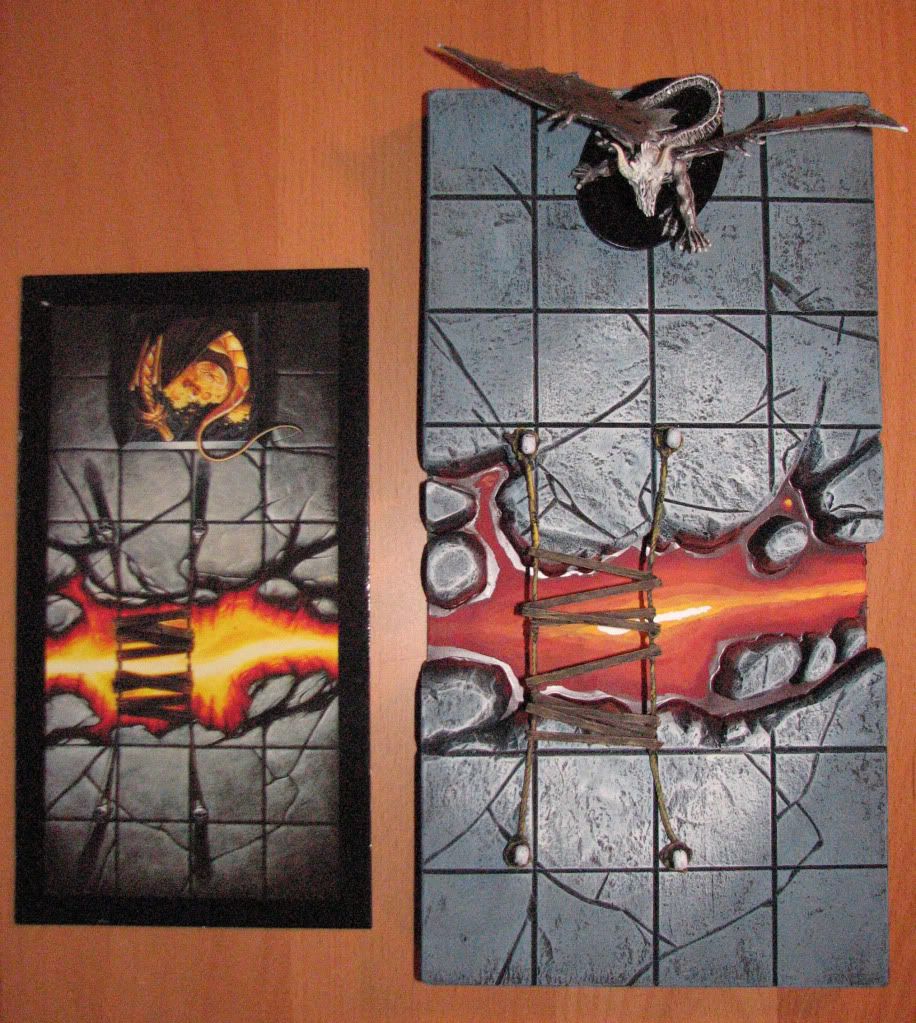
And the finished piece
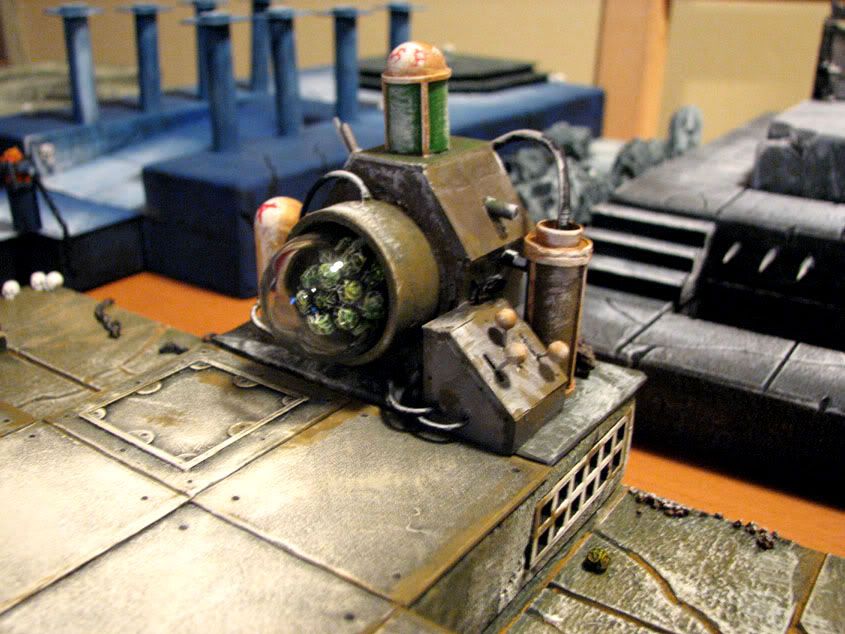
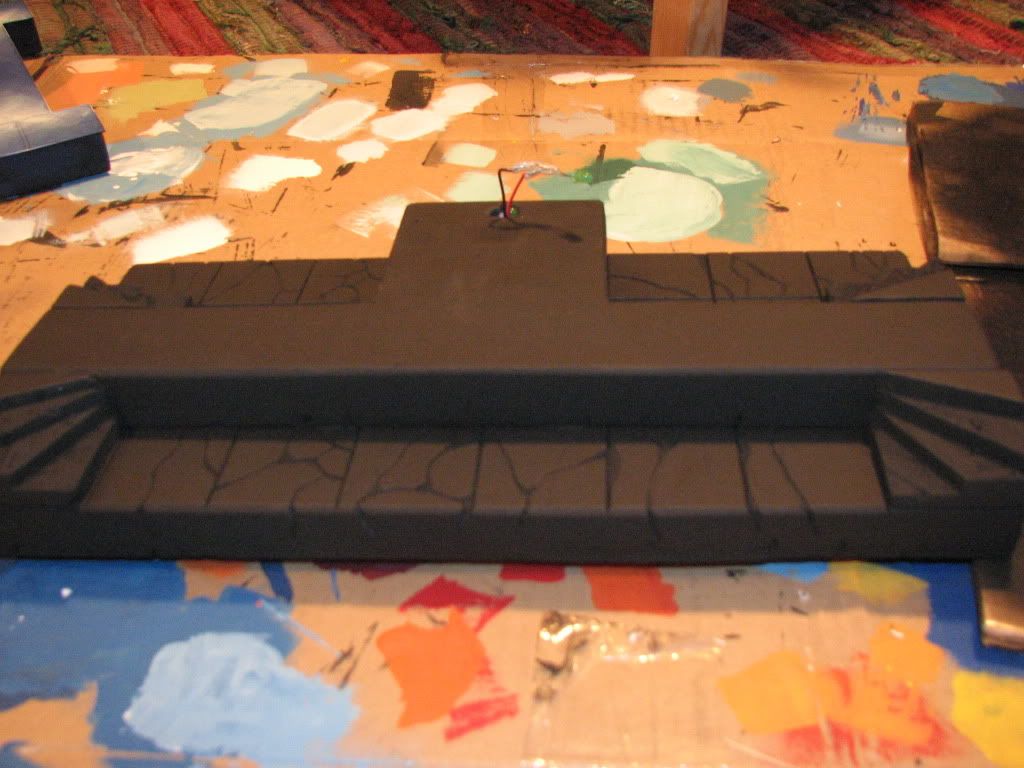
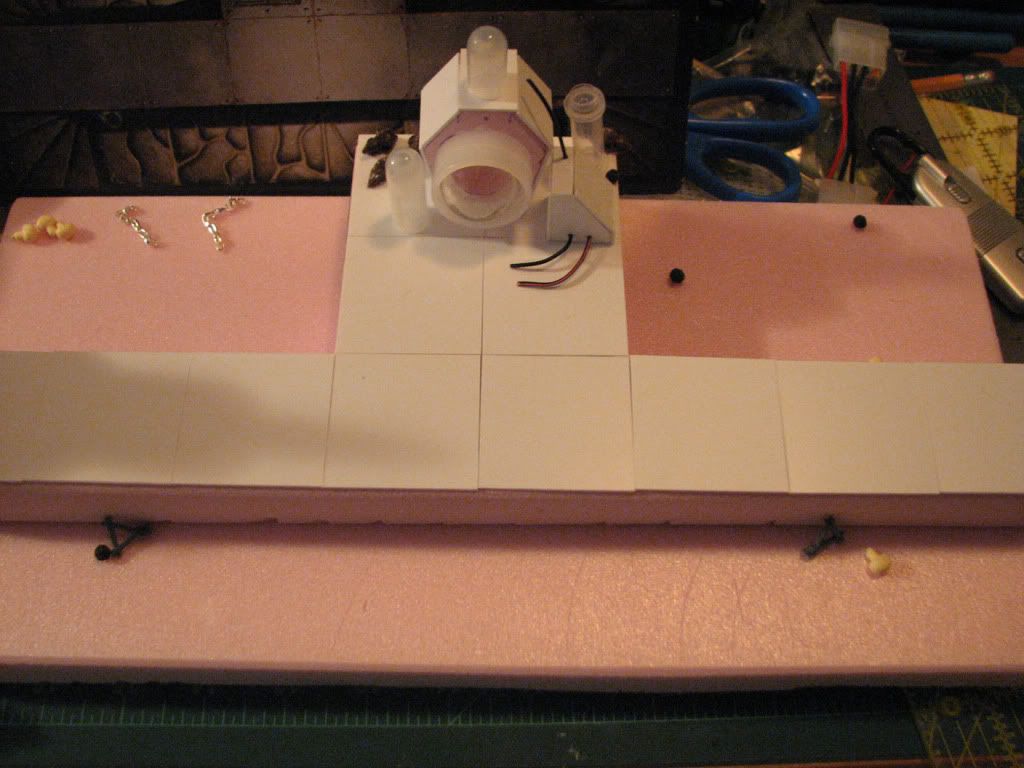
As a side note here: the panel in front of the warp generator was just cut with individual strips of card stock that were glued down with super glue (the hot glue gun is totally out of the picture when you're working with these smaller scales so forget about it!!). The semi-circles are from a hole punch used on some plasticard. To get the bolt holes along the corners I thought about getting some small round bits of plasticard but it was ultimately easier to go the other way - I used an embossing tool (shown below) to press a divot into the spots the bolts are supposed to be. When you're dry brushing the tiles later the brush should skim over the surface of the divot leaving it it's original black undercoat and giving you a perfect looking dot for the bolts.
Here's the embossing tool:

I don't have any examples of actually painting the boards, but you can feel good that most of your work is done by this stage! For painting I generally just dry brush everything. If you're not familiar with the technique you just get some paint on your brush and then get rid of almost all of the excess (either back on to you palette or on some paper towel) until the brush is almost dry. Then just do a couple of test brushes on some other surface (your paper towel again perhaps) and then very lightly brush the surface of your board.
You want to start with a dark base coat, go darker than you think you will want, it's easy to go lighter, if you start out too light you won't be able to get good light/dark contrast and if you want to make it darker you need to start over (really) as your eye will be able to tell that something is wrong when darker colours are showing up over top of lighter ones. From your dark base you can start pressing a little more with the dry brush if necessary or you can start going to lighter shades.
Note for contrast and picking up details: you probably never want to use a pure white to highlight your boards as it's just too much highlighting and will be as subtle as a dwarf in a brewery. Use lighter shades of colours already in use, or even start to go toward a grayish tone of your palette for the board section. White needs to be reserved for extremely close surfaces at light sources or very sharp edges of things.
Here's an example of a very dark base, several layers of lighter shades (just by mixing a pale blue into the paint I was already using for the base coat) and then slowly working up toward white. Again, it's all dry brushing which will really pick up details and gets the job done fast.
If you notice on the tiles there's always a focal area that's supposed to draw the eye, either to a light source (above) or to somewhere else (below):
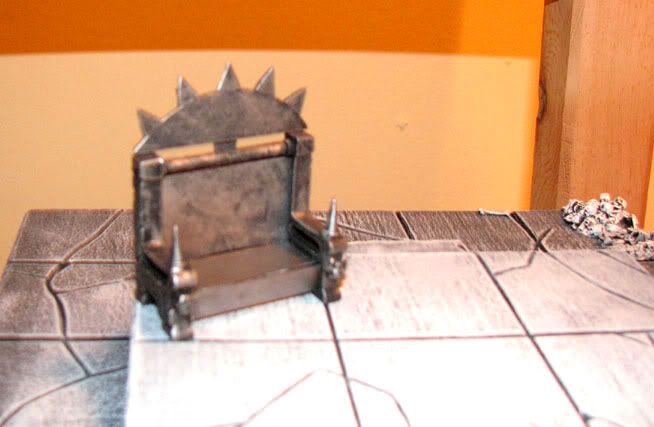
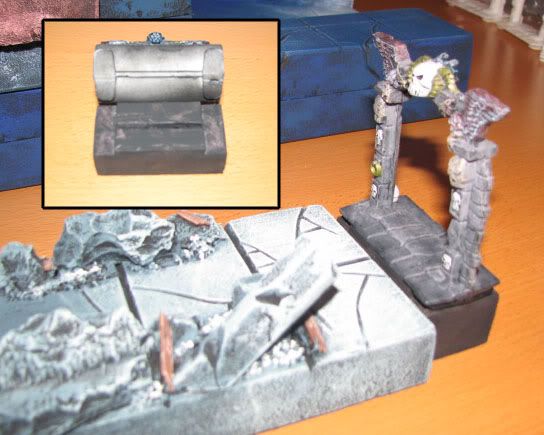
For some of the final bits, like doorways (if you're reading this for WHQ) you can make some pretty simple stands for the doors by cutting notches into the base of a piece of foam, sized to fit under a door. Note that this block only had one base coat of black in the photo and still needs it's second coat to be brought into play.
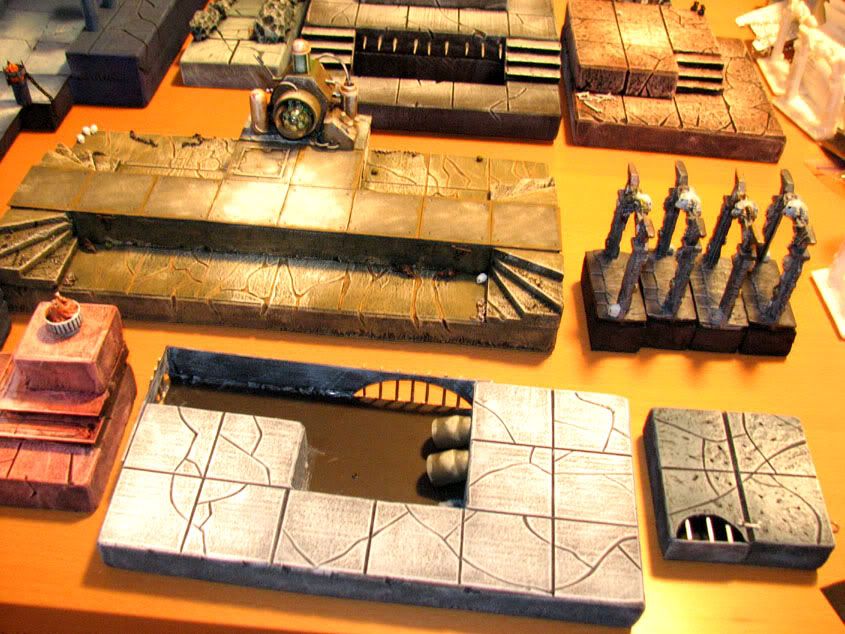
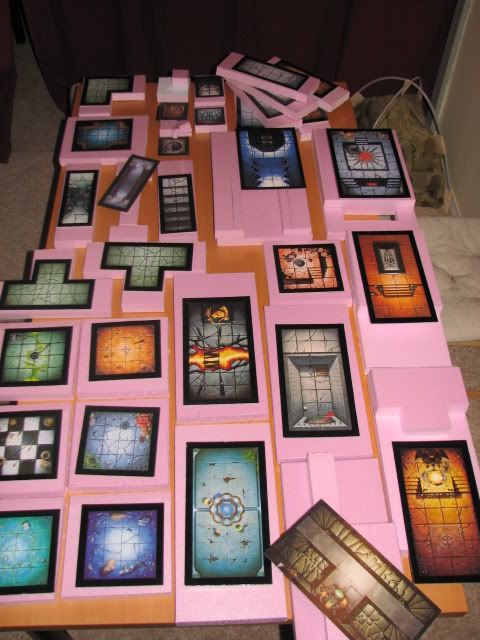
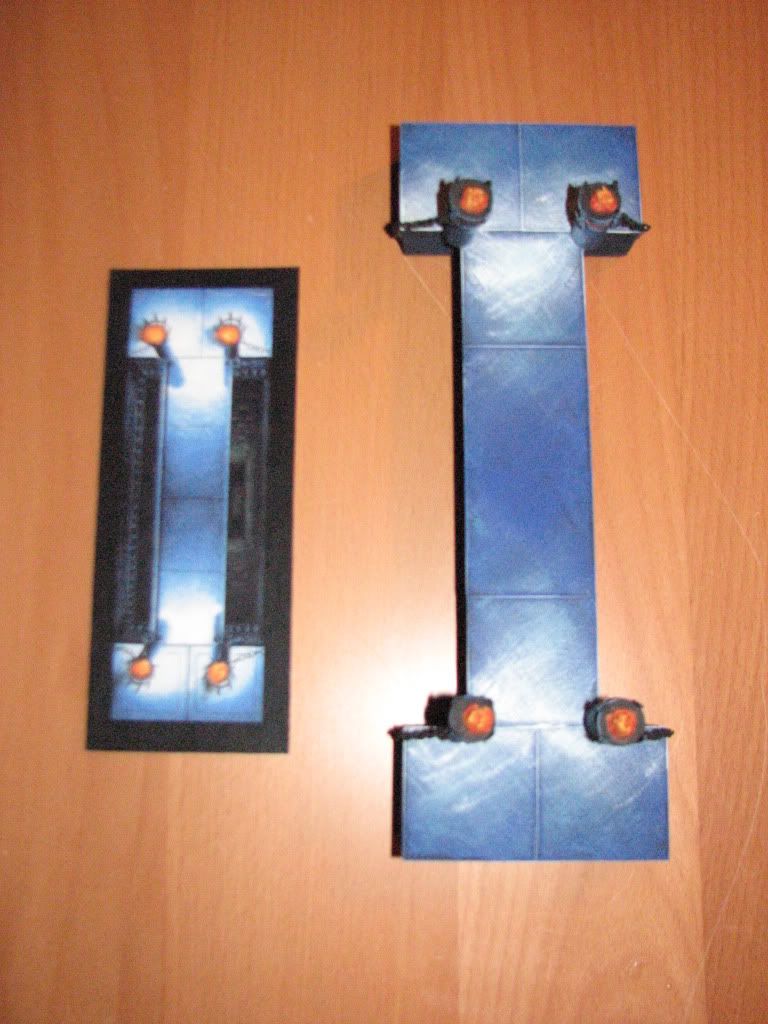
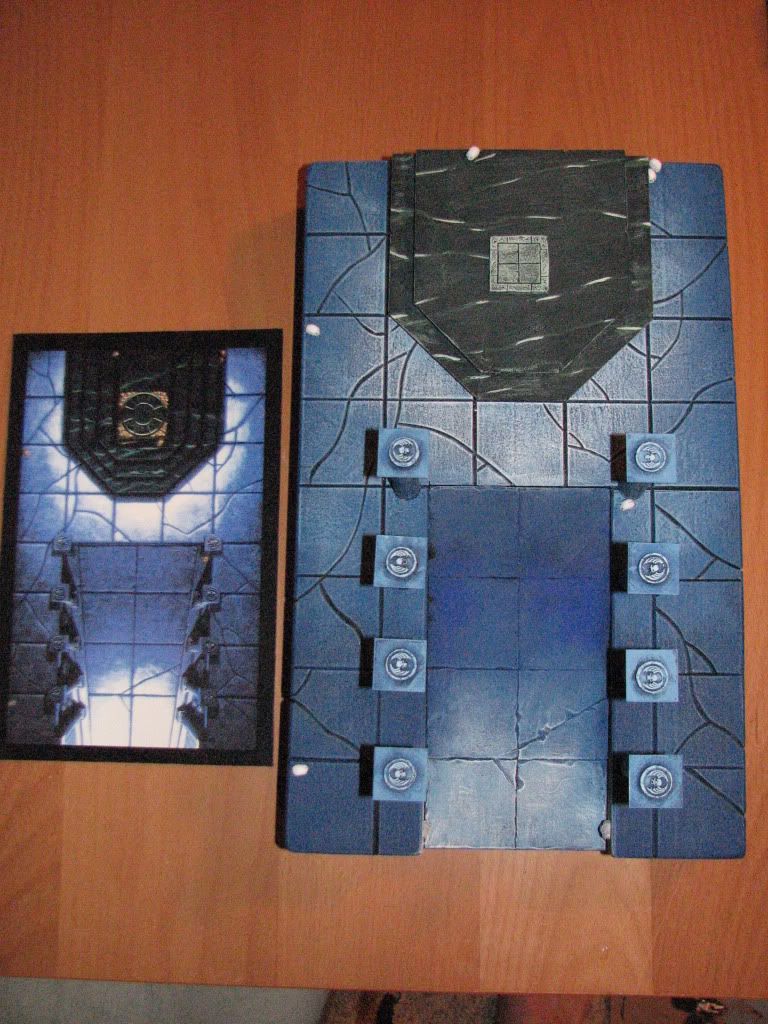
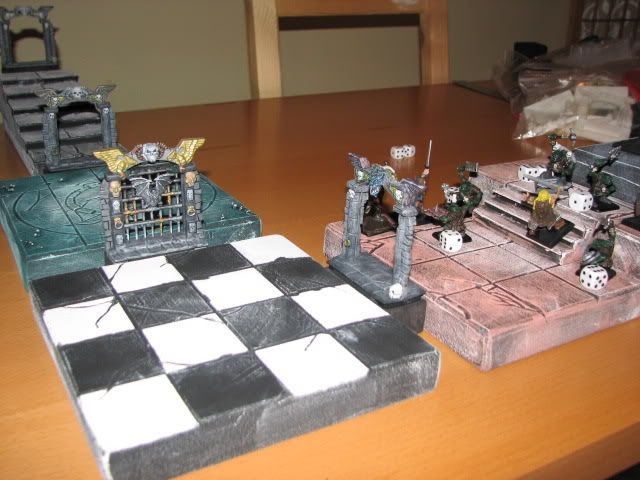
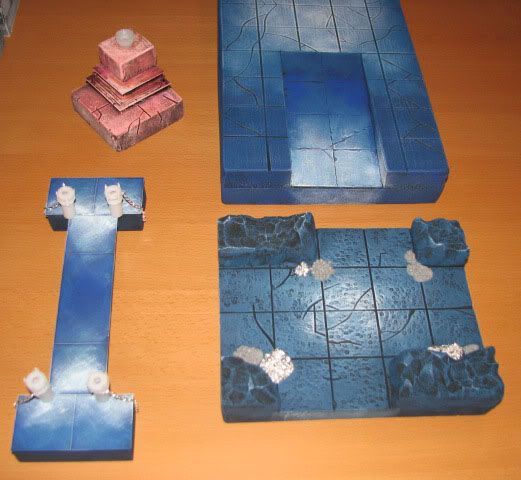
Here's some other examples of the boards...
Example setup before added all the detail to the board sections, such as skulls, barrels, etc.
I detest making flames... or at least I did. I can make passable ones now that only take 2-3 minutes to scupt.
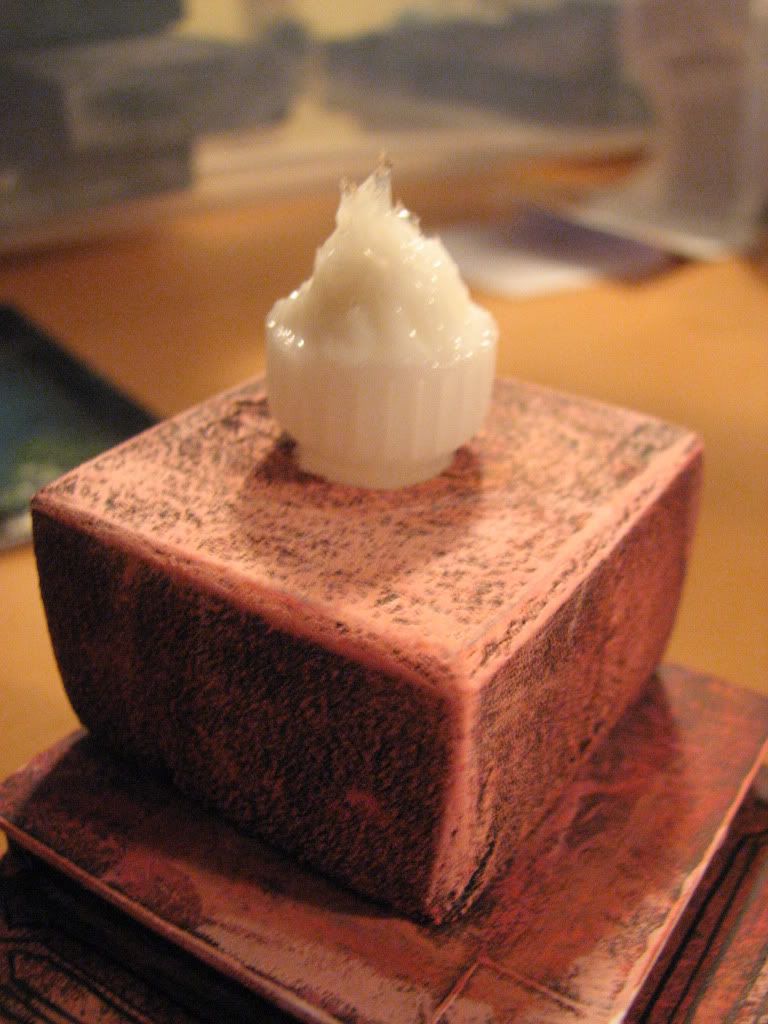
The material is called "Water Effects" (shown below on the far left with the black cap). You can just apply a glob of it and sculpt it really fast using a toothpick. Make sure you let it sit for 24 hours before spraying it with primer.

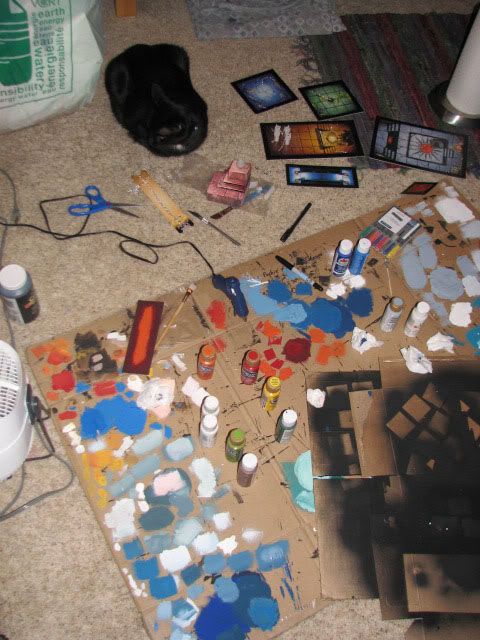
This is my "palette" and you can get a sense of the number of colours that go into making up a board section:
As a second-to-last final note: you're going to want to spray all of your boards with some kind of sealant/protectant. Use a matte finish for most, if not all, areas. If you want good looking water, slime and lava mix some wood glue with your base coat (I use a little of the water effects stuff too to make it more viscous so it doesn't run everywhere). Once that's done it'll have a bit of a shine to it, now you can spray it with a gloss finish.
But wait... pretty well all of the finishing sprays on the market will eat foam (in the same way some of the the primers do)!
I hope someone didn't run off to spray too soon before reading this far down...
With all those base coats and layers you're pretty protected already, but you will ruin all of your hard work if you're not careful at this stage. Testors Dulcote is safe for foam, if you're using anything else (like me) apply a
very light spray to the surface.
I mean very light. Let it dry completely and then do it again. Once you have a bit of a protective layer built up on the board then you can be a little more liberal with the finishing spray. If you get any pooling or dribbles (or if the nozzle is clogged and you have drips falling down onto your work) it'll eat through the foam like acid (well, like a polystyrene solvent anyway).
As a final-final-note: I've done all kinds of cheaty things here that others may be wondering about... I've been doing casting for a few years so I'm able to make a single item (like the pillars in the throne room above) and then get identical copies. Hidden from you in some of the photos as well is green stuff (such as on the warpfire generator). I also cast my own WHQ doorways, and this allows me to cast individual bits from the surface of them as well - like the stone faces which I've used to inlay in some other board sections.
Just to be clear - I cast for my own in-home use, so I'm sorry in advance to anyone who wants to have me make them things or buy recast things, I just can't reply to you... and it's not fun for me either ;)
Hope everyone enjoyed...
~N