As somebody might have noticed, I haven�?Tt done much on my scratch build army project (army blog) �?" lately.
Not that I didn�?Tt wanted to, but simply because of that fact, that there hasn�?Tt been time. Wedding, holiday, euro 2008, the collecting quest and a lot of other bad excuses has consumed all my spare time.
So I need to kick-start this project again �?" so had to start one of those big projects of mine - the choice came down on … :
The Earthshaker
And why not share it with you �?" could really use you advices and comments a long the way. And I�?Tm still looking for a few components including wheels, so perhaps someone feels for helping me out too.
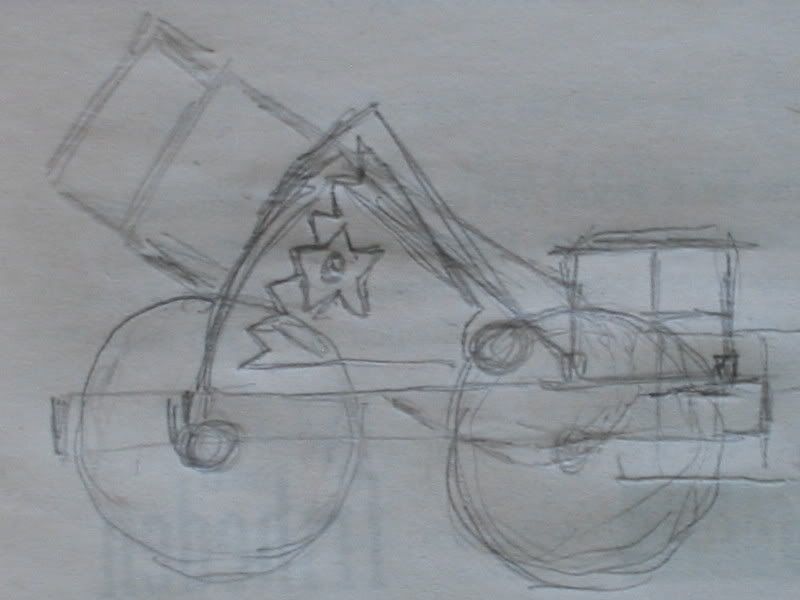
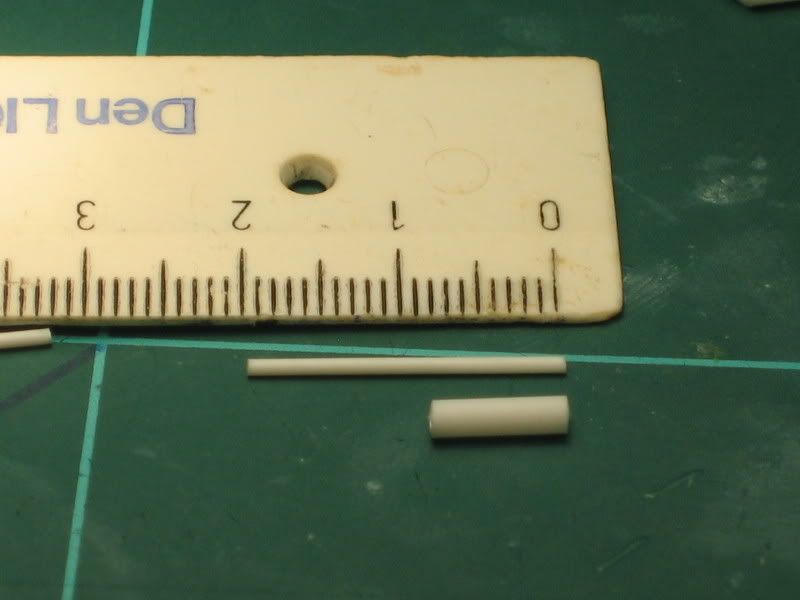
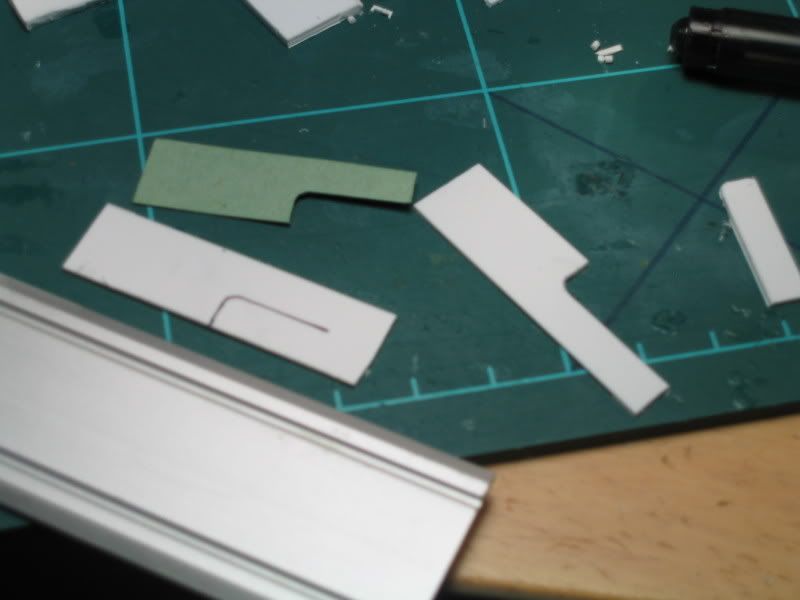
So, Thursday, on one of my weekly train rides to Copenhagen (3 hours each way) �?" I did this on the back side of �?oMetroXpress�?�.
It ain�?Tt much but it will give you an idea of, what I have in mind.
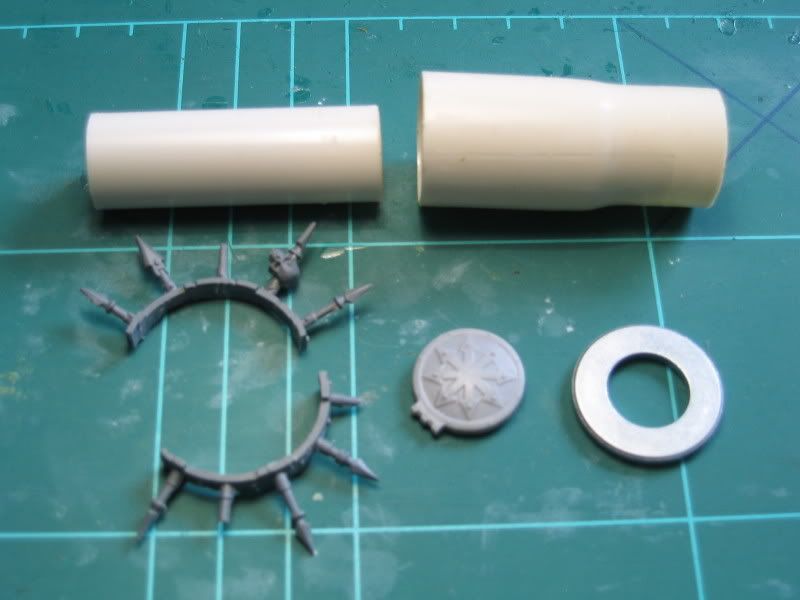
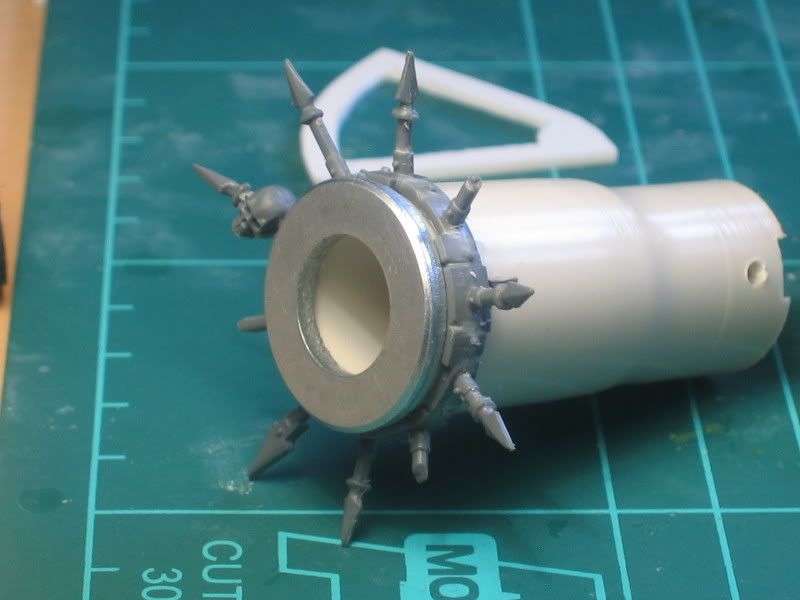
2 pieces of tubes (the ones you use for electrical installations) 5cm long and with a diameter of 19mm and 16mm. I used the upper end of the 19mm, where it’s slightly bigger aprox. 22mm.
A �?~washer�?T(right word?) with a diameter of 23mm
A Hatch lid from the Chaos Vehicle ass. sprue and
2 round Spicky bits (yes, I�?Tm going to lent a few of Ishkur�?Ts ideas �?" sorry!)
And the plastic stripe/sheet box (all from Evergreen Scale Models)
And a fresh new bottle of super glue.
So here we begin.
Update from 08-08-2008
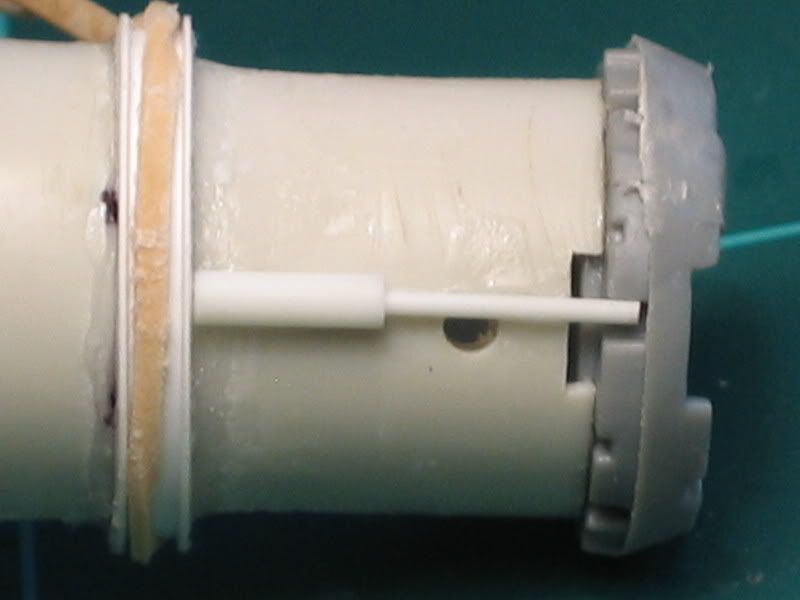
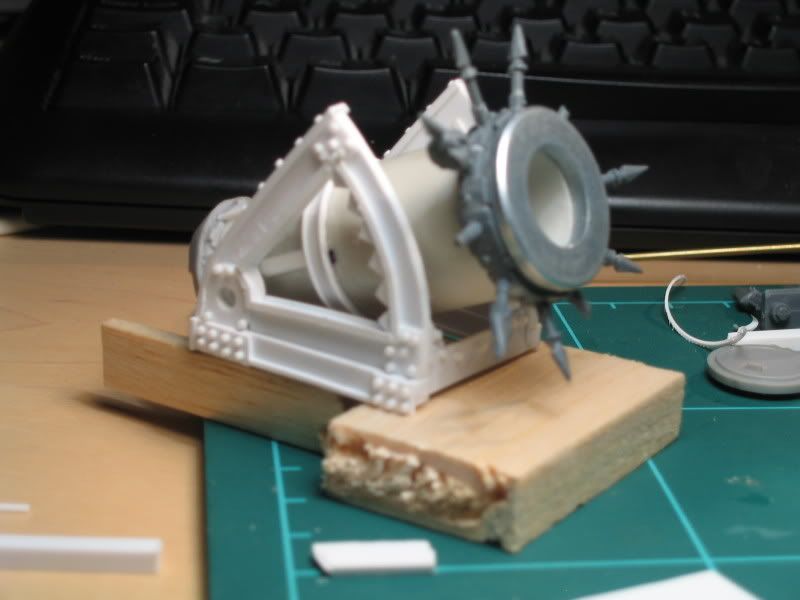
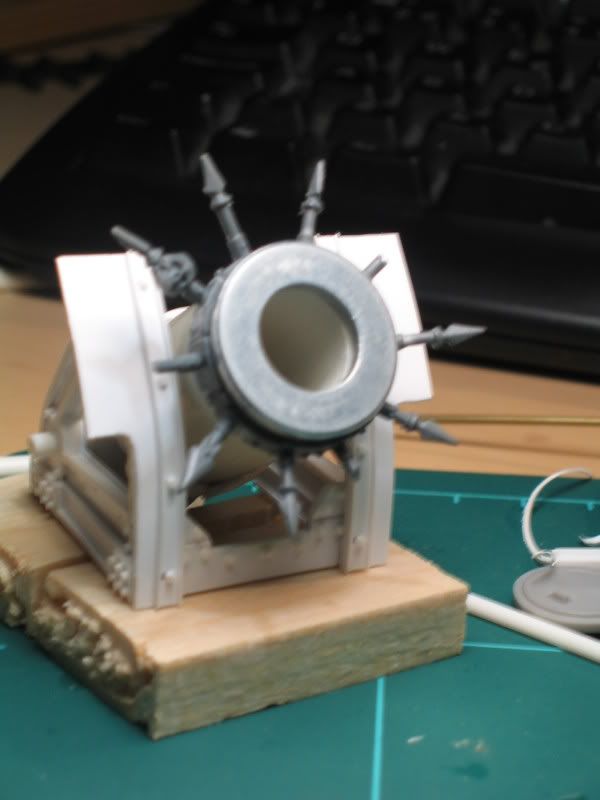
Barrel:
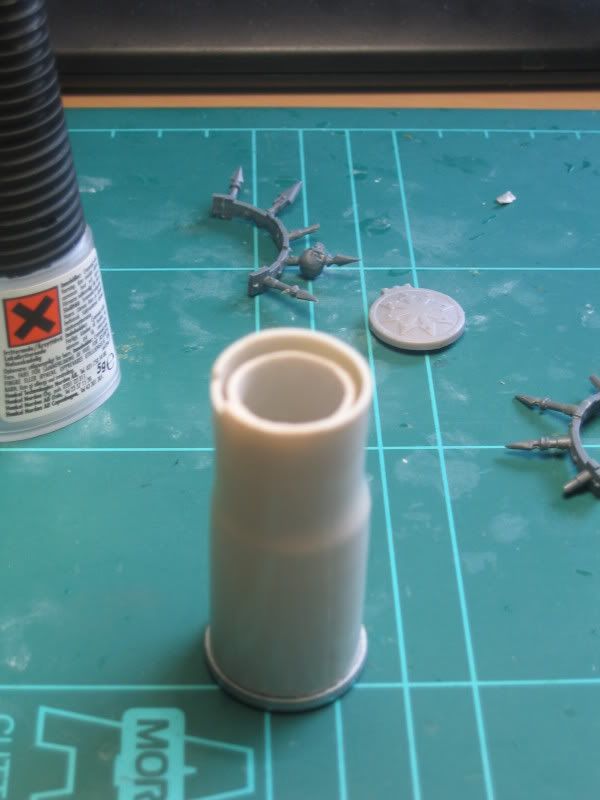
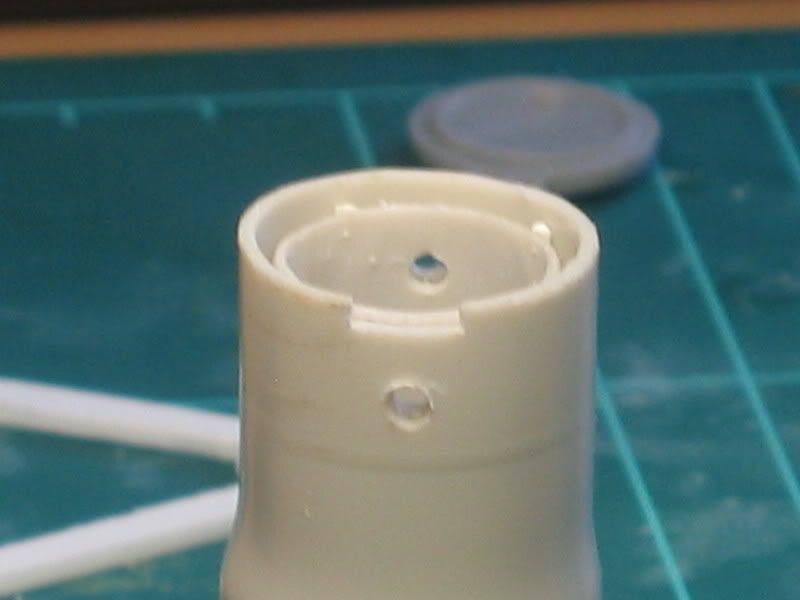
I glued the two pieces of tubes to the �?~washer�?T. Made room for the hatch and drilled a 3mm hole for gun support.
Then I added those spicky bits.
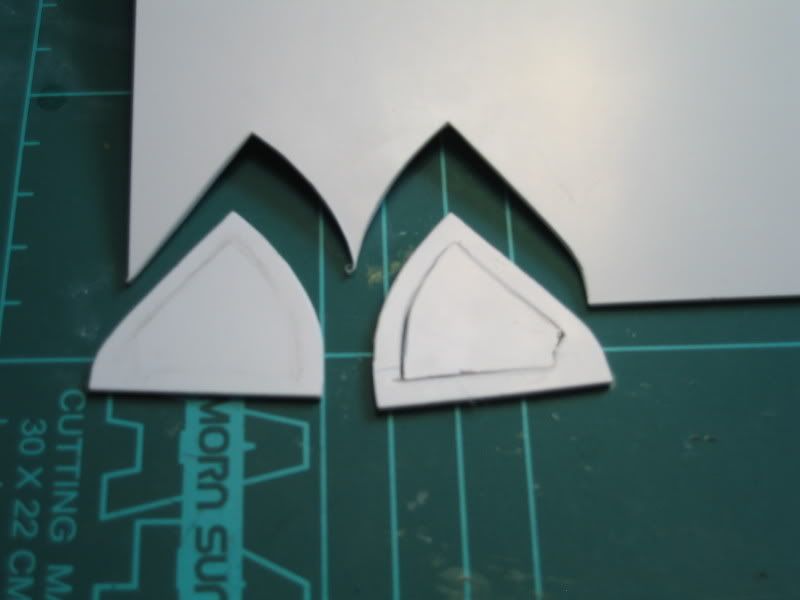
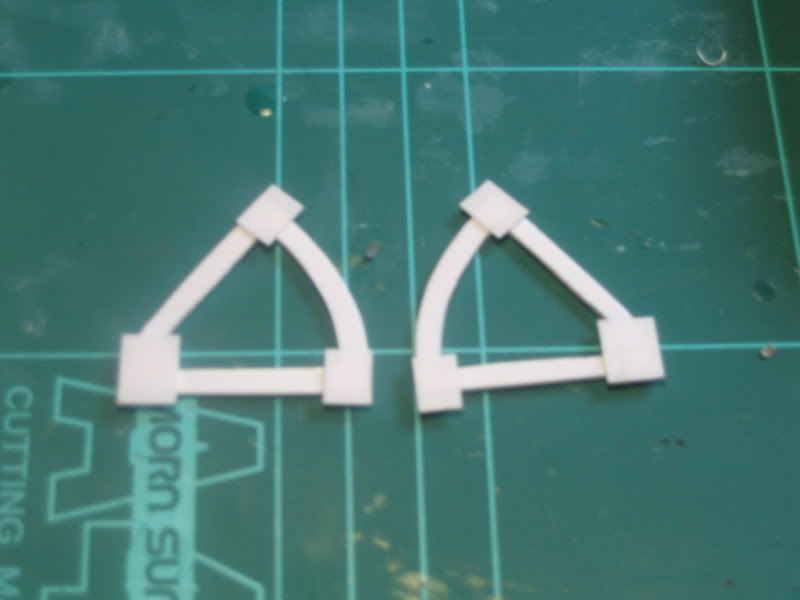
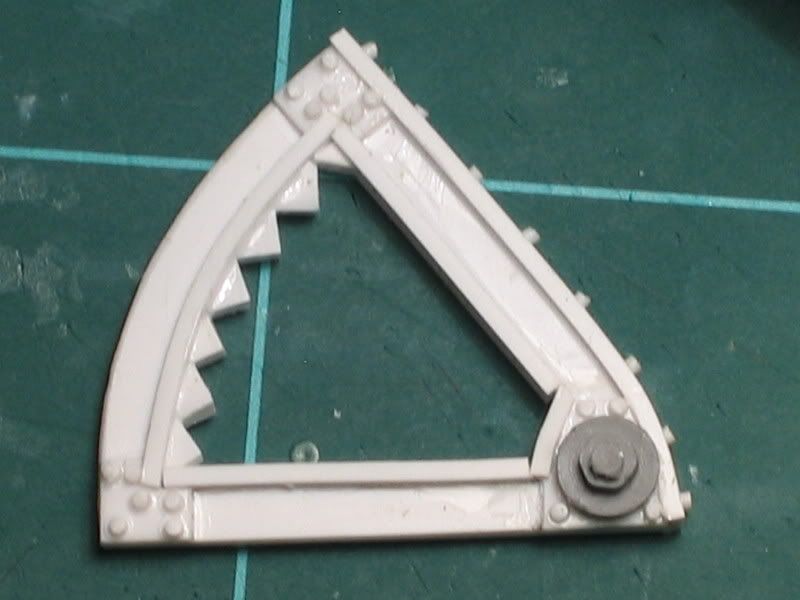
Gun support:
I cut these from a 1,5mm sheet styrene.
Removed the inner part and glued 3 pieces of 0,5mm sheet styrene �?" on what should come to look like joints
I’m sure Ishkur won’t mind he’ll have to get used to people ‘‘borrowing’’ some elements of his Earthshaker, it’s his own fault for doing something like that The star from spikes at the end of the barrel are perfect, the supports look awesome too. I like the look of the ‘cog’(?) that lets the cannon move up and down with the supports too, I hope that stays in the design.
What kind of wheels are you going for, hellcannon or old-skool wooden ones?
Took a look at your blog earlier on too, I’m sure this will look good seeing your skills over there, will be keeping an eye on this.
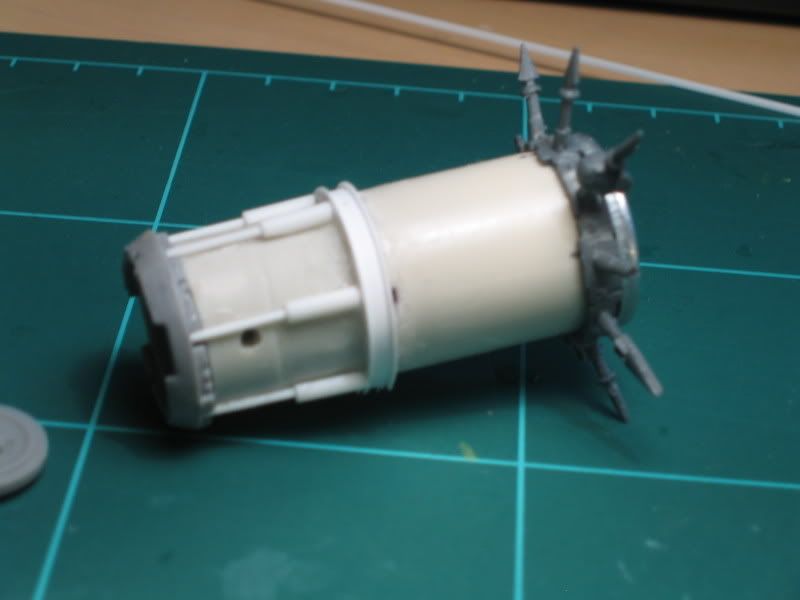
Originally, I just wanted the hatch at the end of the barrel, but with this idea (see next) I decided to use the cupola from the Chaos Vehicle ass. sprue as well. So, I cleaned it up a bit:
I wanted �?" in some way - to use the effect, that the barrel is slightly bigger at the upper end.
So I came up with this idea to give the impression that the barrel is a two-piece thing �?" so when the barrel recoils - then the lower part absorbs the pressure.
So to give that impression I glued a 3,2 stryene channel around the barrel
and then I made 6 absorbers from a piece of 1mm styrene rod and a 2,4mm styrene tube.
And placed them around the barrel:
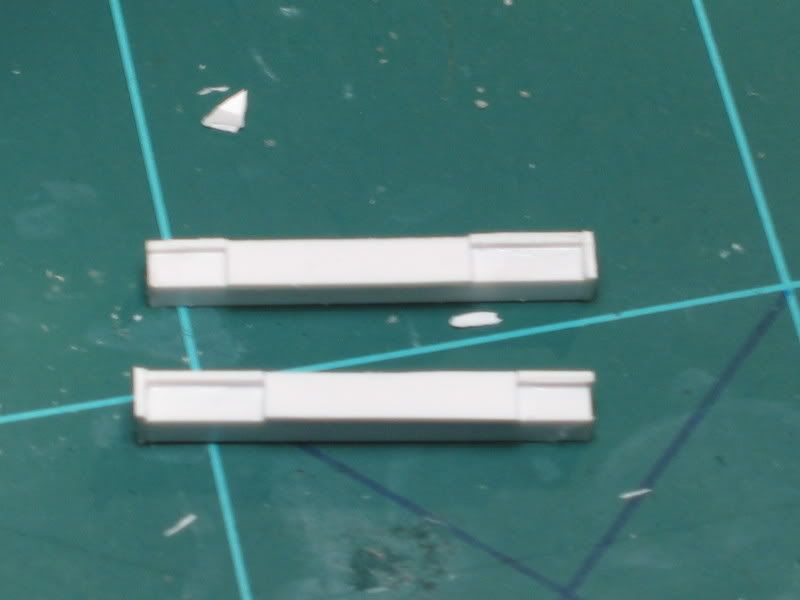
Gun support:
Also did some work of one of the support sides. I added some stripes of 3,2mm styrene channels and some rivets, made from 1mm styrene rod to make it look metal.
So, right now it looks something like this
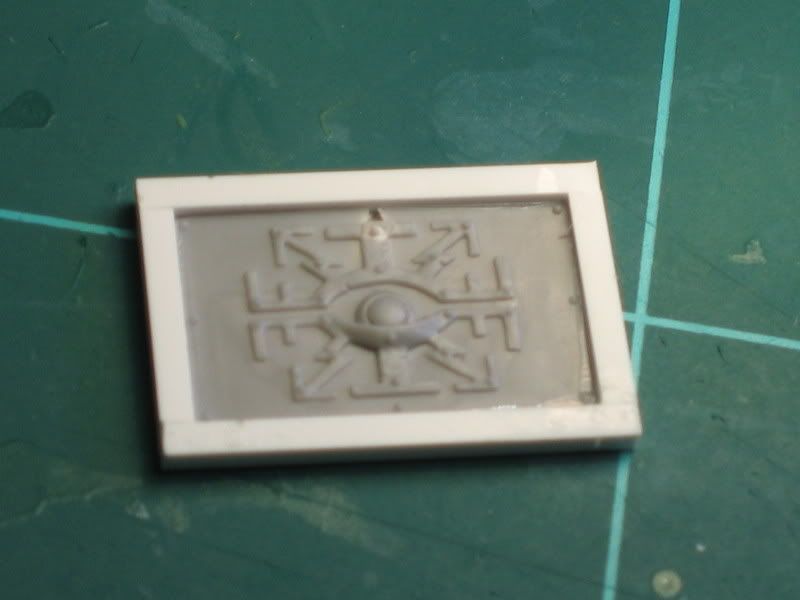
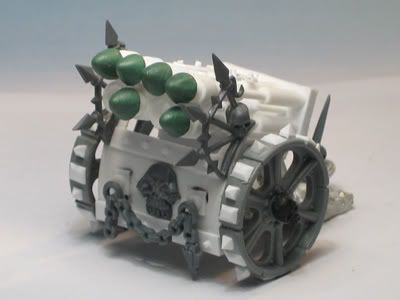
Gunner platform
Think I�?Tll place a Gunner Platform on the cannon. So I�?Tve made this:
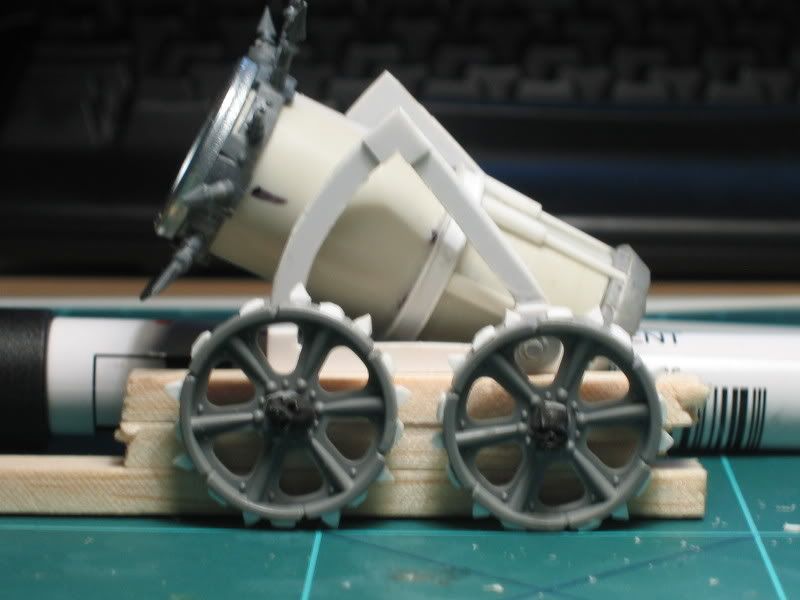
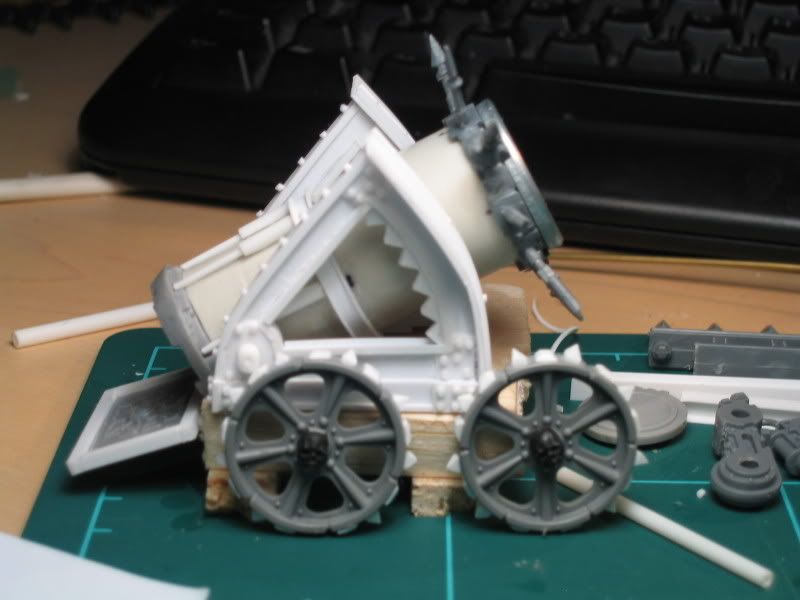
Cannon chassis and wheels
For now, the idea is to use the same wheels as I used on my Death Rocket.
It will come to look something like this:
The chassis is going to be made from some more solid styrene stipes, that I do not have at the moment. But I have just ordered them - so I hope they will be here soon
[align=center]Want/help add:[/align]
Therefore, I need 4 x 40K Ork Big Gunz Wheels �?" does anyone have some of these laying around, then I would be very interested in buying these - or do you know where I could get some (without buying 2 blisters :)) - or should I use something else? - hellcannon wheels would look great, but where do I find 4 of those?? - any surgestions on what to use?
And then I could also use those Dwarf Cannon cogs/gear wheels (4 pieces), so if someone have those as well - please come out with it
Looking very good. Glad to see you’ve made so much progress in such a shrt time. The riveting on the angle-girders looks really good. I also like the idea of the hydraulic shock absorbers. Glad to see you don’t want to remain static with your ideas. One suggestion though, have the front wheels be those large ones (if you can get them) and dwarf cannon/organ gun wheels at the back. I just get the impression that that might look better. I have some of those dwarf wheels, as it happens. Where are you and is it a trade you’re looking for?
I think that might be slightly too large I can help with the dwarf ones, if you decide to use them.
Hashut’s Blessing
I think they will be to small for this - but thanks - it’s very generous of you. You don’t - by any chance - have some of those cogs/gear wheels that also comes with the cannon box?
Maybe the iron wheel found on some 40.000 warmachines. I think the Grot Lobba, Zappa etc have them…
Oh, and that’s looking awesome mate! :cheers:
Obsidian
Yes they have - and those Iron Wheels are the ones I’ve used for the Death Rocket as well. But I just hope I don’t have to buy two brand new blisters to get hold of them. So would really like if some could guide me to someone that have (some of)these.
You have made the perfect guide for me to copy, do you mind? I cant wait to see what happends next!:cheers
Knight Of Awsome
If i did - I wouldn’t have showed you “how to do” Feel free to use any of ‘my’ ideas - and as you can see - I’ve also lent a few ideas here and there
Wow cool man - I always like to see some home made figures
I�?Tm spending two days i Copenhagen, so it isn�?Tt possible building anything tonight, but why not share what I did last night then.
Update from 08-12-2008
Barrel:
Nothing new here �?" sorry!
Gun support:
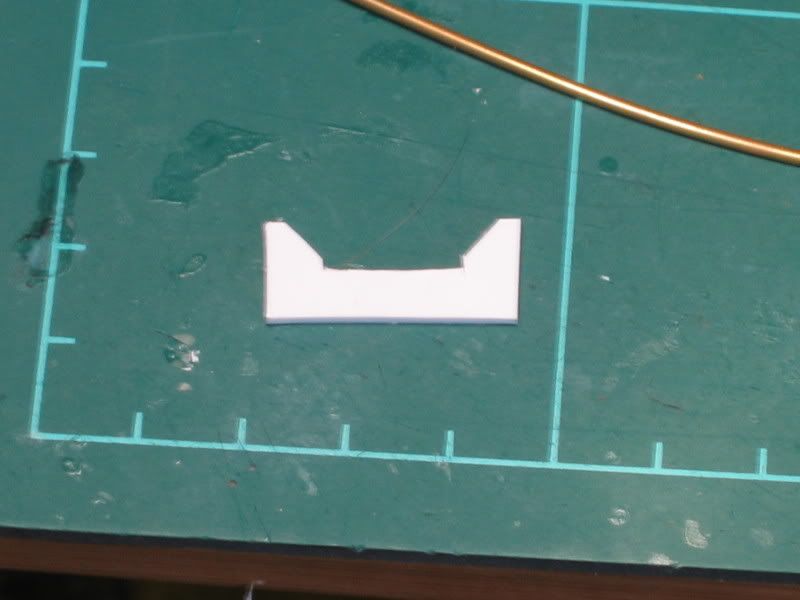
Lower front panel:
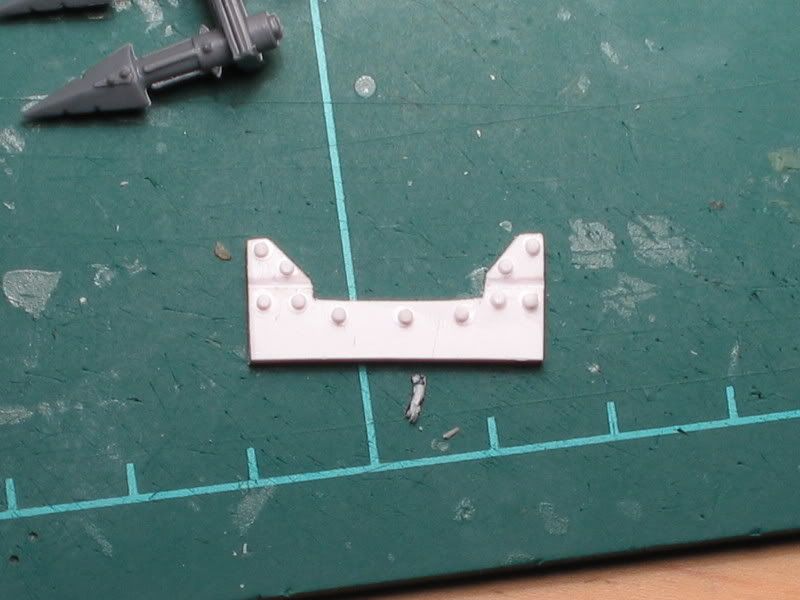
I have cut out a small piece of 1.5mm sheet to be used for armour under the barrel and between the two sides. This:
I then carved two lines to make it look like some joined armoury plates �?" and then added another 11 rivets:
Support sides:
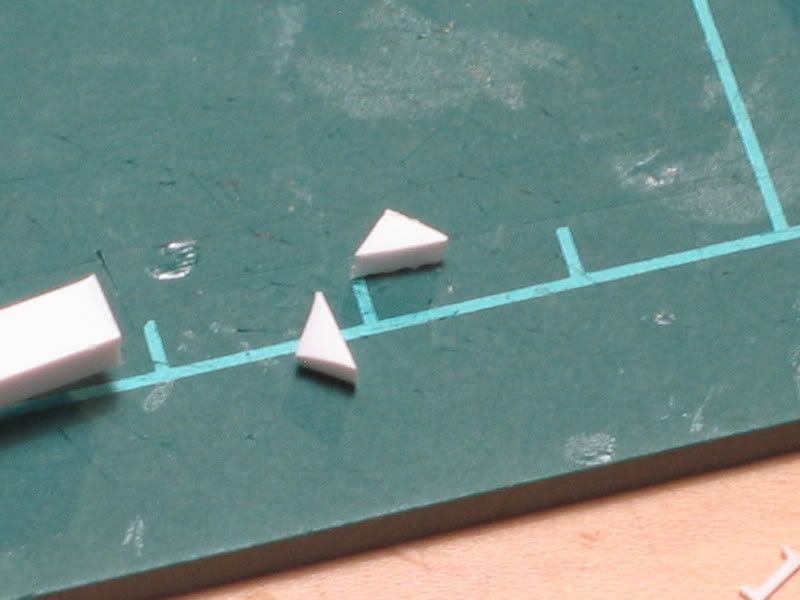
Then I did the cogs, that are going to be placed at the inner side of each gun support.
Each cog is made from a 2mm piece of the 3.2x3.2 styrene square �?" which is then cut diagonal in halves.
6 on each side �?" and vola:
I�?Tve decided to lift the support a little bit, so I have made these two to enlarge it a bit.
It�?Ts a piece of 3.2x3.2 styrene square with some strips�?T of 0.50mm sheet
And it comes to look like this:
Upper front pannels:
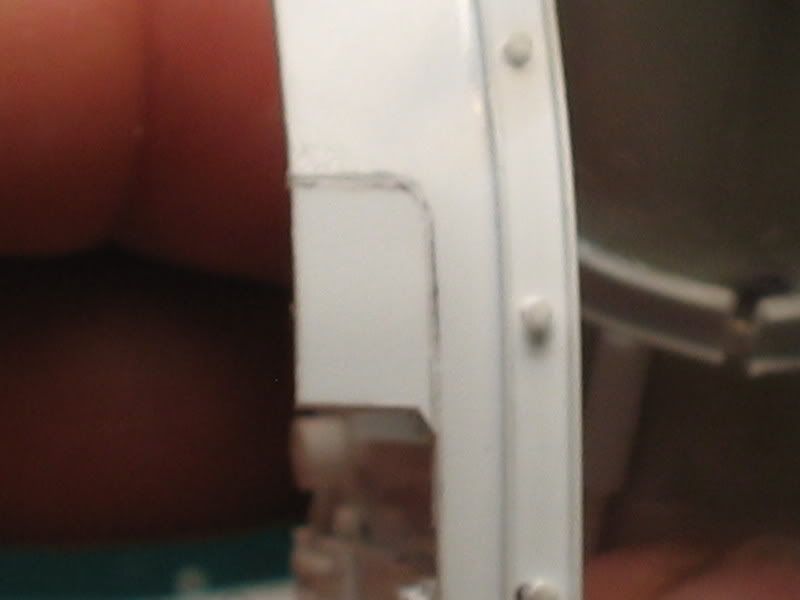
Then I did the armour plates that should cover this fragile cog mechanism from enemy fire (and here I did the first big mistake).
I�?Tm making the plates from 2 pieces of 0.75mm styrene sheet - aprox 12mm width, 43mm long, two strips of 3.2mm styrene channel and 8 1mm rivets.
This picture show the mistake I did :mad �?" I forgot that I have lifted the Gun Support, so the �?~room�?T I did for the wheels is to big - so it made the distance - from the wheel up to the plate - to wide.
So, I�?Tve tried to glue some card back on.
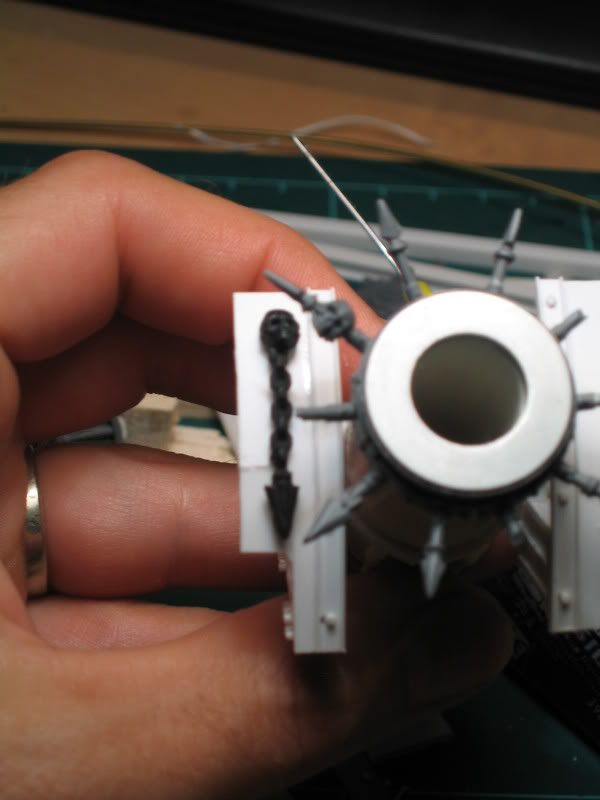
Then I though about covering it all up �?" by adding a piece of chain �?" like this:
But I think I will cover it all up by gluing a second �?" but very thin - layer of card (styrene sheet) back on �?" have a 0.3mm styrene sheet laying around some where.
Adjusting concept:
I have decided to use the 40K Ork Big Gunz Wheels. But I�?Tll move them forward a bit �?" so (right now �?" I think) the Earthshaker should come to look something like this:
It’s not much to look at, but there are �?" now �?" 103 rivets on it �?" all cut out of a 1mm styrene rod �?" and glued on with help form a sharp knife :sick
Next:
I’ll cover up the mistake by adding a thin piece of card - and then I’ll place a small rune of Hashut on the upper right front panel - I think - or should I make a big one on the barrel itself??
Then there are all the rivets on the barrel :sick
And I’ll start on the Cannon chassis. Just spoke with my wife, and she told me, that the missing plastics have arrived. So stay tuned!

 The star from spikes at the end of the barrel are perfect, the supports look awesome too. I like the look of the ‘cog’(?) that lets the cannon move up and down with the supports too, I hope that stays in the design.
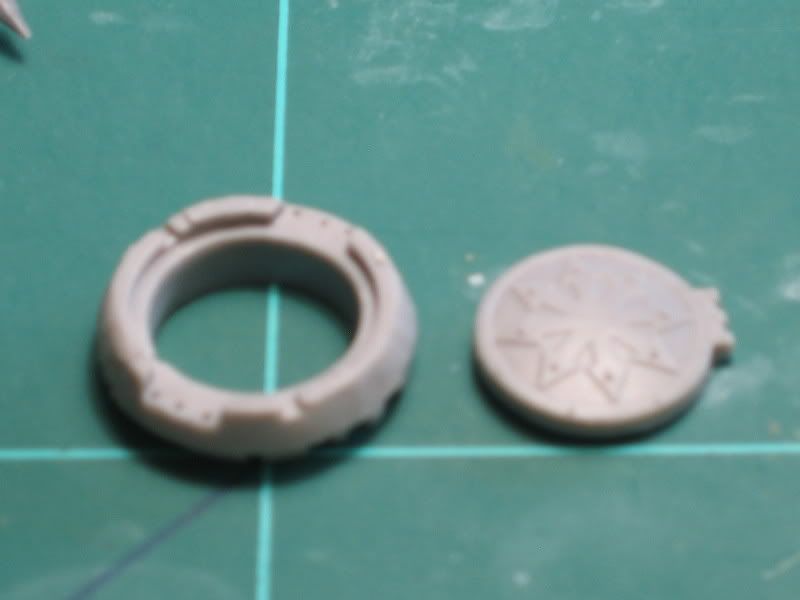


