Grimstonefire:
Anyone else think that the model is stupidly hard to put together well?
I’ve spent ages sawing, cutting and filing the main barrel to try and bend it so the 2 parts fit.��Then cleaning off the miles of mould lines (and this is only the barrel :mad), then doing loads more sawing and filing to get the cog thing under the barrel square and getting the main barrel generally more square!
After all this then the fun part comes; greenstuffing and gluing the 2 parts together and smoothing the awkward gaps, then going all the way round sculpting bits to fill gaps and cover up mistakes.
I plan to sculpt a long line of runes along the metal bit running along the top of the main barrel, and a few around the sides as well.��I’m not sure what I will do with the skull parts, whether to add them or convert etc.
I also need to look at the main plate that goes on the front as I’m not happy with that at all.
Anyone else had problems or got some ideas?��I’m guessing it would be easier to ask who hasn’t had problems :h
cornixt:
Yep, same here. Unless you have a tub of greenstuff don’t even start to put it together!
Khan!:
I have had to assemble two hellcannons, one for GW a couple of years ago, and one for my Tzeentch army more recently. I remember them being irritating but definitely not to the degree you’ve had trouble with, Grimstonefire! Particularly with the flash, that sounds rough indeed. Maybe I lucked out with the kits or somethin.
I was distinctly annoyed with all of the fiddly chain/skull bits for attaching the cannon to the ground. I didn’t include those in either one (now one of those is on the base of my BFSP slayer-turned sorcerer!). Ugh, and both times I forgot to attach the furnace doors at the rear of the cannon, so it looks like the skulls and fiery goo are going to fall out. sigh.
Grimstonefire:
Forgot to mention that one of the chains holding it down I’m going to replace with the middle fantatic;

And I’m going to have these two on the base;


With the one on the right pointing towards the flying night goblin.
My second Hellcannon will be a real pain to put together as the 2 halves are nowhere near fiiting nicely.��Also on one of the barrel parts the whole thing is about 1mm height difference along one of the mould lines.��So that will take ages to correct.��I’m also missing a few bits.
EDIT
I’m also thinking of doing the ‘rune of hashut’ for the wheel hub caps instead of the stars. I will make some from plasticard and see how they come out.
Xander:
I have never myself put one together, but it certainly looks tough. I will probably buy one once I complete my army, maybe as a reward for my hard work. 
For now I have to stick to assembling and painting what I already have. 
Grimstonefire:
Those who have assembled and painted it, should I paint each part individually and then assemble it all at the end?
The Flying Beaver:
When I got the pleasure of assembling it with water-thin super glue. I was picking at the super glue on my hands for days! Horrible memories.
angryboy2k:
You should assemble it AFTER painting it, for sure. Mine is currently in various stages of painting and assembly.
The hellcannon molds are deteriorating. I wouldn’t be surprised if the model were retired within the next year or so. My first hellcannon is definitely of superior quality to my second one.
On the positive side of things, assembling this model is MUCH easier than assembling the Space Marine “Iwo Jima” diorama from the skulls promotion a few years back… I have no idea how anyone with less than six hands could possibly put it together properly.
Steve
Khan!:
You should assemble it AFTER painting it, for sure.
angryboy2k
I actually prefer to assemble all of my models before painting them.��The Helcannon is really complex and has lots of crazy bits, but nevertheless imo it is better to assemble first because then it is easier to do more effective highlighting (ie in the context of the miniature as a whole).��That said, painting all of the components before assembling the helcannon could certainly be simpler than trying to get one's brush in all the wee crannies etc.��It comes down to personal preference, I think.
Revlid:
Undercoat and base colours before assembly, proper painting afterwards.
Lord Zarkov:
I also had problems assembling it, resulting in a big hole in the barrel (despite doing everything I could pre painting to fix it; including taking a hammer to it)
The gap is still there:
Painting wise; you’d find it hard to spay well if you assemble first and some of the more internal bits are better to paint first.
If I were doing it again I’d paint all bar the flamy bits on the barrel first then assemble the barrel and GS it before bainting the last bits before the rest of the assembly
Xander:
Ya, I guess green stuff is truly necessary for this model. o_o
cornixt:
I tend to partly assemble, then paint the parts that are difficult, then assemble the rest for the paintjob to be completed
oboudd:
there incredibly hard to put together like the flame cannon.
Half the bit are in my bits box.
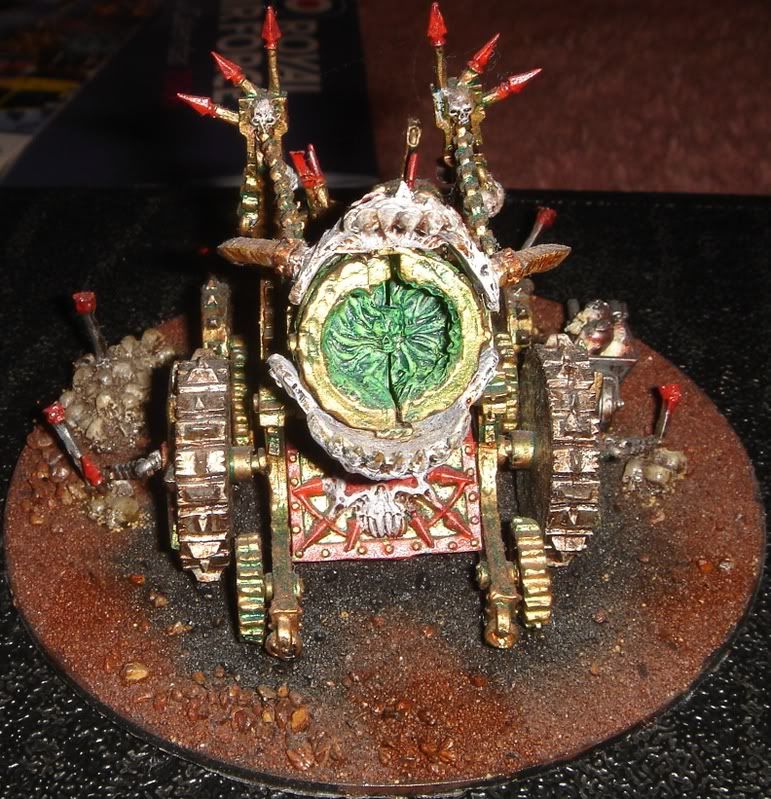
angryboy2k:
I haven’t finished my Hellcannon yet, but I’ll probably post a picture in this thread shortly to show what I did.
Basically, I realized post-assembly that the inside of the cannon would be impossible to paint. So I broke it apart and started again. I held the two halves together (without gluing them) and greenstuffed flaming bits into the mouth of the cannon to hide the join. When the greenstuff was dry I very carefully separated the two halves.
Then in one sitting, I painted the insides, and held the two halves together for the parts near the join. This ensured continuity of the paint scheme.
After I was done, I glued the two halves together and redid the greenstuff I’d previously destroyed on the rest of the barrel.
There’s still some work to do inside the barrel as I’m not satisfied with some of the gradations, but the problem areas are all easily accessible when assembled. I’ll get round to it eventually (damn work).
Pic later.
Steve