Your are absolutely nuts. That is got to be the most epic thing I ever saw in my life. I am not even kidding: more epic than the LOTR movie trilogy, more epic than a Devil May Cry new weapon video, more epic than a fully painted Space Marine chapter. Goddamn. Even without paint it already looks friggin good.
Would it be sounder to cut into the wall itself and have an electrician move the light switch to keep it easily accessible?
Admiral
Haha, nah! I do most of our electrical stuff anyway, but I want to be able to keep the switch where it is when ai take theiece down. I think mounting a switch and box inside the piece will work ;)
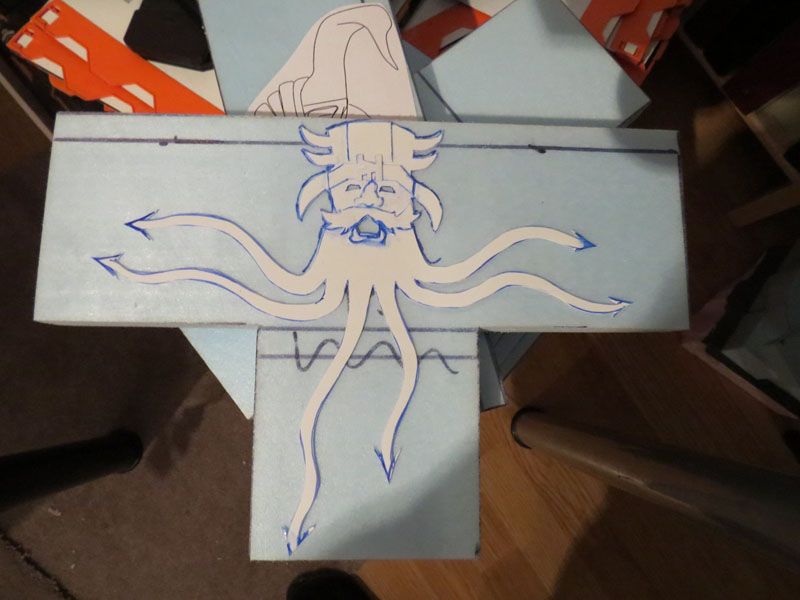
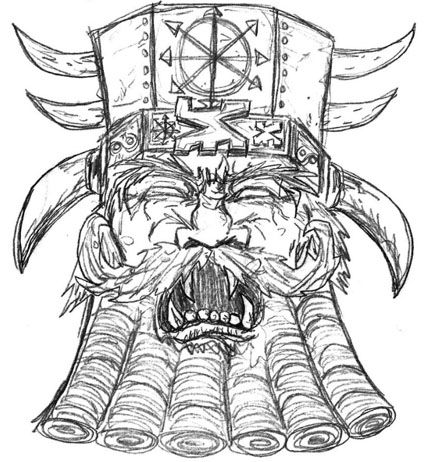
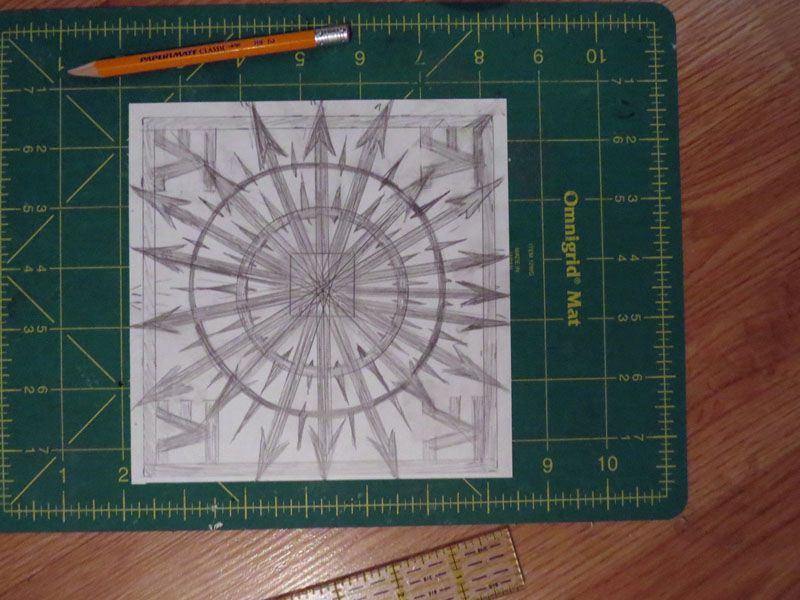
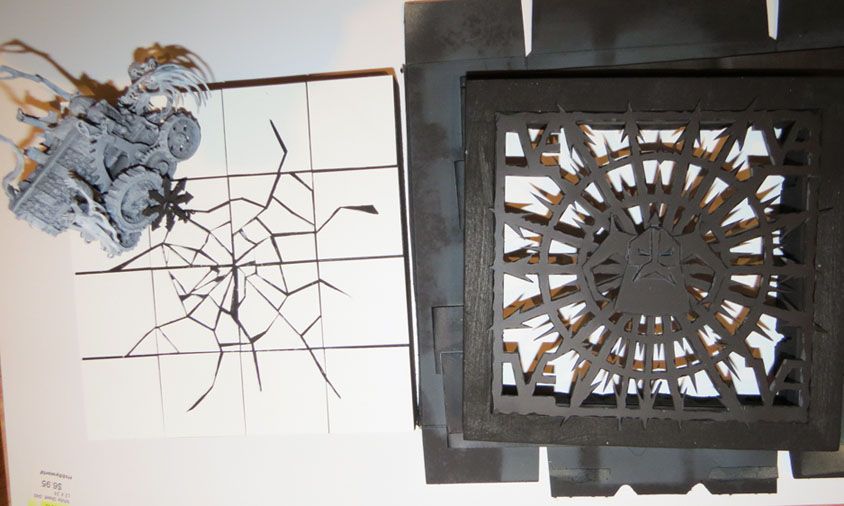
For the 4x4 lava room I want a heavy metal grate covering the lava pool and decided to go with a combination of a Chaos wheel and some unique Chaos Dwarf iconography, which is from the CD ship in Dreadfleet, and which I’ve used in a few projects previously:
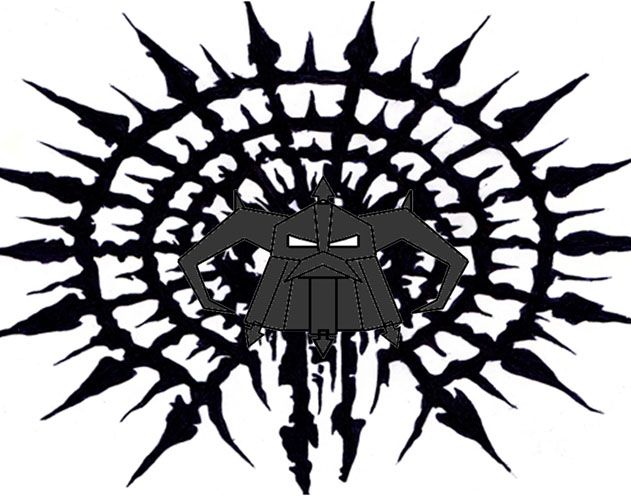
After combining the two and resizing the template in Photoshop here’s what it will look like
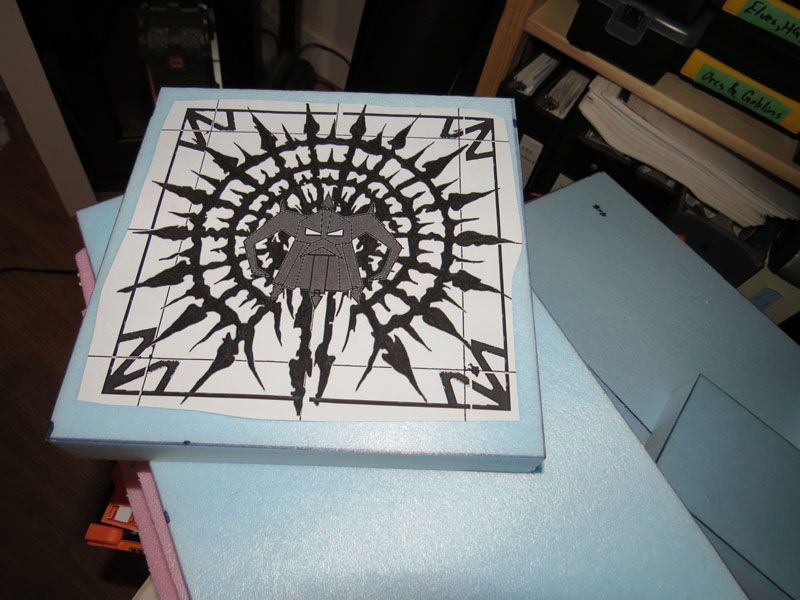
I decided I didn’t like the “W” shapes in the edges, which are based on a similar grate idea in Warhammer Quest Shadows Over Hammerhal, so I changed them, perhaps unimaginatively to the symbol of Hashut. I tried a version that was rotated 45-degrees, so they’re all facing inward, but it didn’t look good. Here’s the freehand drawing of the same idea directly onto the plastic.
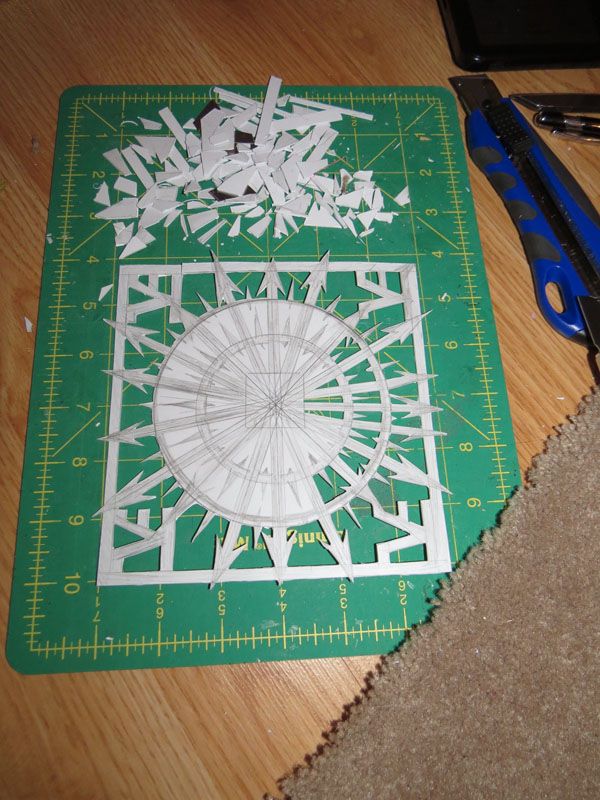
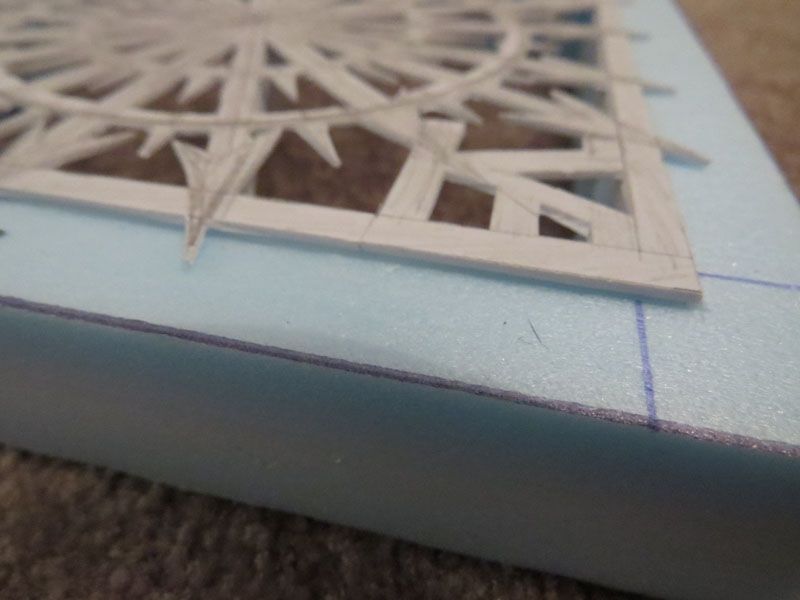
Once the plastic starts getting trimmed away the pressure being applied to the plastic with each cut will cause it to warp, which you can’t quite appreciate from this image
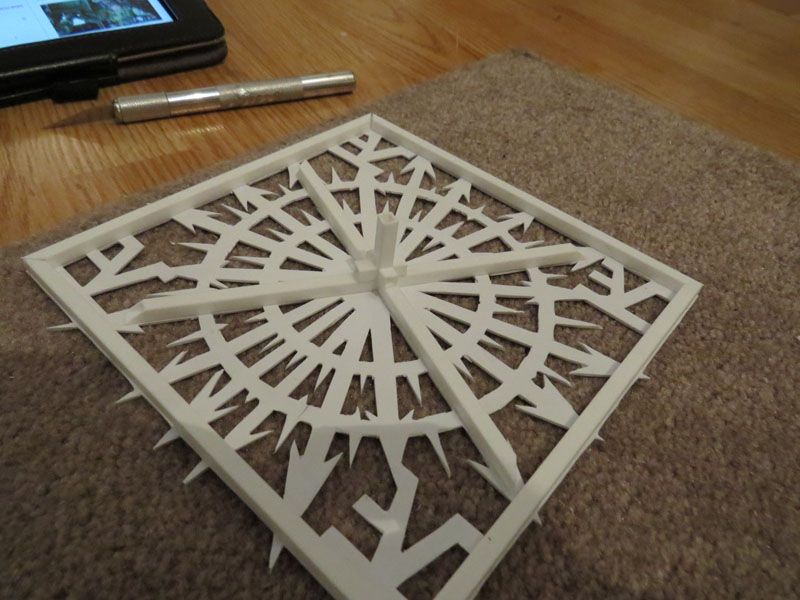
In order to regain some structural stability and flatten the piece back out I added some square bracing on the backside, as well as a central support that will ensure the plastic doesn’t bow inward when a few heavy models are placed on it.
Here’s what the bracing looks like (before I put on that central vertical support piece)
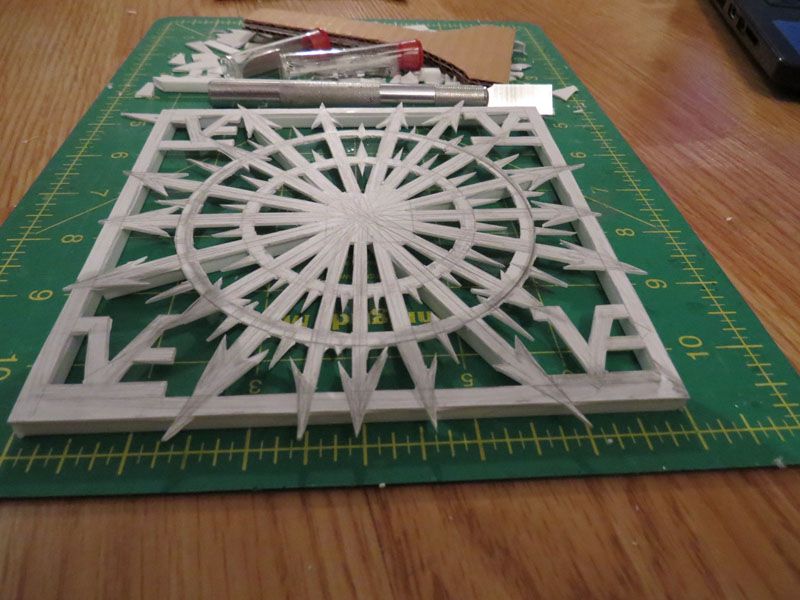
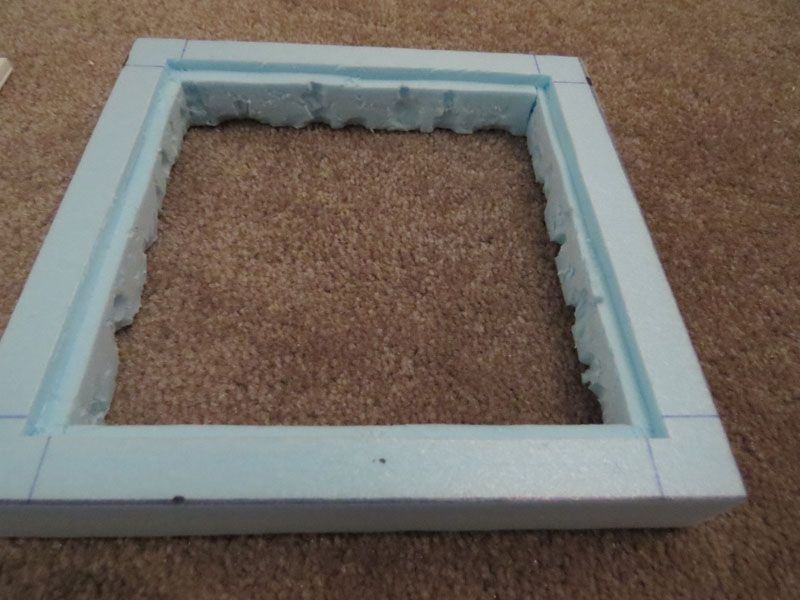
I also needed to trim out a border in the dungeon tile, and I roughed up the interior of the lava pool to make it look slightly eroded. For the trimming I held the plastic piece over the foam and traced the edge out with an X-acto blade to ensure I would get a snug fit.
Fitting the piece into the board
And another shot of how it sits. I could trim out the points on the star and cut the rim a little deeper so that the surface is flush with the foam, but I’m planning to put an equal thickness of tile on top of the foam, which will make the finished piece look flush.
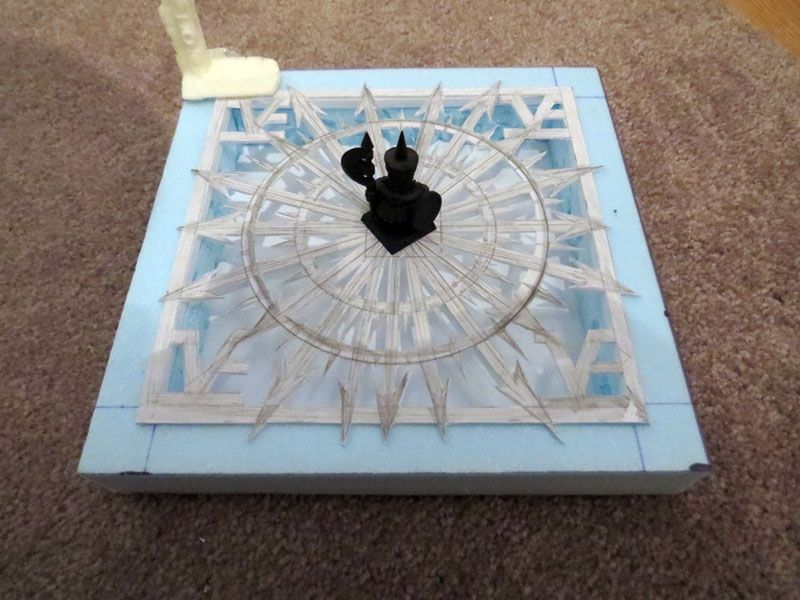
Here’s what it looks like so far, minus the central Chaos Dwarf head symbol in the centre, with a CD Warrior and a fragment of WHQ doorway just for scale
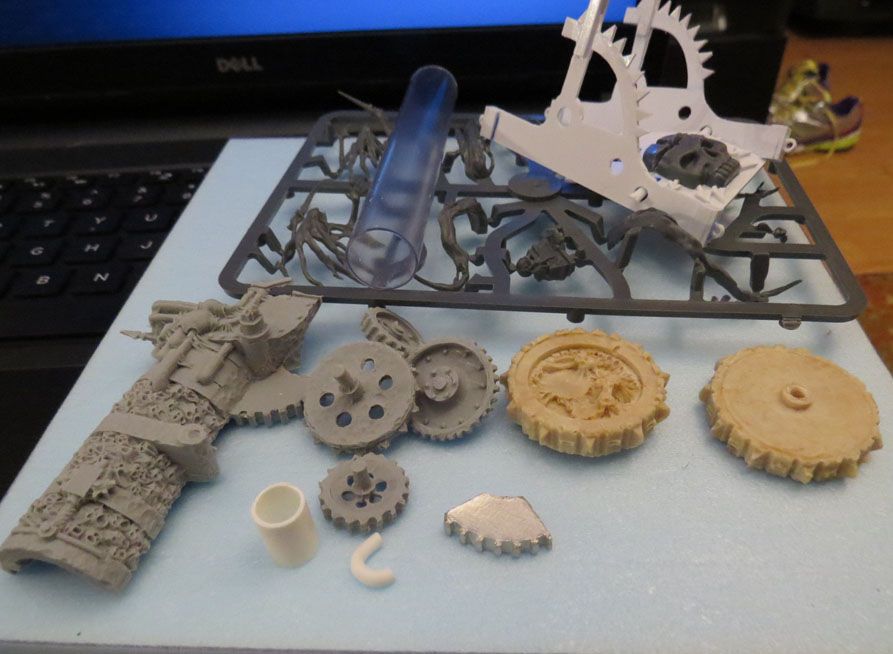
Going through all of my bitz I’ve amassed quite a pile of components that can be used for my Chaos Dwarf-themed dungeon tiles
And speaking of doorways
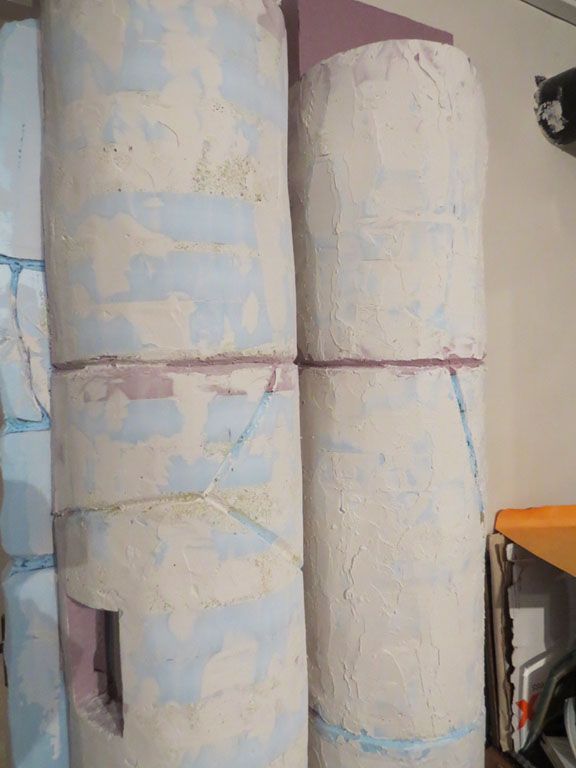
After roughly trimming down the columns so they were close to the right size I covered the whole thing with plaster and will need to start sanding to smooth it out further. I’m guessing this is going to take another 1-2 applications of plaster before seams are hidden and things are looking relatively smooth.
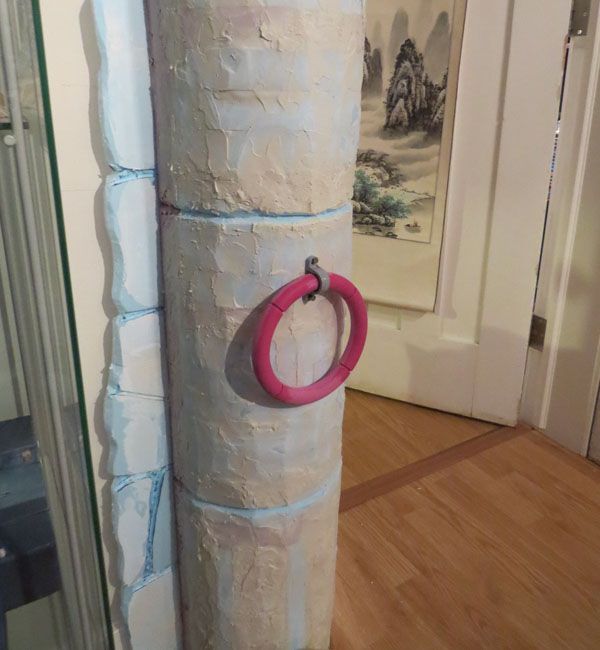
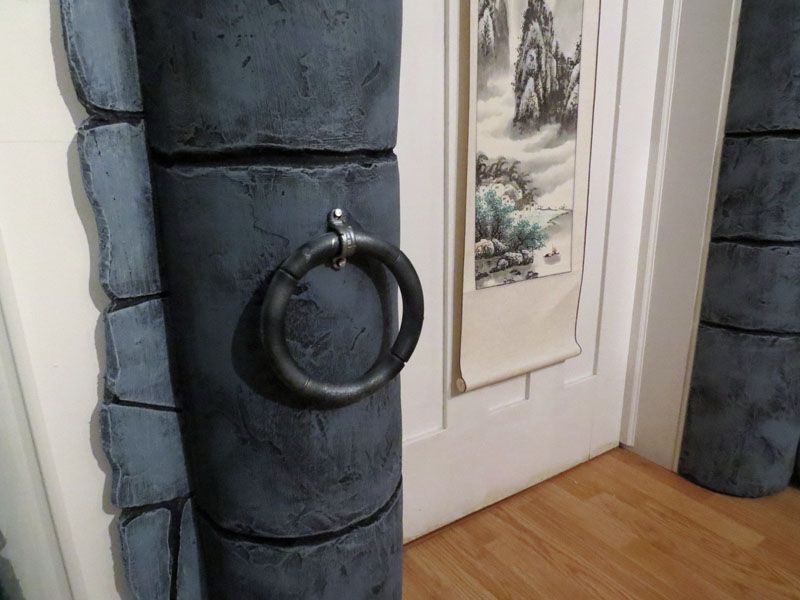
I also managed to find a perfectly sized ring that can be primed and painted
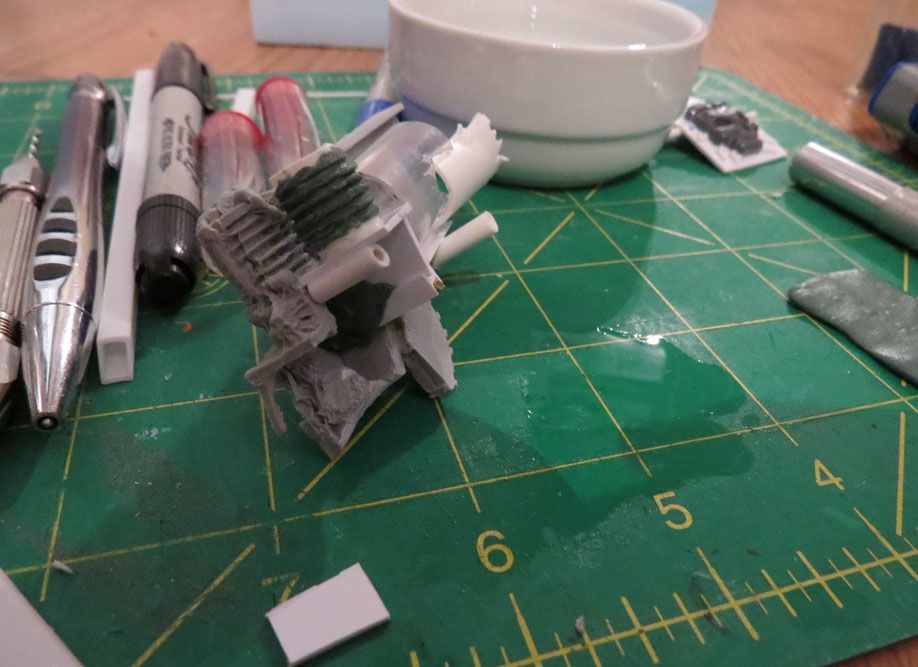
Inspiration - Half of a Finecast Hellcannon. This was from a terrible casting, this half was unsalvageable for building a Hellcannon and had a lot of problems with the back and inside surfaces (pink rubber from the mold embedded in parts, miscasting along edges, etc). Waste not, want not :hat off
Wheels - The Finecast wheels are from the same miscast set. Half of the wheels had one side that looked presentable, so those will be the ones I use. I also cast up my own resin copies of the large wheels to use.
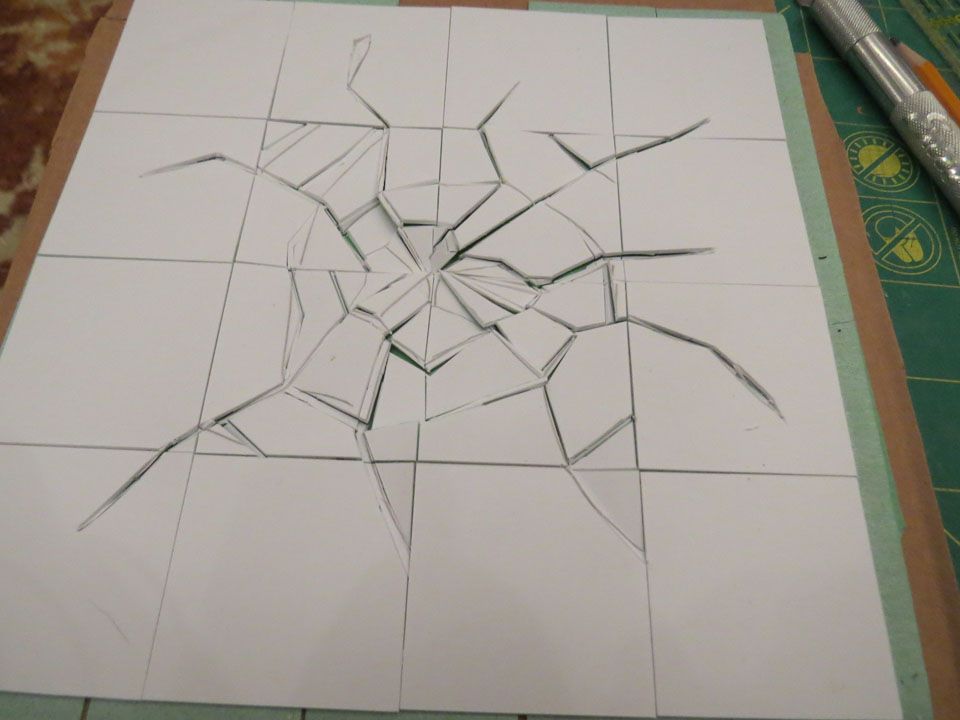
Floor - I want the Daemon Binding room to look like something went terribly wrong. As my Chaos Dwarf dungeon boards are all going to be tiled I went with a shattered look, radiating out from a central point. As you will see later, the final inner pattern is slightly different… one of my kids knocked over the entire table that all the craft stuff was on, which included all of these carefully arranged tiles. x.x It’s like a puzzle, and after cleaning up 5-6 pieces were never found :mad
Body - Here’s the start of building up the frame of the missing half
The Hellcannon is going to be slightly toppled over and resting on its side a little, so some of the reconstruction and Greenstuff won’t be seen.
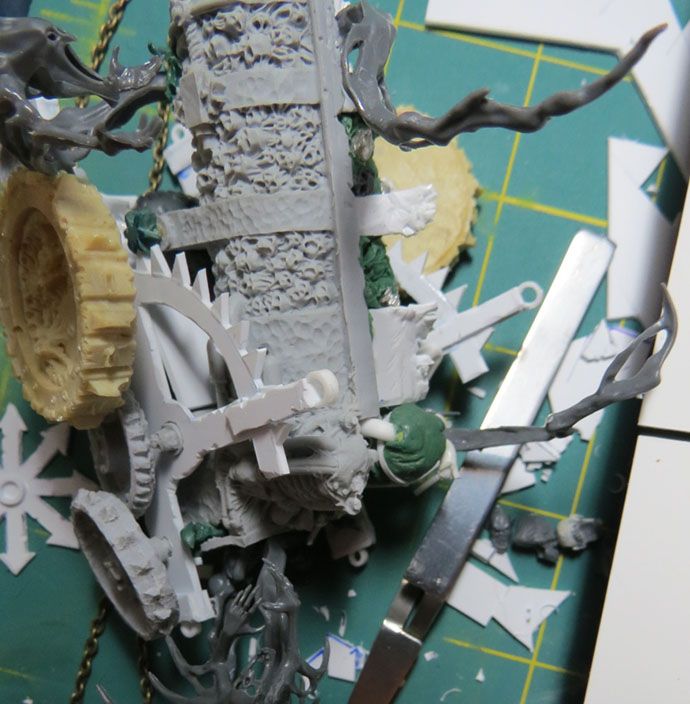
Checking the fitting of the wheels. You can see the bucked open banding from the body of the Hellcannon well in this pic. I’m still going to cover the surface with a thin layer of GS and give it a hammered look to match the original side.
Here’s a better shot of the side that will be mostly down toward the table. You can also see I’ve still got cleaning up to do on the grey plastic to the left.
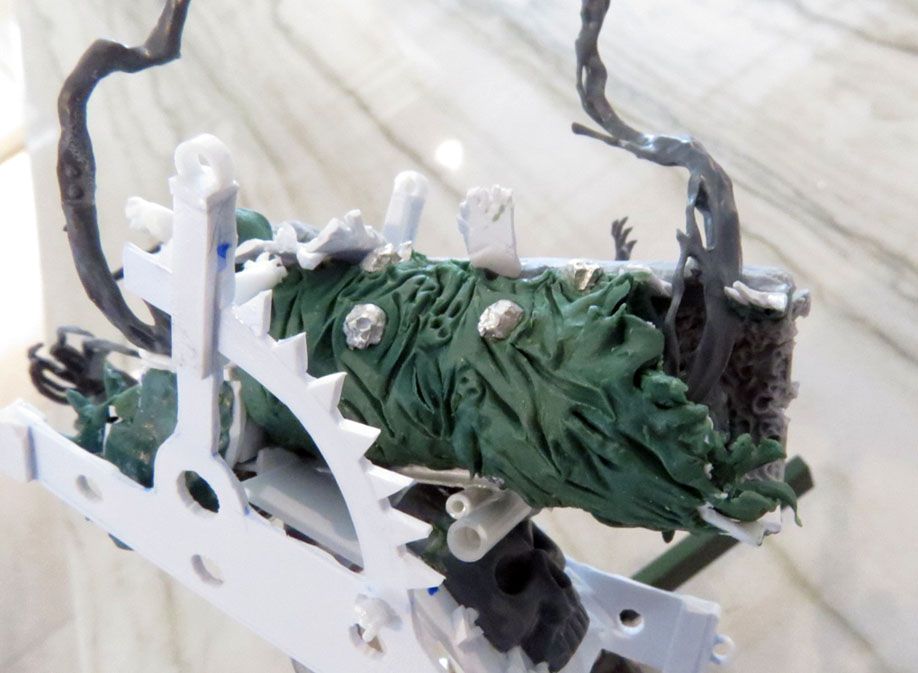
Better view of the escaping fuel source for the ruined Hellcannon
And again, a better view of the side, showing the burst pipes. This was also the best pic I could get of the hammered look for the GS on the metal part of the body. Still lots of final bits of GS work needed to clean up edges, but it’s getting very close.
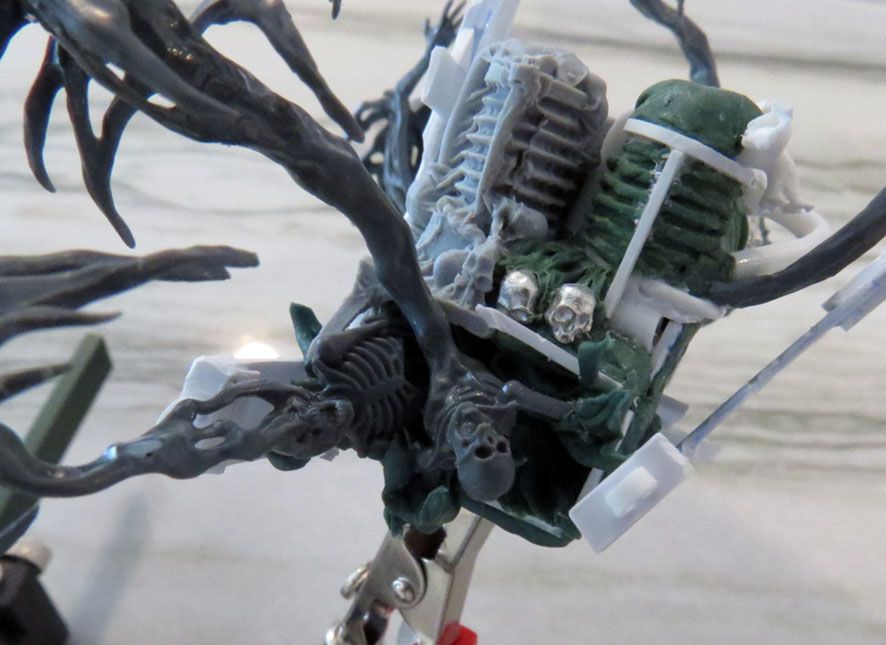
Current state - Here’s all of the bits for the Daemon Binding Dungeon Room. Once painted the Chaos star will be attached to the large wheel that’s facing up. I’m as-yet undecided if I’ll use the furnace doors I made for the back - it’s pretty crowded as-is.
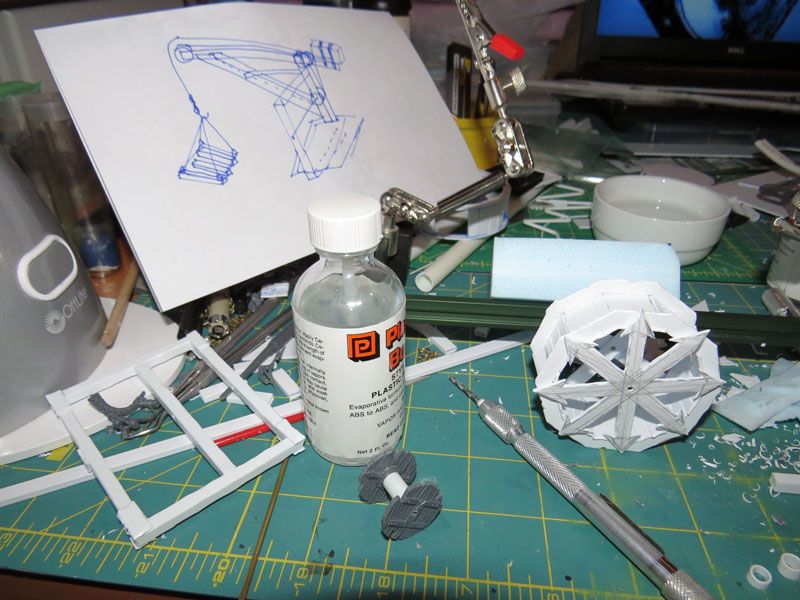
Starting work on the Slave Pit (Fighting Pit), which requires a slave-operated treadmill crane:
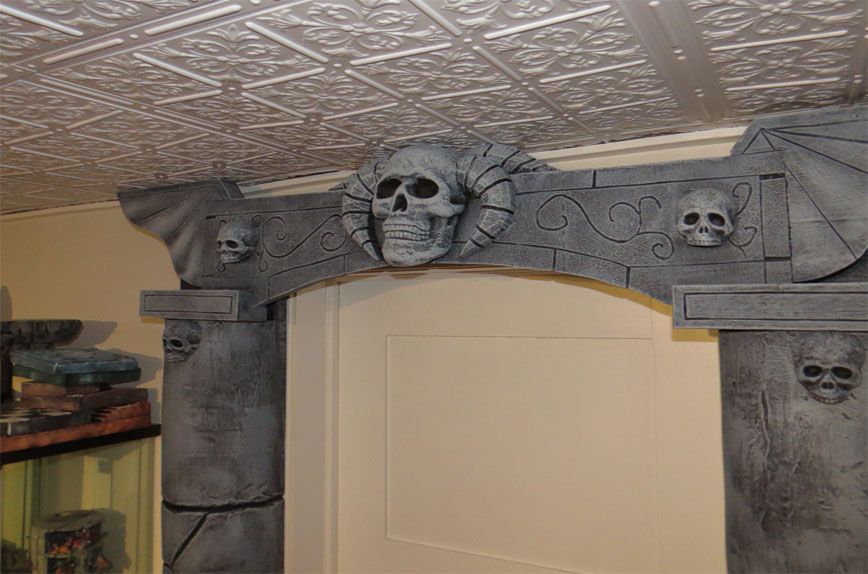
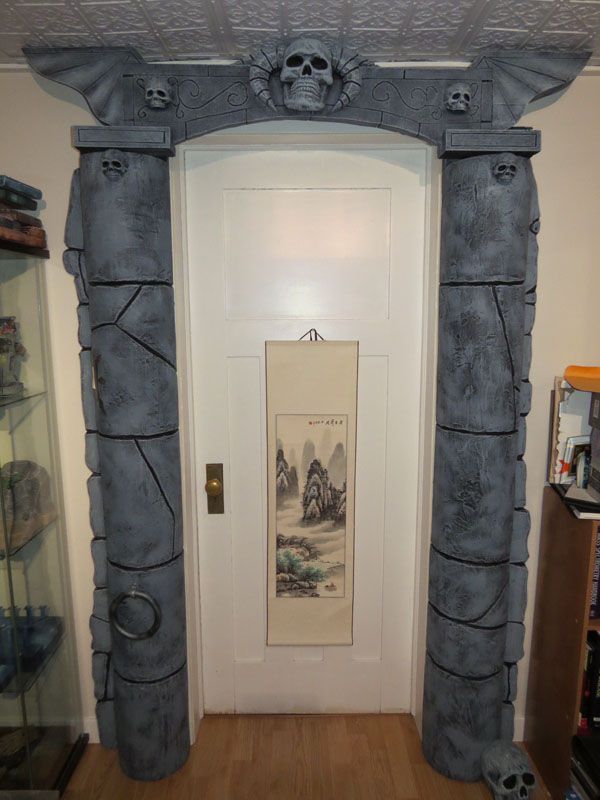
And the final steps for my Warhammer Quest doorway:
Some final sanding and smoothing.
Checking placement of the new light switch receptacle.
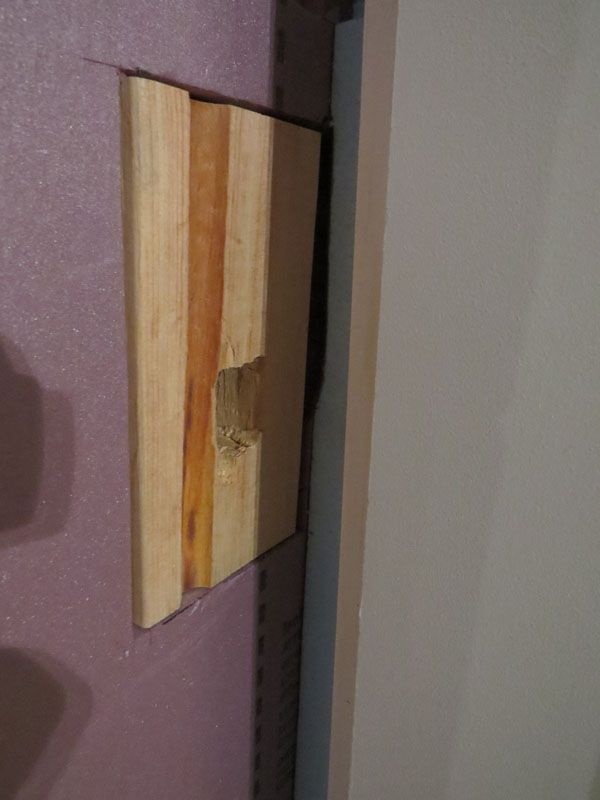
I cut a recessed space into the backing to put in a 2x4 block of wood with a space chiseled out for the wiring to feed through and to also give me something solid to screw the metal receptacle housing into.
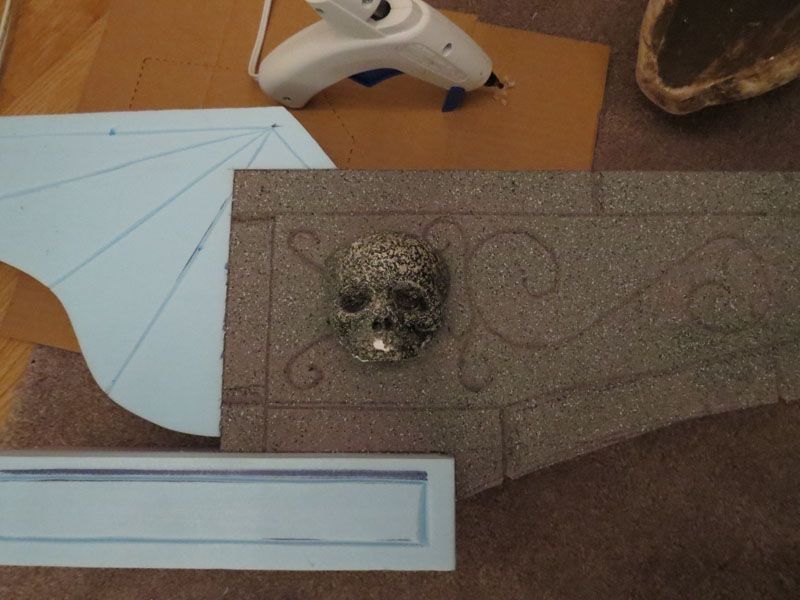
Carving some final details onto the archway and masking off the areas I don’t want to spray with the stone-look textured spray can.
The final textured look for the archway.
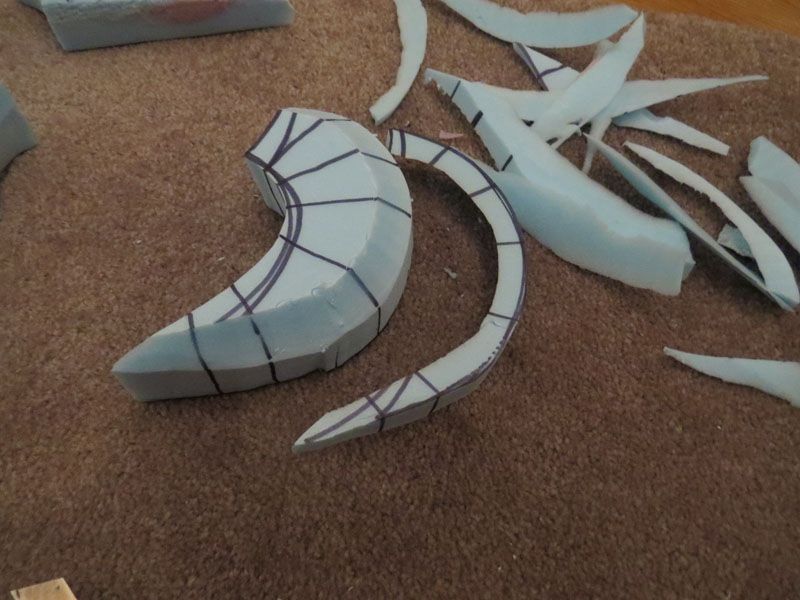
I drew the lines for the horns onto the foam and traced them all the way around. Then as I cut pieces off to approximate the desired curvature I re-traced the lines I had just cut away to maintain the pattern.
Shaping up.
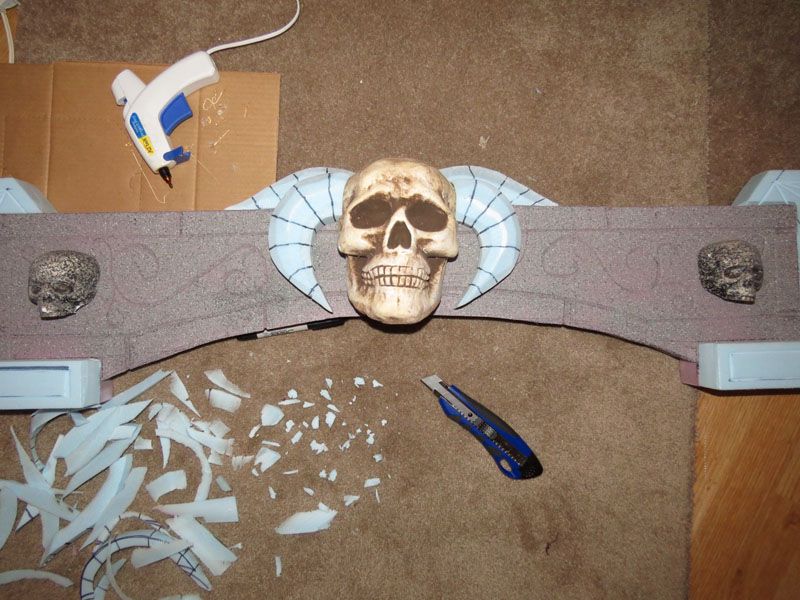
Checking the fit and some final trimming along the seams with the skull. Not shown here is how I made the grooves in the horns. I heated up my soldering iron and used the heated tip to melt a smooth groove into the foam. This is the same technique I used to outline the stone pieces that you can see along the back edges of the columns.
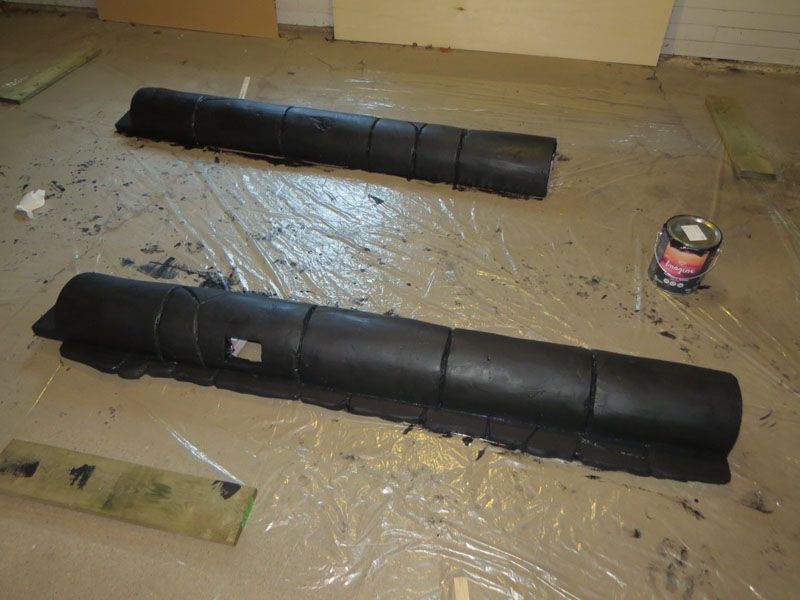
Paint/primer mix. The kids had a great time painting these up with me.
Installing the receptacle and making sure it’s a good fit. The centre line sits just flush with the column. Not shown is shutting off the breaker panel, opening up the light switch, extending the wires out farther with some twist caps and re-wiring.
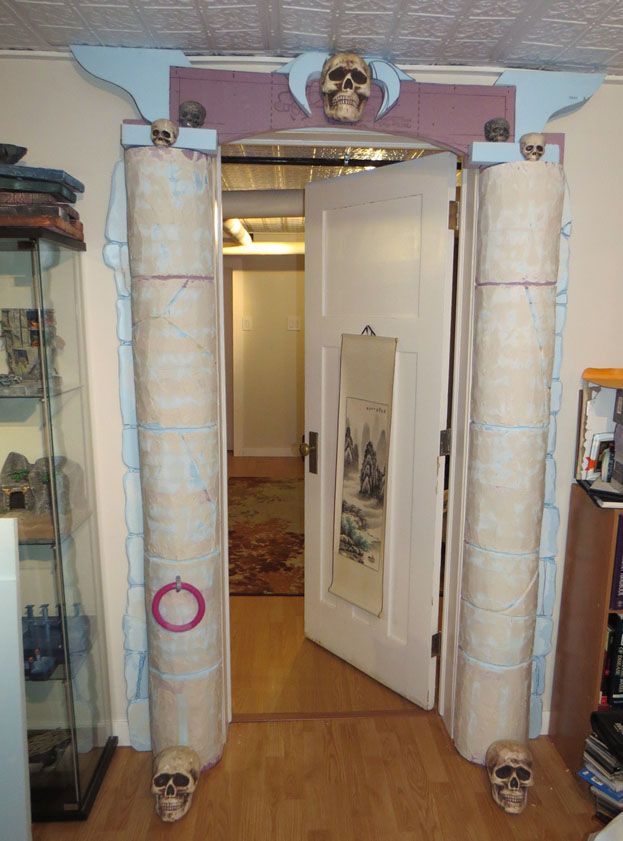
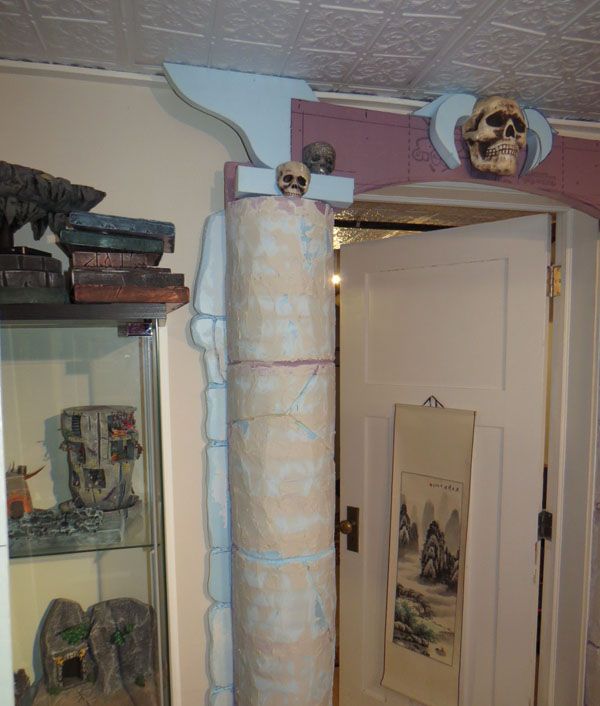
Wohoo!! The finished piece.
Surprisingly the kids aren’t weirded out by it
The ring was from a dog chew toy at the pet store. Size was perfect and now that it’s been filed down and painted it looks great.
Finally, the light switch got a cover just to hide everything. It still needs some additional hand-painting to highlight the edges.
I like this thread so much, even if I dont find the time to visit it often.<br><br>For me the most awesome thing is that you finish your projects. Its not just a brilliant idea but there are actual results. That doorway is impressive as are your gameboard pieces and the rest.
Some really eye-catching detail work done here. The floortile work is stunning, and the souls escaping from the hell cannon is a just brilliant idea and well executed. :hat off I wish I had thought of it, and it has inspired some ideas in the same vein.
And finally, the doorway is beautifully done. Now to just do it again to all of the detail on the rest of the house… Cheers!