Hammerhand:
Warning this is not a stand alone tutorial. You will need to have seen Xanders BFSP conversion tutorial to use it. Follow the link:
https://discourse.chaos-dwarfs.com/t/5711
This tutorial is alsopart ofmy army blog (that I posted in the wrong place) if you want to see my other stuff, follow the link:
https://discourse.chaos-dwarfs.com/t/5499
Preparation.
To start with, I completely carve up the dwarf as Xander does in his tutorial, only I completley remove the head and shield, and carve down into the shoulders with my craft knife/needle file to get the helmet to sit in the right place. Then I glue in the plastic add-ons such as helmet, shield and arm. The arm requires a long pin armature wrapped in a little greenstuff, you don’t need to worry about the detail in this arm as most of it will be covered by the cape. I then add the scale mail as in xanders tutorial, and add on a greenstuff shield arm. Again, this will mostly be covered by the cape. Be sure to remove any pouches/equipment from the Dwarf’s back. Your start point should look like this.
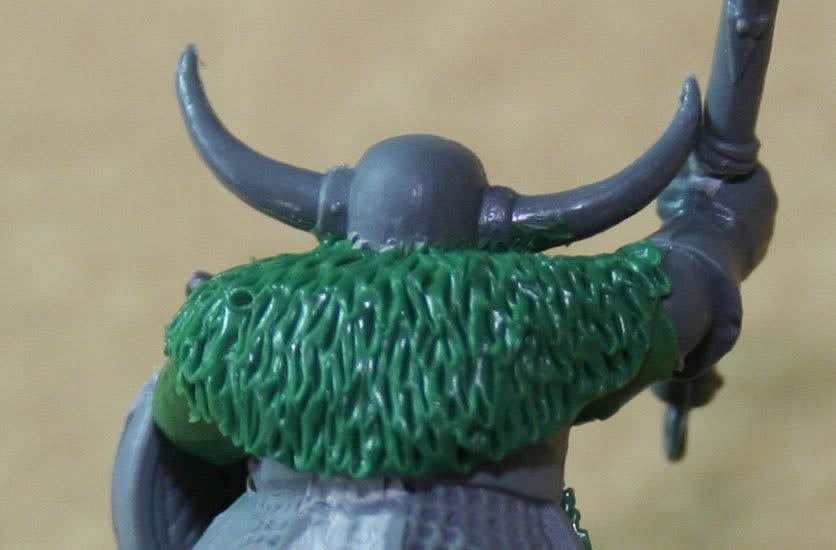
Fur Collar
First off, I sculpt on the fur collar. Make a GS sausage about the size shown in the picture below and place it carefully around the neck area: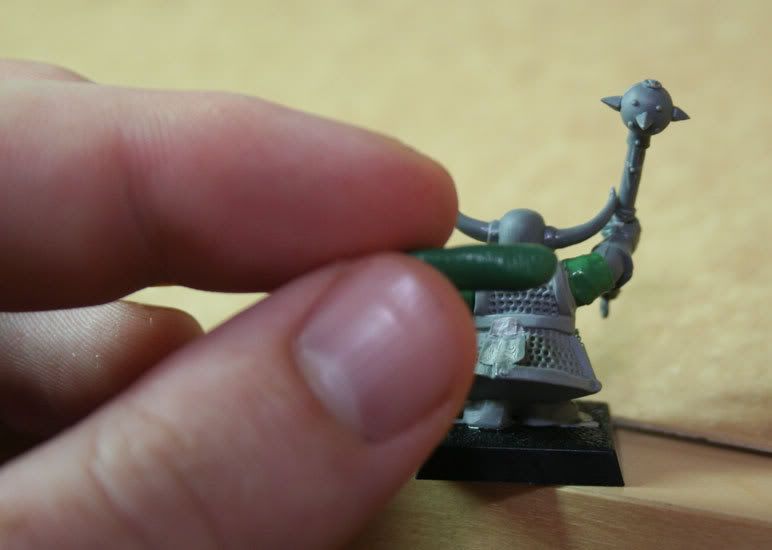
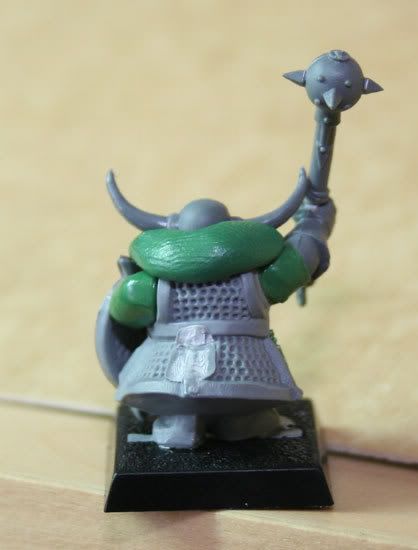
Next, using a flat sculpting tool, smooth down the GS and spread over the area of the model you want to cover: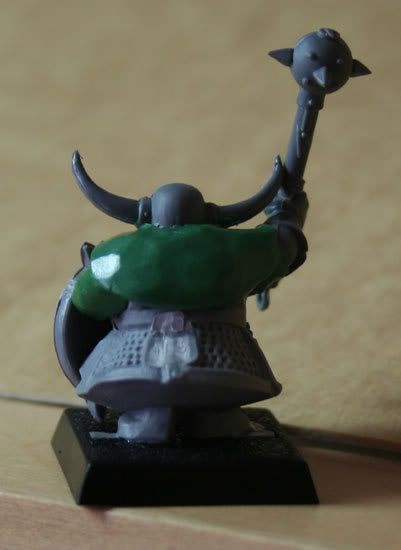
Once you are happy with the coverage (it doesn’t have to be 100% smooth as you will be texturing it anyway) Take a sharp sculpting tool and begin engraving small grooves starting from the neck area and working down to the bottom of the collar like this: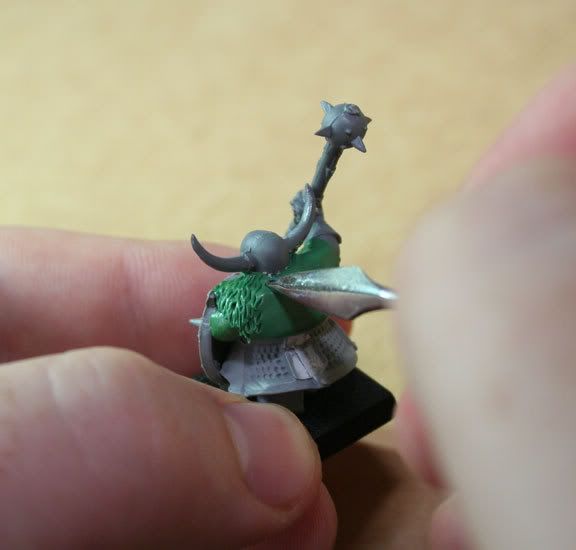
Games workshop’s website has a tutorial for this technique, just follow the link if you want more detail
http://uk.games-workshop.com/convershunk…-stuff/14/
Cloth Cape
It’s a good idea to let the collar cure before you start the main cape. Make a GS sausage about the size shown in the picture and carefully place it along the bottom edge of the dwarf’s armour: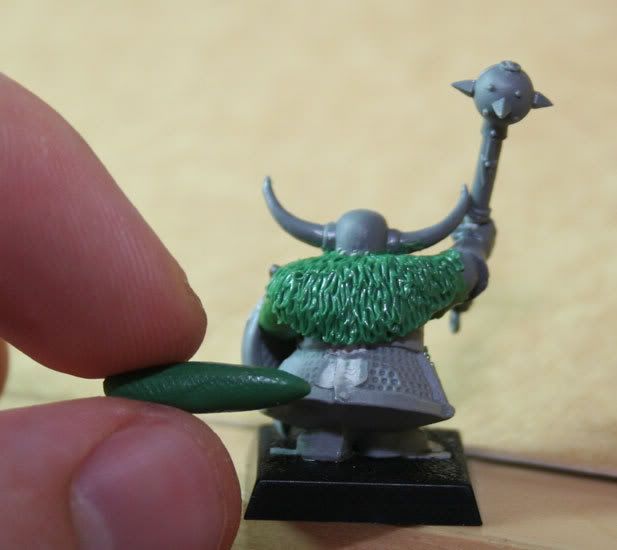
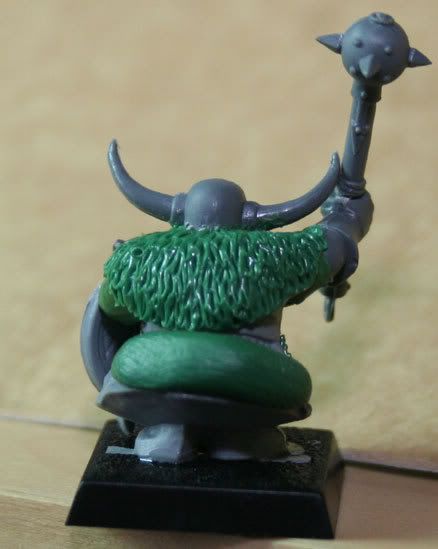
Next, use a flat sculpting tool to spread the GS over the area you want to cover with the cape. This will probably be the whole of the back area: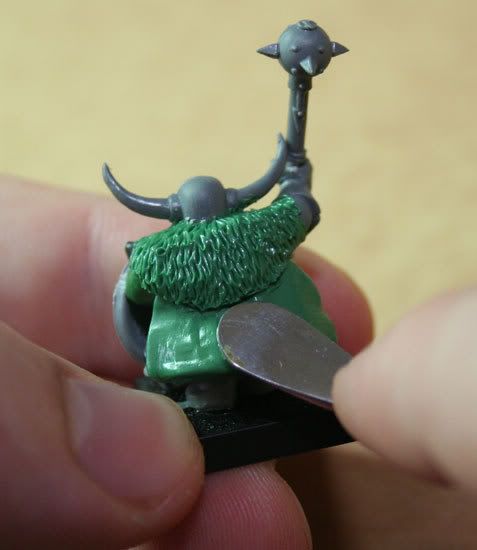
As the warriors arm is raised, there will be a bit of cape flaring away from the body. Use a flat sculpting tool and your thumb to pinch the edge of the GS and pull it gently away from the body as shown in the picture blow: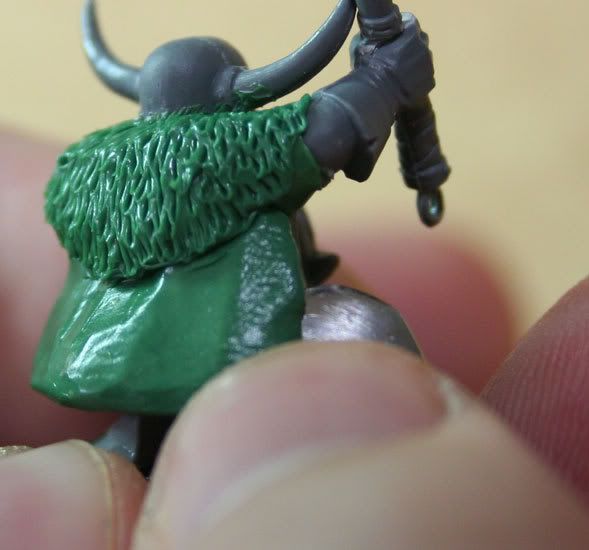
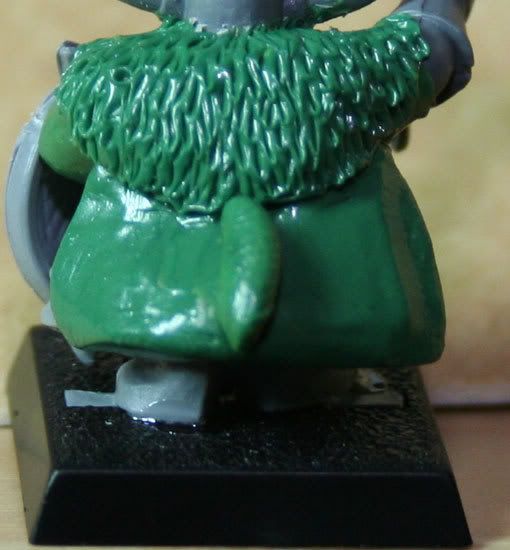
Once you have done this gently smooth out any finger prints using a flat sculpting tool this can be fiddly but persevere, it’s worth the effort at this stage. Your finished flat cape should now look like this: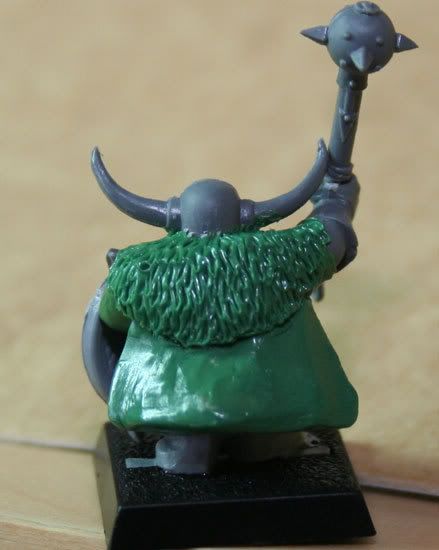
Modelling the Folds
You need to let the cape cure fully before starting to model the folds
As these are core troops, I am only putting 3 basic folds in the cloth. You can put more in if you wish, simply alter the amount of GS to alter the depth of the folds. For now, we will just cover basic folds.
Make 3 GS sausages about the size shown in the picture below. Place one carefully where you wish the centre fold to be: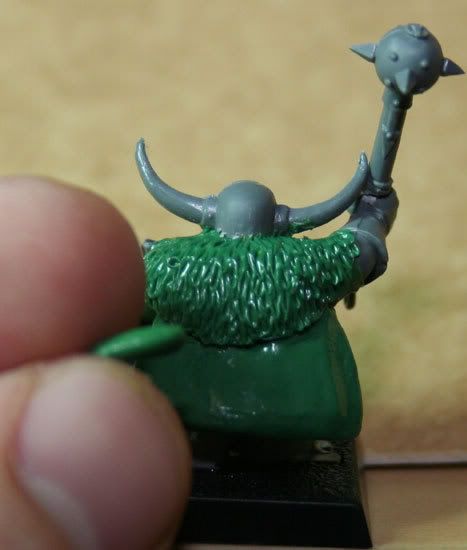
Once you are happy with it’s position, place the other 2 sausages either side where you think the folds would look best: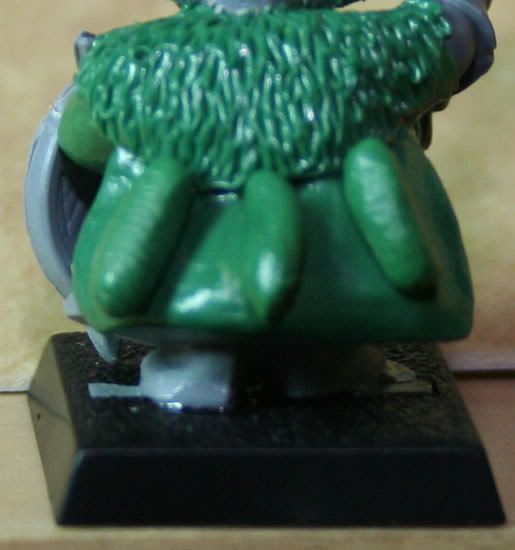
Once you are happy with their position, use a flat sculpting tool to work the sausages into the cape, creating a triangular ‘tent’ shape. I find it works better to have the outer folds leaning towards the centre and the centre fold shaped evenly as shown in the pictures below: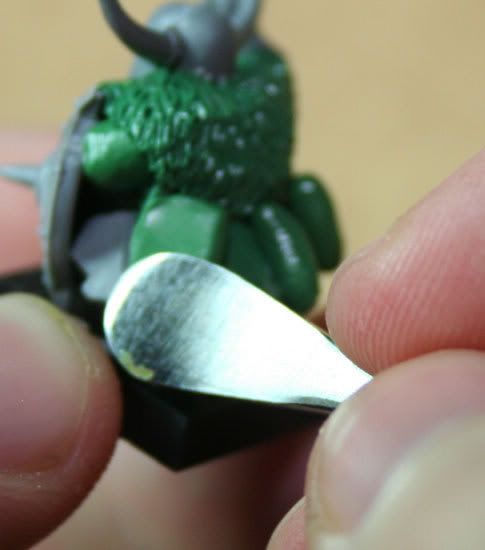
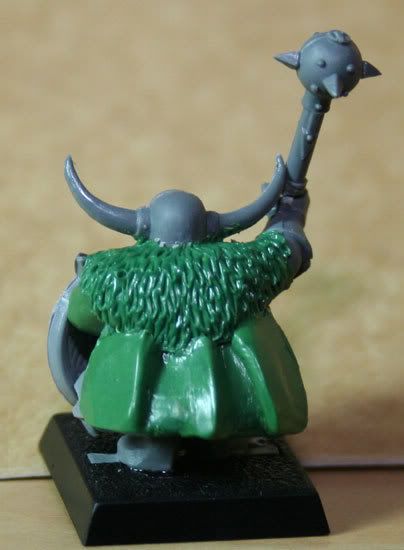
And that’s it, your finished basic Chaos Warrior style cape. Go on then, you can see him from the front too!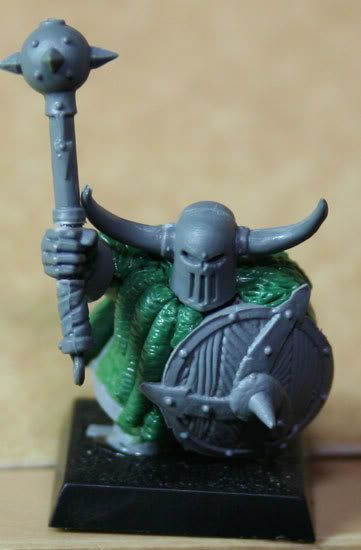
Notice where the cape sticks out slightly under the arm. The beard is done exactly as in xanders tutorial. I have tried both scultping the beard before and after the cape, I think it’s slightly better to do it after but it doesn’t make much difference TBH.
[align=center]2017 Image Salvage
 [/align]
