[Archive] Ongoing HeroQuest Project [July 06, 2019]

Nicodemus:

What with Storm of Magic kicking off I’ve decided to get my backside in gear and finish some of my smaller terrain pieces to press into service as Arcane Fulcrums.

Ruins of the Forgotten Orrery


View into the interior


Still so much work to do on this one…

Ancient Shrine


I also decided I want a piece of floating terrain again, but I decided to make it perform double-duty. The bottom has a few thin beads of hot glue that give it some grip once dried.


Fozzricks Flying Fortress :wink:


flipped over, it’s also used as a piece of floating terrain (or an Arcane Fulcrum):


Lastly… I abandoned this guy a few years ago when I didn’t like how his head and cape were coming along…


By time or by crime Zargon will be making an appearance in our Storm of Magic games!! :wink:

~N

Hazkar:

oh nice one,do you have some wip pics of the flying fortress?

also that solar system model is pretty cool,cant wait to see that one painted

Nicodemus:

oh nice one,do you have some wip pics of the flying fortress?

Hazkar
Well the fortress is on page 10 of my blog, the flying base is still being made ;)

Flying base for the fortress / Floating terrain:


Extra bits and pieces for the Forgotten Orrery:


.. just a small update, my Doom Engine is eating up all my evenings x.x
~N

Abecedar:

[/quote]
… I wanted a light coloured terrain piece as I have a lot of dark coloured pieces already and it was getting samey… I was kind of going for a very weathered granite kind of look.  My intention as well is to have the light colour help accentuate the plastic bits they’re done - so the bell, statue, clock face and building pieces should pop out of the rock (I hope!!)
~N

Nicodemus:

Haven’t been doing a good job keeping track of my non-Chaos Dwarf progress… I’ve even gone so far as to forget to take photos of entire sets of miniatures before they head out the door :o

I painted up this Reapear miniature for one of our Warhammer Quest players who was taking up a new job out of the country - it was his wizard retirement gift as well as his going away gift. One of the other guys (English major and ESL instructor) did up a big sheet of parchment filled with epic and florid prose chronicling the past two years of adventuring with the party, which we all signed.   … and I remembered to take a photo half way through our last game :stuck_out_tongue: It was a very rushed job as I only have two nights notice that we were playing our last game.


~N

Thorne:

ive missed a lot of this but I like Fozzricks Flying Fortress its a awesome idea that may be borrowed … :wink:

vulcanologist:

Always impressed by terrain making and still awed at how you find the time for such major projects!

Kera foehunter:

Wow some all around great work Nic. Like the terrain very much

Nicodemus:

After a very long hiatus, and many years since updating this section, I thought I’d put in some of my other gaming projects that I’ve been working on over the last 2 years or so :hat off

We’ve got two girls, our oldest is very much into gaming and probably at the top of her list is Mice and Mystics. At some point I’ll get around to posting pics of the M&M minis I’ve painted up.  At any rate, the girls haven’t been very keen on many of the kids boardgames from the stores, and neither have we. They’re cheap, absolutely no imagination has gone into them and the kids are only drawn to them for the theme but tire of them pretty fast because they’re absolute crap as far as ‘games’ go.  

Being kids, they often make requests for things that just don’t exist.  They were into yahtzee for a while and wanted a Wall-e themed yahtzee game. No such thing. At one point the girls were into the movie Brave and wanted a Brave memory game. No such thing. You get the idea.  So this is where I come in… and surprised them with some homemade games, printed in colour, usually mounted on good card stock, etc. Some of them have been played more than the store-bought games :wink:

Anyway, here are some examples with some brief descriptions.  Just to be clear, what is shown below is just an example and in no way the complete games (except maybe yahtzee). I also do not own the copyright for any of the graphic material, and make no such claims of ownership. These are made in Photoshop from images downloaded from the 'net and are only for our person in-home use. Not for resale.   … oh, and none of these are their actual size. They’ve been shrunk down, in some cases less than 20% of their original size used for printing.
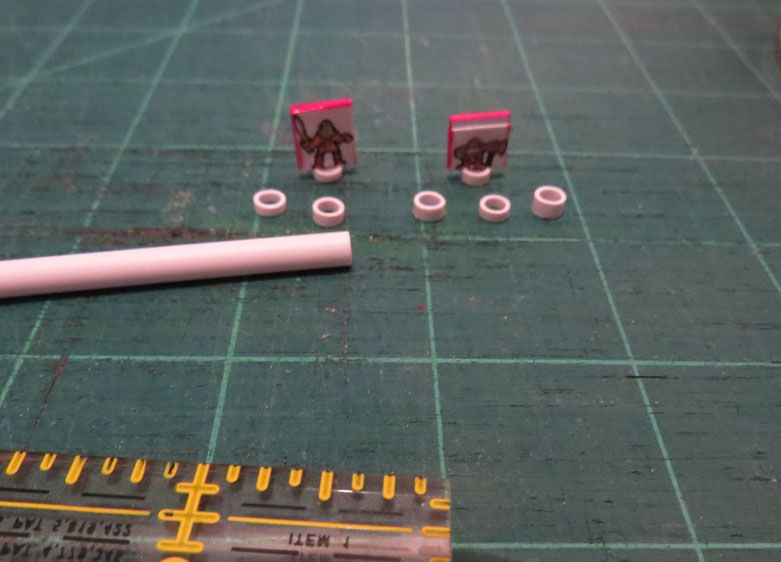
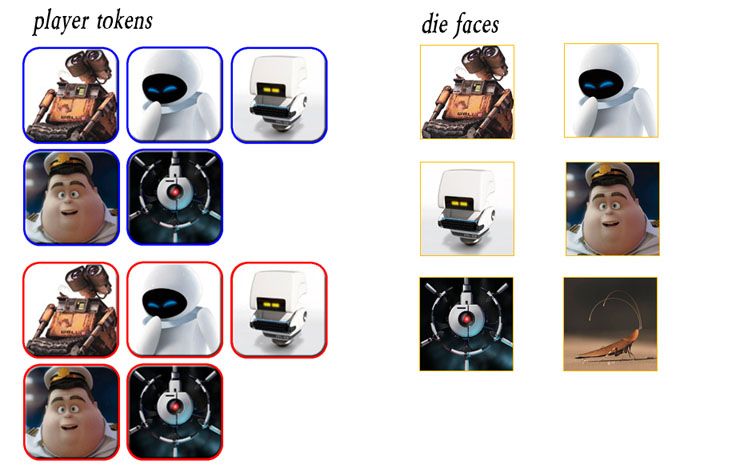
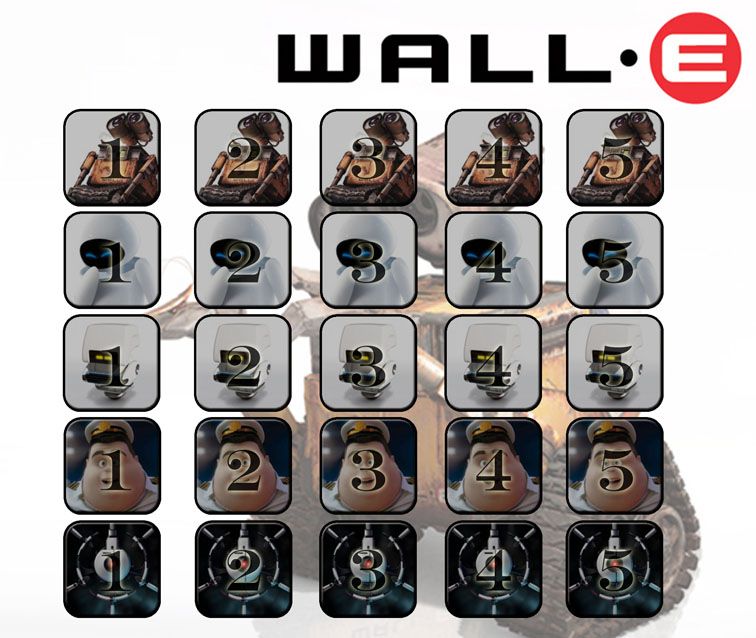
Wall-e Yahtzee

Colour-coded player tokens and images to glue to blank dice (note that 5 dice are needed). The 6th image, of the roach, is wild.
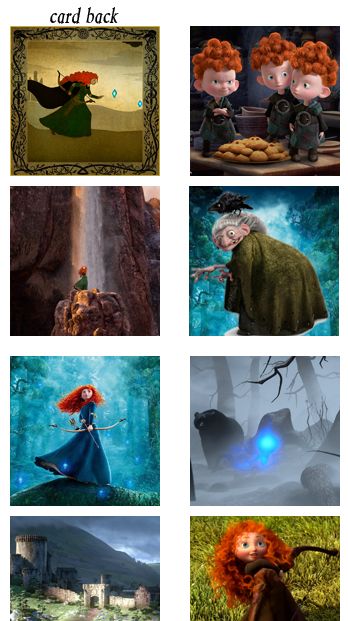


Brave Memory Game

These are mounted on card stock, the borders traced with black Sharpe and printed on both sides. The backing is shown, along with a couple of example images. Of course there are two of every image and I think the full set has ~25 images (so with duplicates that’s 50 tiles).


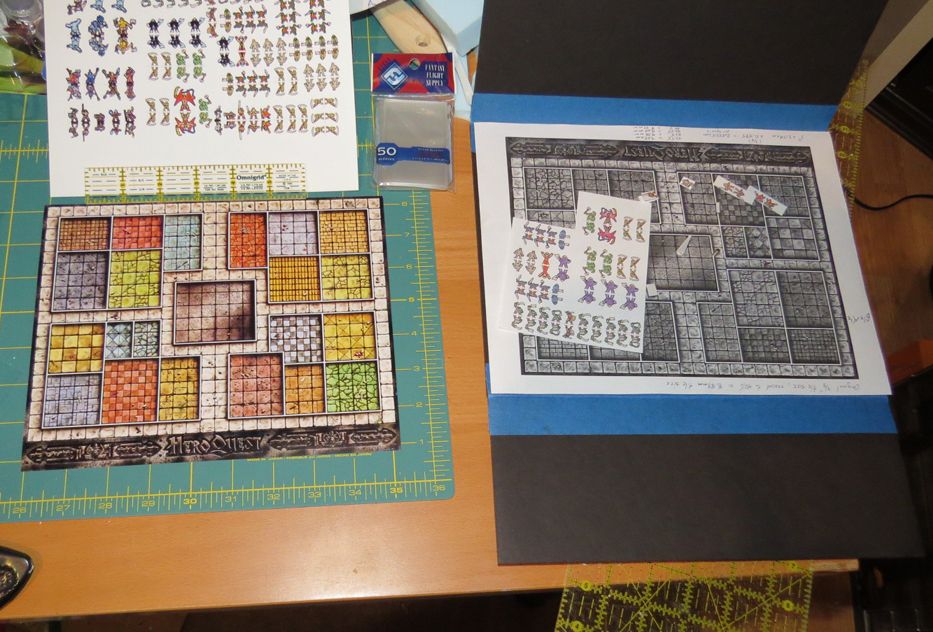
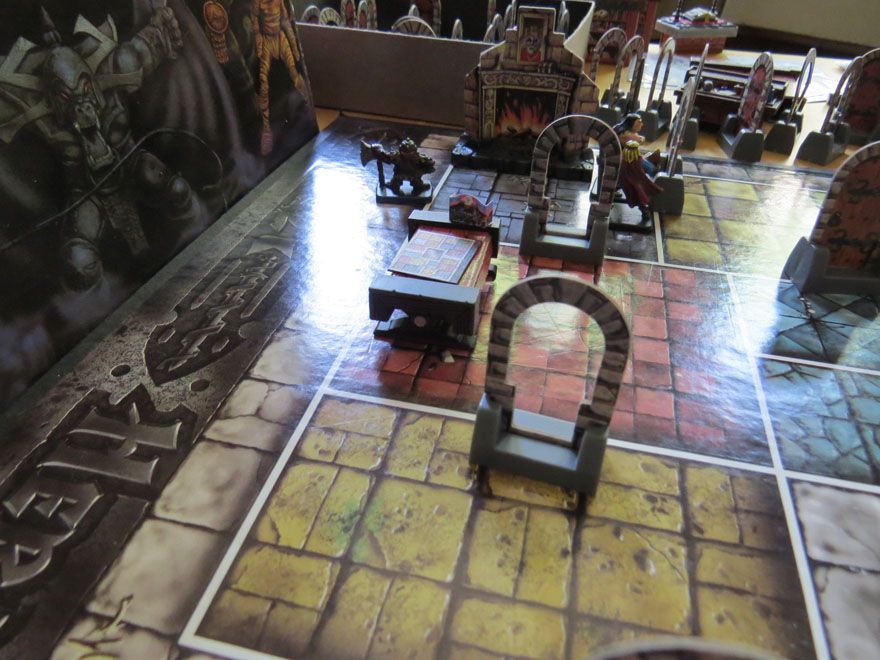
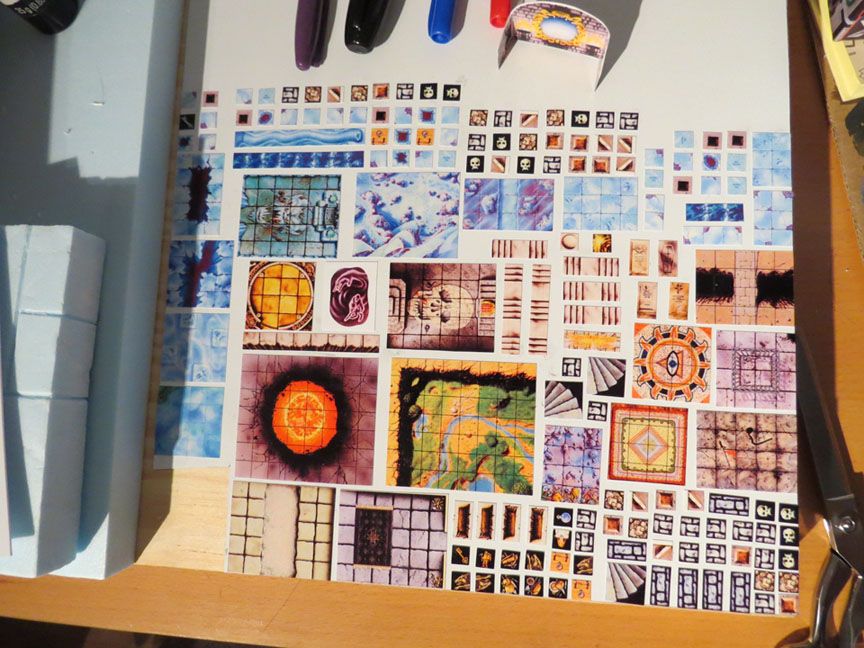
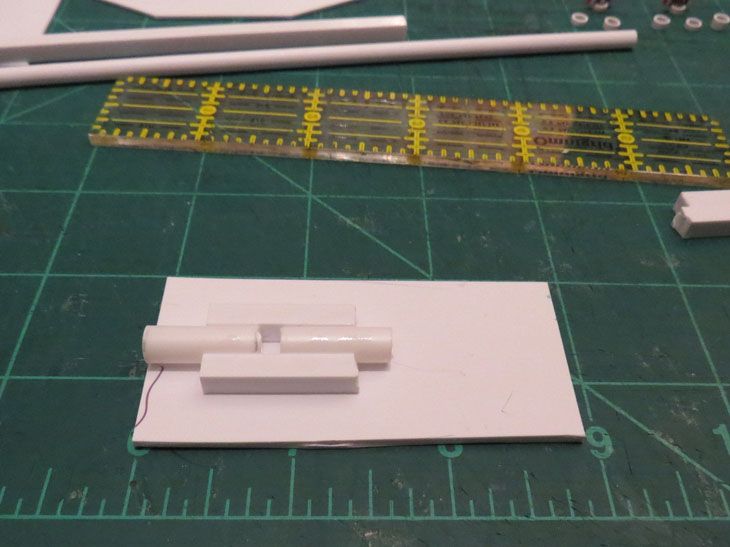
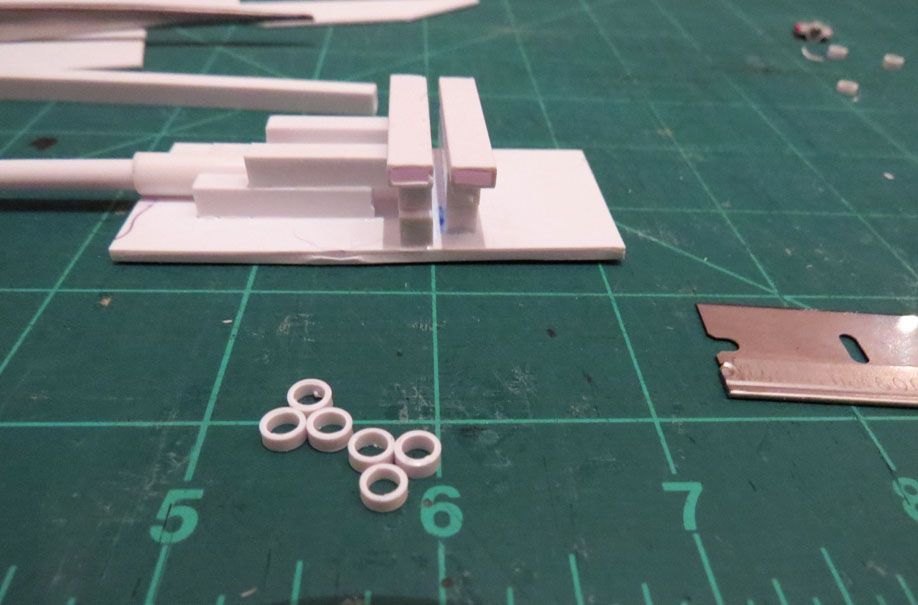
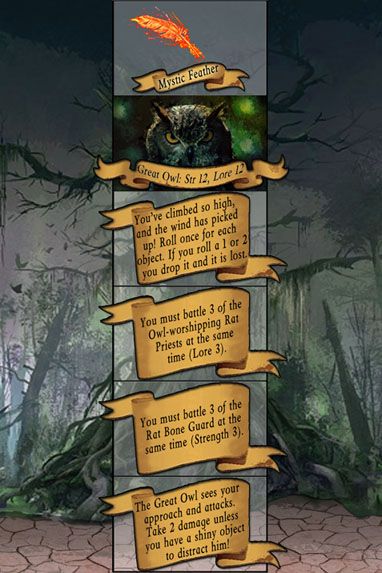
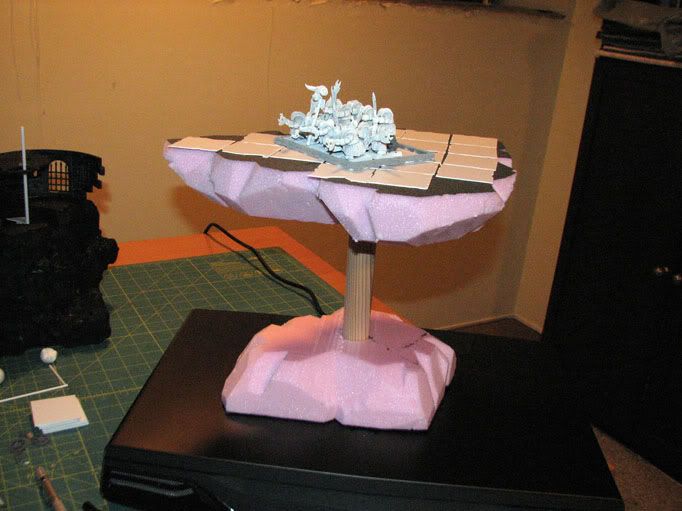
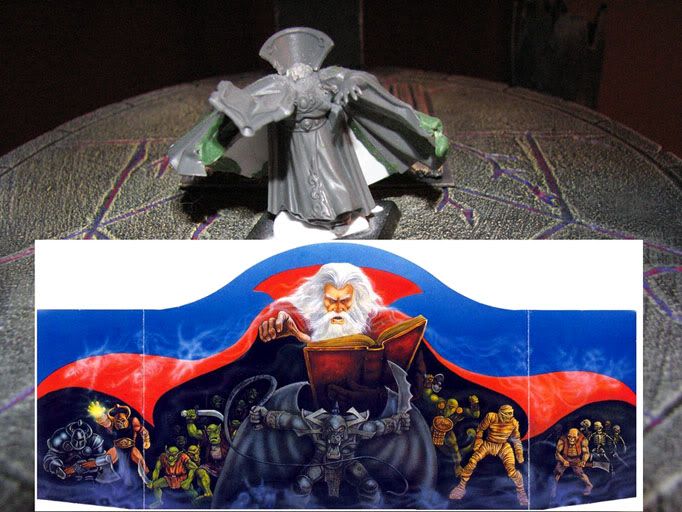
Talisman - Mice & Mystics variant (incomplete)

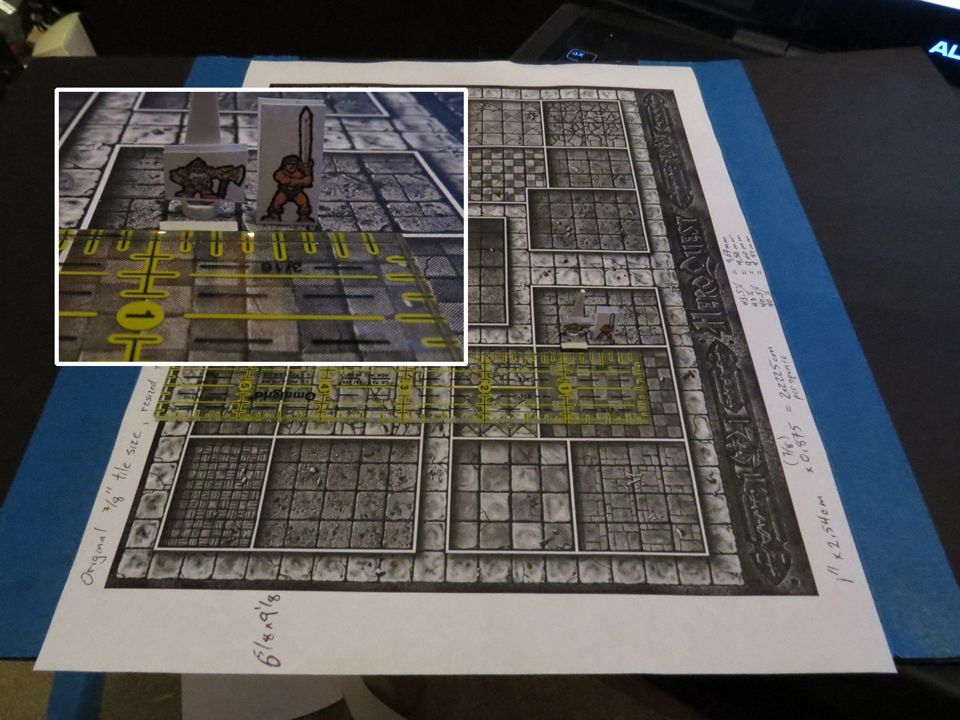
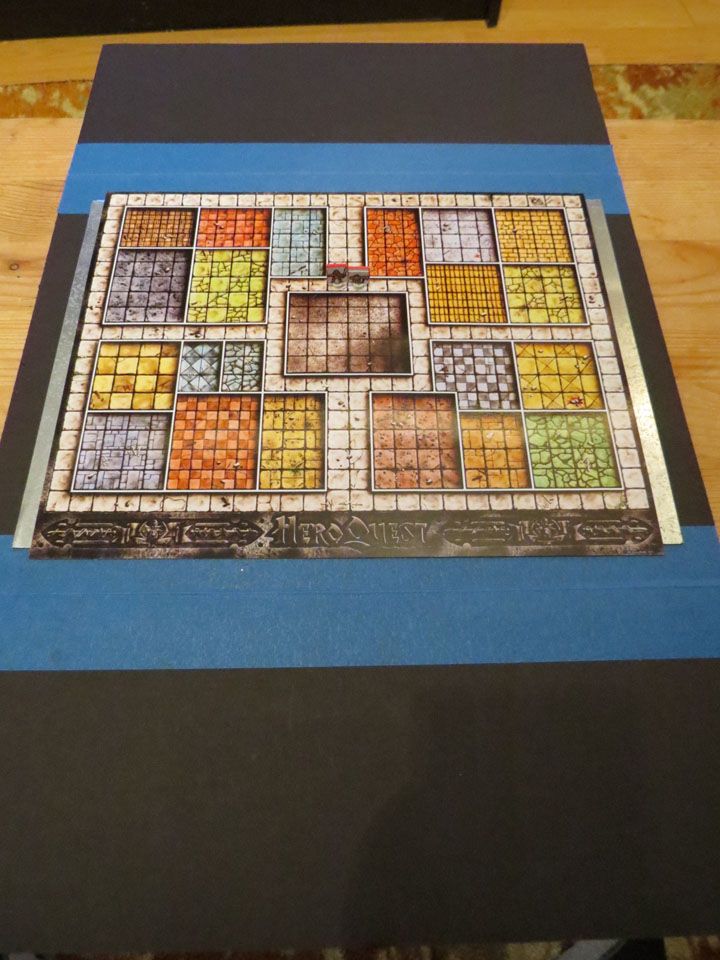
Our eldest is a big M&M fan, and the old edition Talisman is probably a close 2nd.  She has been wanting an epic version of Talisman, but with M&M characters, etc.  Of course this would never exist in real life, but we can do what ever we want at home ;)  The premise is that the Great Owl has stolen the Mystic Feather, which must be retrieved (I forget why, ha ha!!)


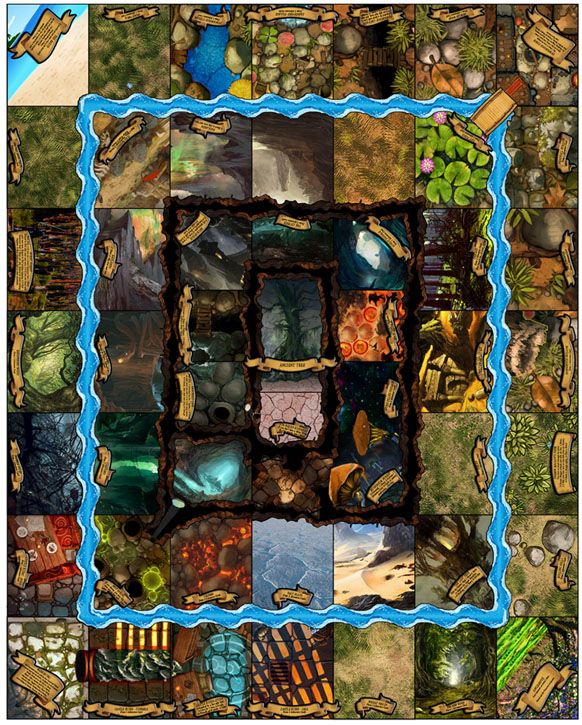
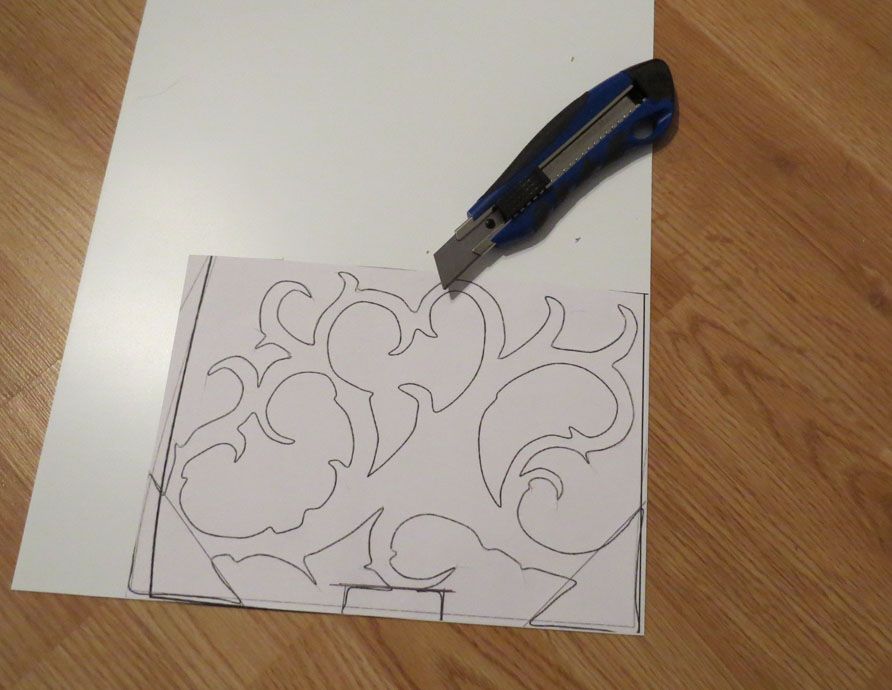
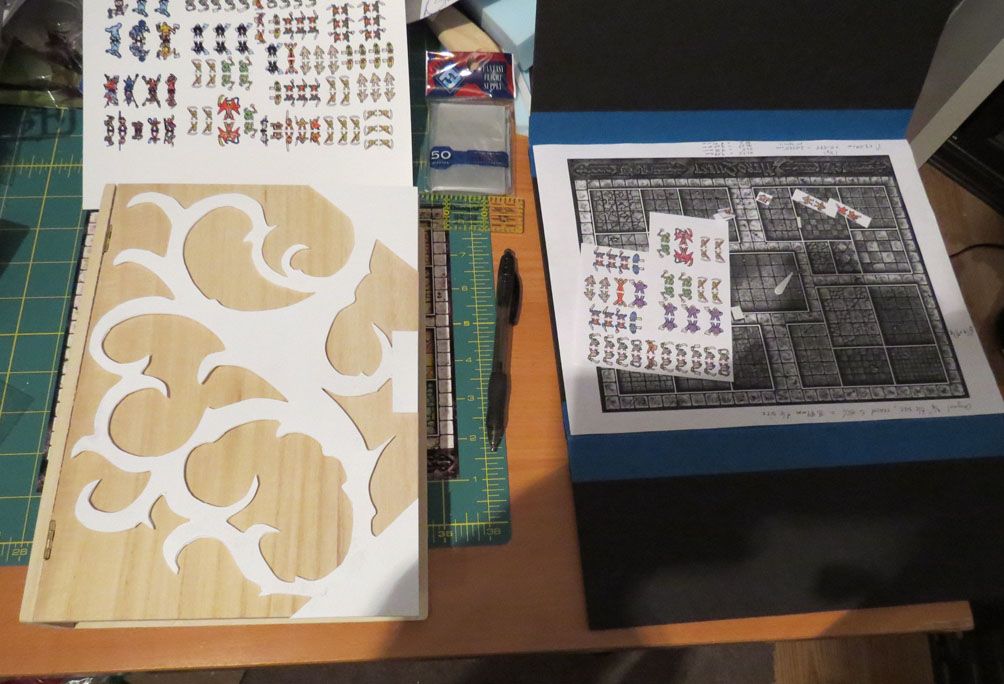
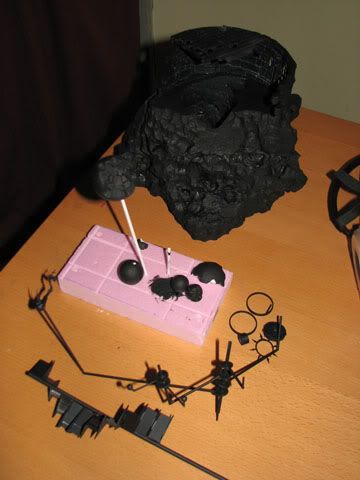
It’s obviously larger than the usual Talisman game, and there are to be many more cards in the deck as well.  Once the Great Tree is reached in the centre there’s a separate stand-alone board for the characters to make their way to the Great Owl.


PAW Patrol

I have no idea how popular this is in other countries, but from what I understand PAW Patrol is a popular Canadian export. Our youngest went through a PAW Patrol phase and wanted a game.  We have some characters from another game that we use as playing pieces. The game starts with the marked map locations containing tokens flipped over so you can’t see what they are.


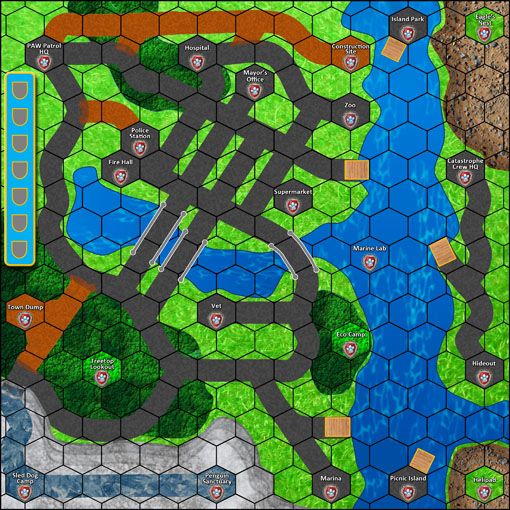
Each turn you play an action card to move the pup shown on one of the Action cards in your hand. Once you get to a token you can flip it over. There are also a persistent set of Rescue cards, indicating which tokens you have to find and where they need to be returned to.  You find the token, pick it up and get the pup carrying it to the goal in order to get a point. The Cat-astrophe Crew also move toward the nearest token marked on a Rescue card and try to take it back to their hideout. If they claim it they get a point. First to get to 4 points wins. Of course there are special action cards and rescue cards to mix things up, and each pup has a special ability that lets only them access certain parts of the map.  The whole idea here though is that the players work cooperatively to fulfill the Rescue missions.
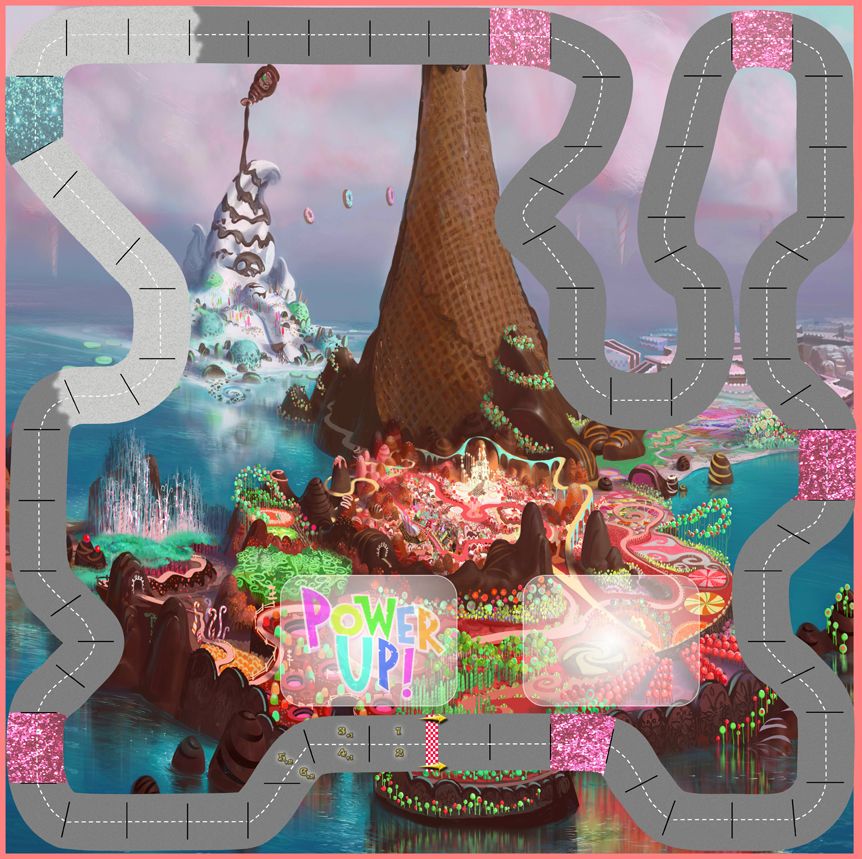
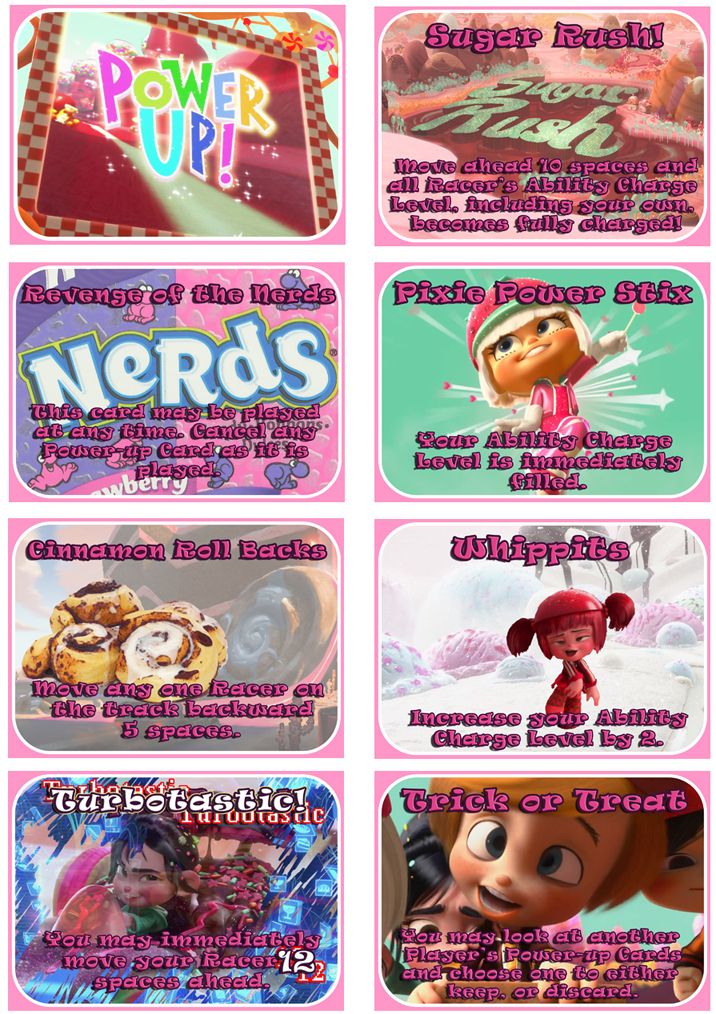


Sugar Rush

OK, so this is THE BIG ONE. Our youngest isn’t all that into games, but has been a massive Wreck-it Ralph fan for almost 4 years now. My wife and I really like it too. It’s probably my favourite kids movie, tbh.  So, when my youngest asked for a Sugar Rush racing game (you’ll have to watch the movie to get the connection) the only choice was to make one.

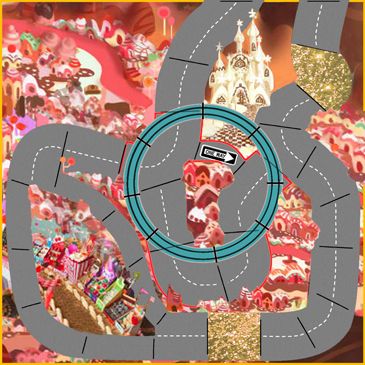
The board is 20"x20" and is mounted on a re-purposed folding game board from the thrift store.  Player pieces have to occupy a lane, and you can only pass if there is a lane free. When all four of us play it’s possible that someone in the back can get blocked. Luckily for Vanellope her Glitch ability from the movie let’s her get around such problems. A few of the racers are “Frozen Treat” racers, and usually get a bonus in the frozen section, and there’s some Powerup cards specific to them (it’s not all good, some cards specifically target them too, so it balances out).


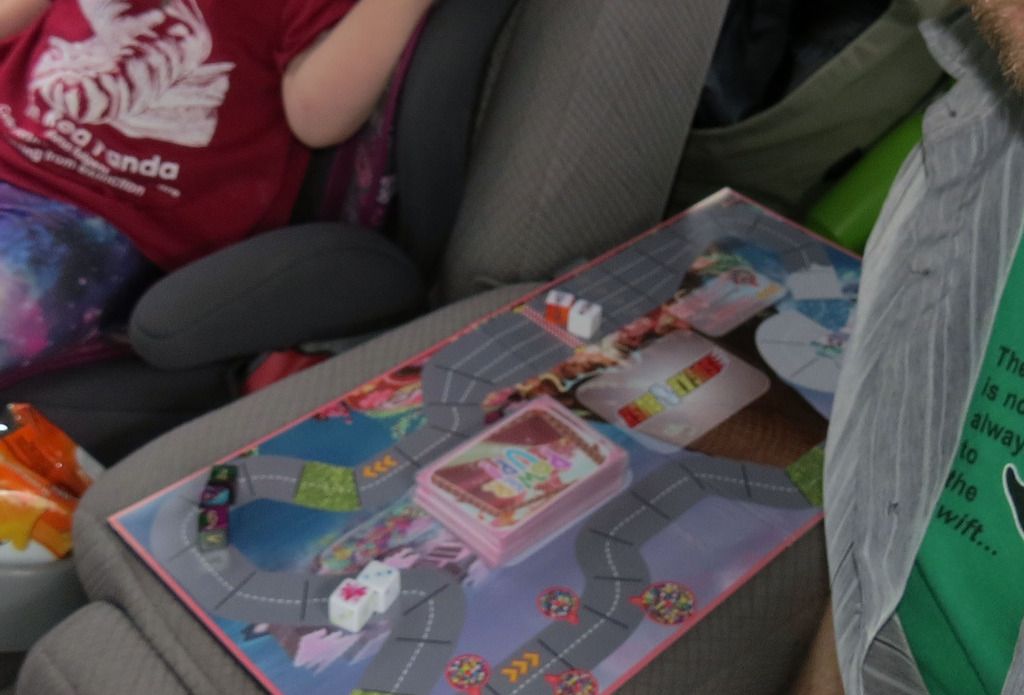
We’ve also made a half-width board for travel as well as when we want quicker games at home.  Here’s a cropped pic of us playing in the van while taking a break from the rain while on a road trip.  The “>>>” arrows are a speed boost and you roll the movement die again, while the gumball machines in Gumball Alley will make you miss a turn if you roll a 1 for movement.  We since updated the larger 20x20 board to include the speedups and Gumball Alley.


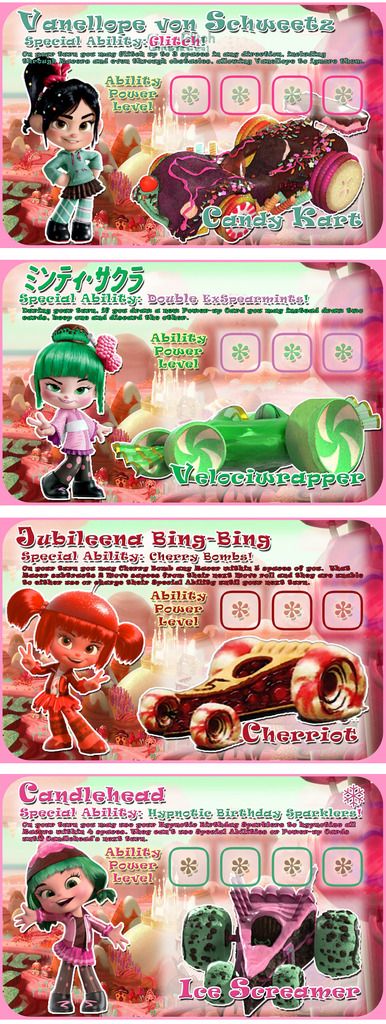
There are 16 racers in total. All of the ones from the movie, as well as a few others, such Sour Bill (who was not a racer in the movie), Vanellope (pre-Turbo era), and both Minty Zaki and Minty Sakura (unique to the Japanese version, I believe).  Each racer has a unique ability that can charge up while they race.  Players roll two dice: one is now many spaces they move, the other is a Special Ability die, that will give a single or double charge to the ability meter, give no charge, or “!” will indicate something went wrong. If players roll a 1 for movement and get the ! then they spin out and miss their turn.


There’s also a huge deck of Powerups that you can gain while driving. King Candy, being who he is, with access to the game source code, and having lots of tricks up his sleeve, gets to start with a Powerup.


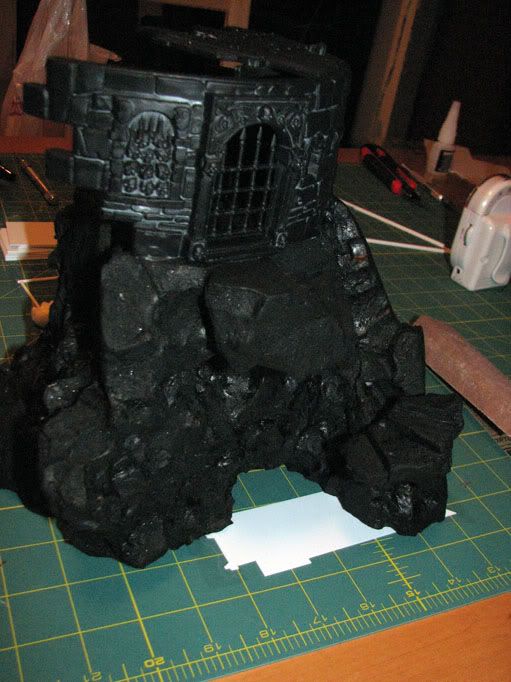
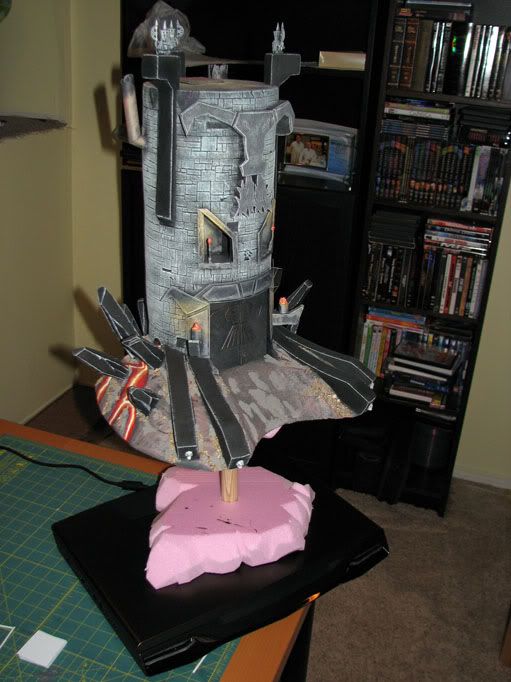
We also have several expansions. Some, like Bakersville, is an overlay for the 20x20 game board, and has it’s own unique rules. There’s a train that moves randomly and can potentially block the path on a turn, there’s a shortcut, a one way, and a group of racers called the Semi-sweets based on concept art characters, who are really sucky drivers and usually cause problems for the real racers as they try to make it through town.  The other expansions (raceway expansions as well as unique Powerup cards) are: Boo Bratley’s Castle, The Cakeway, Ice Cream Mountain, and Cybug Attack.


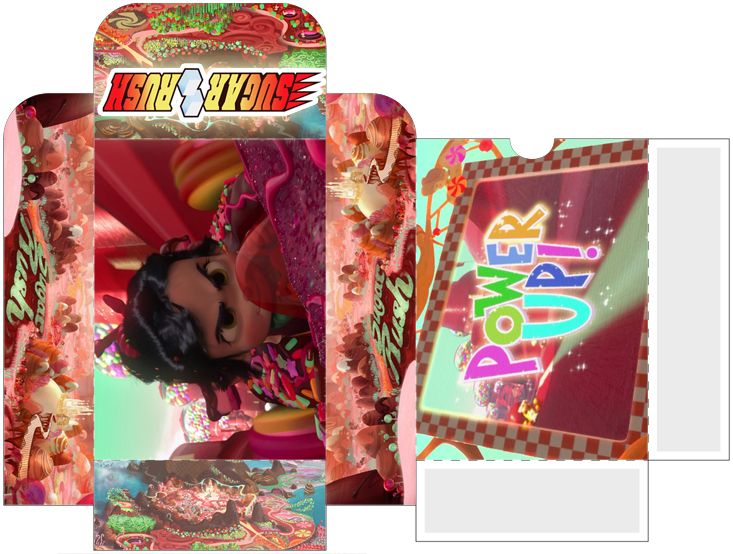
Even went to far as to make up tuck boxes for the cards :wink:


For playing pieces we just have 16 blank dice in different colours that we printed 8-bit stylized renderings of the characters onto.

So, now you have some idea what I’ve been doing with my time when I haven’t been on CDO ;)  :hat off

~N

Abecedar:

Your a good dad!

This message was automatically appended because it was too short.

TheHoodedMan:

Not only a good dad, this looks splendid! I love homemade board games adjustments, a real rewarding activity :cheers:cheers

Admiral:

Your children are lucky. Very lucky. Great job!

Methink we’ve got a serious contender here for the current Artisan’s Contest. We’ll have to view the premature publishing of your Chaos Dwarf Quest material as a handicap unto us others. :wink:

Bassman:

Wow, your girls are very lucky!

It’s fantastic to have something to play and use imagination instead of just watching toons and videos.

Me and my wife like to read stories, play and draw but this takes to the next level!

I wonder if some day I’ll do something similar for my kiddo…

Nicodemus:

MiniQuest - 7mm scale HeroQuest

I’m not entirely sure what started this insanity, but it’s well underway in our house now…

It’s going to be small enough to travel with, and everything will be magnetized using 1/8" rare earth magnets and a plate of sheet metal below the board.


… A little tracing in Power Point, exporting as a vector drawing into Photoshop and re-adjusting the angle so it’s straight-on… then a little printing, adhesive spray action and some cutting…


The plan is for the game to pack up into two parts: The game board will have two folding sides that open up to reveal the board in the middle, while the folding sides will be used to keep Hero cards, items, and the Treasure card deck during game play. The other part is the Artifact book, which will have a sheet of steel inside to house all of the doors, furniture, miniatures, magnetized tiles, as well as mini-sized cards, and mini-sized Quest booklets. It will also function as Zargon/Morcar’s game screen by having detailed game and Monster notes printed on the inside.  I’m also toying with the idea of a mini dice tower that will fit into the side of the board so that the dice are contained. With the board being so small there’s no chance of maintaining the house rule that only dice that are rolled on the board count x.x :stuck_out_tongue:


I’m using paper stand-ups as the models as there’s no way I’d consider custom sculpting so many models with my poor abilities… but I am planning to make the 3D furniture :hat off  The nice thing about the 7mm scale (measured from the bottom of the paper Barbarian’s feet to eye level) is that a single 8½"x11" sheet fits every HQ model, including extras from Kellar’s Keep, Return of the Witch Lord, Wizards of Morcar, Against the Ogre Horde, and the Barbarian and Elf Quest packs. I also had enough space to print out 4 sets of Heroes, extra Men-at-Arms, as well as an extra stone Gargoyle, 4 stone Chaos Warriors, a zombie Wizard (Wardoz), Sir Ragnar, an Orc with an extra large notched blade, and a few others.

The whole game board will be less than a sheet of 8½"x11" sheet of paper. Each square is 40% the size of the original 7/8" wide square, bringing it to just under 9mm per square. I figure with this scale I’m going going to be quite as crowded as the full-sized set usually is :cheers


Now I just have to sit tight and wait for my special order of mini card sleeves from Fantasy Flight Games, 250 1/8" magnets, and some black book binding tape, and a whole lot of patience once my fat fingers get started trying to piece each figure together!!!

~N

Dînadan:

For minis have you considered looking into Warmaster (and similar) minis? They’re slightly bigger at 10mm, but should do the job and some manufacturers sell them as singles rather than strips, so all you’d need to do is buy a base or two and you’d have enough for the monsters (e.g. Kalistra (Kallistra Ltd - Quality Wargaming Products - Miniatures - Terrain) do 32 skeletons for £6). Heroes would be more tricky as you’d have to buy the ‘command’ packs and would end with an excess, although you could probably get the basic dwarfwarrior/elfarcher/humanbarbarian/humanwizard out of Copplestone Castings’ ‘Heroes and Halflings’ set (TM10 - 10mm Heroes and Halflings - Copplestone Castings)

Of course this is all moot if bumping the size up to 10mm means they won’t fit. Plus you might not be able to find suitable minis for everything anyway.

cornixt:

That’s insane and adorable at the same time. I’m in the middle of making a tiny magnetized Blood Bowl set.

You should add some tweasers to move the pieces about.

For dice, a lot of people use a clear jar that you just shake up with the dice held inside and let settle. You’d want to mark the dice in some way so you’d know which to ignore if you only need to roll one or two.

Nicodemus:

NanoQuest. It’s a thing. Get over it.


Back to MiniQuest

Here are all of the tiles (sans Wizards of Morcar tiles and the various doorways) laid out on the backside of a magnetic sheet:


I’ve since cut them all out and coloured in the exposed white edges with various colour Sharpies to match the tile colours.  I also put a metal sheet in the bottom of the wooden Artifact book box and the tile pieces stick in there nicely.

Before I use my expensive $40 roll of linen book binding tape I’m experimenting with various ways of doing the folding edges using cheap painter’s tape.  I tape the inside of the joint down flat so both pieces are touching, then fold it over and put a piece of tape over the wider exposed edges of both pieces. It sticks well enough that when it folds out everything sits flat and has clean edges.


The top and bottom of the folding board is still going to be used for holding cards, dice and character sheets during gameplay. I still have plans for an appropriately-sized mini dice tower as well, something that can go away inside the Artifact book between games probably.

This is the test with the actual size of the MiniQuest board I’m going with. The metal plate is larger than the board by a little on the sides, which I’m going to keep. I’m going to add a border to the game board so that it covers the metal plate completely and also gives more of a border at the top and bottom as well. This will give me more room to work when I use the book binding tape again to go around the entire border of the board, ensuring that the binding tape can then be the border without encroaching on the board itself.


And here’s the test with the Elf and Dwarf test pieces:


The bases have 1/8" disc neodymium magnets. They’re housed in a piece of plastic rod that also has a 1/8" internal diameter and is just 1-2 mm taller than the disc. This gives me a bit of extra plastic surface to attach the central plastic support on the minis. Because they’re so small I can’t cut each model along the border of the figure. Instead I cut out the rectangle and then use a rectangular piece of plastic that I glue the photo paper onto and then glue the central plastic support onto the base. The plastic surrounding the magnet also ensures that the magnets don’t actually touch if models start getting crowded, as this causes chaos at these scales and everything bounces around wildly as they click together.

Lastly, I coloured the border red (HQ HeroQuest plastic colour), and have Sharpies for bordering all of the other miniatures in their respective HQ colours - Red: Heroes; Green: Orcs, Goblins, Fimir; Yellow: Skeletons, Zombies, Mummies; Grey: Gargoyle, Chaos Warriors, Chaos Warlock; Dark Purple: Wizards of Morcar; Light Blue: Barbarian and Elf Quest pack; Black: Ogres.

I just primed the wood and plastic for the Artifact book tonight and will be painting soon :wink:

~N

P.S. In case folks are wondering when I’m going to get back to the Chaos Dwarf Mining Complex… this is actually all connected, in a strange way with the mining complex and the Warhammer Quest tiles as well. I’ll explain it in my blog at some point x.x

Admiral:

Smart, and well executed! You’ve got a daft hand for cutting out plasticard. Excessive practice giving excessively fine results? Curious connection, there. Looking forward to see the mine. :slight_smile:

Skink:

Holy. Cow. That´s gotta be the coolest friggin thing I´ve seen in a loooong while.

Nicodemus:

I showed the preview of the Artifact book back on June 5th, here’s an example of the Artifact card back from the N.American version of HeroQuest.


I had some orange glass beads to test with, which look about right, but I’d really like to get my hands on some purple ones.


The bottom of the box has a piece of sheet metal fitted into it and will have a second platform for additional storage.


I got the airbrush out after about 3 years in storage. Made painting the detail piece on the front a treat!  Nearly there. Just need to break out the hole punch to make some plastic rivet heads for finishing off the detail on the front and it’ll be good to go!


So a problem with MiniQuest I identified early on is making the figures themselves.


I feel like I’ve got a solution I’m happy with, gluing neodymium magnets into a piece of plastic and mounting the figure images onto the magnetized plastic disc… the big problem is cutting the plastic rod straight. Here are my Elf and Dwarf test pieces and how many rings I had to cut to get two I was OK using:


Yes, too many wasted pieces.  My solution was to make a jig so that I’d always be cutting in the same place and at the same angle. Here you can see the tube at the top with the 1/8" internal diameter for the magnets (magnets themselves are 1/8" in diameter and 1/16" high). I used another slightly larger rod with an internal diameter that just fits the tube to be cut so that it is held in place and I can just slide it into position. I added some additional bracing to hold everything in place. I use dichloromethane to weld the plastic together as I’ve got a wicket nasty cyanoacrylate hypersensitivity and the GW plastic glue is worthless - crumbling and breaking after a year or so.


Here is the finished jig with space for a razor blade along with my first test cuts.  I measured 1/16" from the front where the rod sticks out and attached the backing piece so that it only sticks out the length I need. Oh yes, nice and uniform!


Time to start cutting.

~N