Nebuchandnezzar:
Can anyone give me some advice on how to create a effective, dull, muddy base that has pools of water and brush ends as reeds???
Nebuchandnezzar:
Can anyone give me some advice on how to create a effective, dull, muddy base that has pools of water and brush ends as reeds???
Baggronor:
I did swamp bases for my VCs.
Basically what I did was:
File the texture off the bases first, so they are smooth and flat.
Cut the model’s feet off.
Glue the model to the base.
Add green stuff lumps to the base (to which brush reeds can be inserted before it dries) to give the appearance of uneven ground that is poking through above the water.
Paint the earth brown, the water brownish green, paint some ripples around the minis’ feet and then gloss varnish. Job done. I went for a goblin green/khemri brown mix with a drop of black mixed in for the water, keep it more green than brown.
Its especially cool with VCs as you can have skellies and zombies emerging from the swampy water and mud :cheers
Nebuchandnezzar:
thanks thats really helpful , but what is the ratio you used with the goblin green/khemri brown???
Baggronor:
thanks thats really helpful , but what is the ratio you used with the goblin green/khemri brown???I would guess it was something like 2:10 black to green, then mix that with the brown gradually (so the shallow areas are almost pure brown, the deep areas almost pure green). I don't really work to ratios, I just do it by eye.
Abecedar:
Have seen some things on pools and swamps etc around the place. try looking in lizardmen or lustria sites.
inkpwn:
Save time, buy them from wyrd miniatures! 
Thorne:
Making Swamp Bases
Requirements
Milliput
Wood bark or Chunks of Roots
Two part Resin (liquid)
Dirt and whatever comes with it, aka nature (Taken from outside. Stick it on a tray and place it in the oven at around 200 degrees Fahrenheit for about 2 mins to dry it out.)
Plasticard (0.2 mm works)
Thinned PVA glue or Wood Glue (I use thinned wood glue, its stronger and bonds better.)
Water Effects
Step One
Plan your base!!!
Step Two
Cut out a section of the base top.
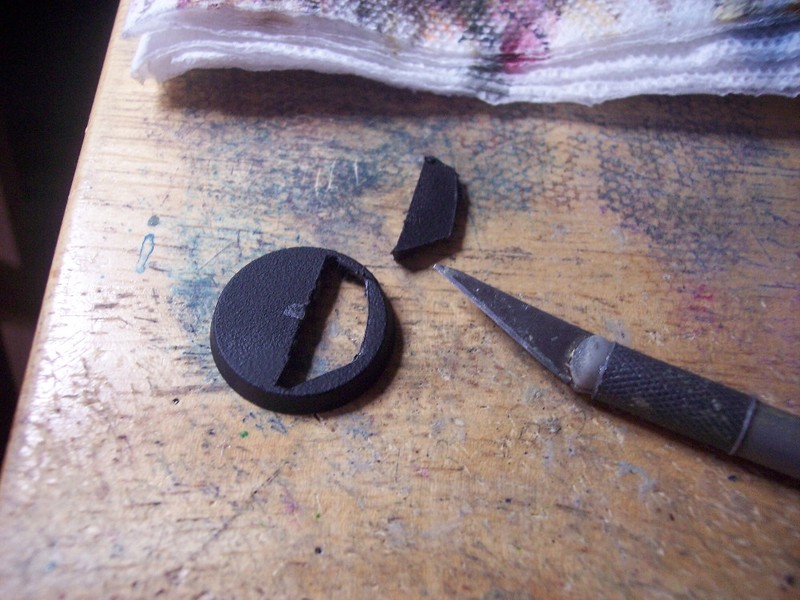
Step Three
Clean around the edges. BE CAREFUL! If you press too hard you will break the rim.
Step Four
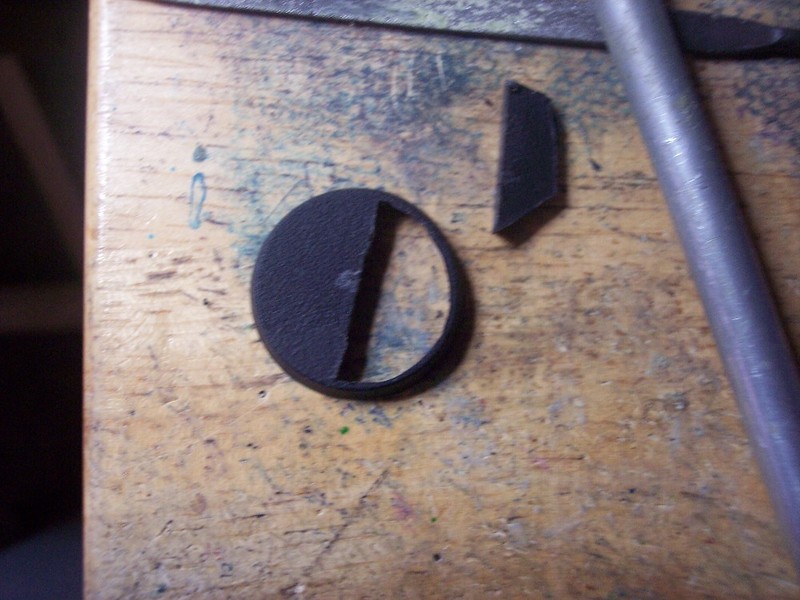
Superglue the bottom edges of your base and place it on plasticard. Let it dry. Once dry, cut out around the base (It doesn’t need to be perfect yet).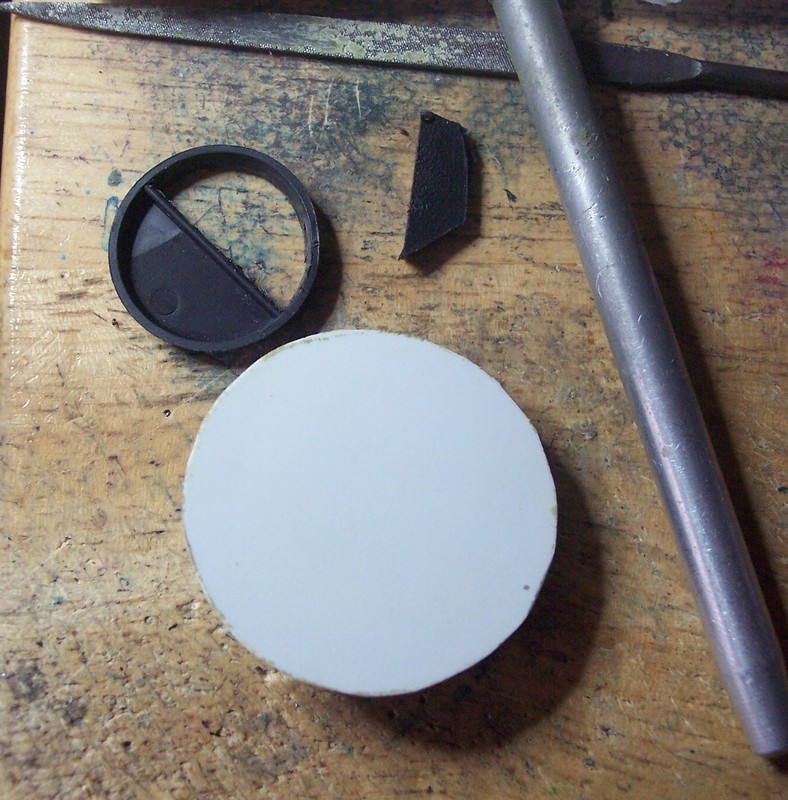
Step Five
Apply milliput in whatever shape you want, making sure your “reservoir” still exists (this is what will hold your “water”). Bases look best when they don’t fall over the edges, keep the edges of the base lined up with the edge of the rim as seen in the examples (it gets painted the same colour as the rim).
NOTE: A good thing to do while putting on your milliput is to check and see how your model fits on the base. If doing squads it is best to have a specific model lined up with its base.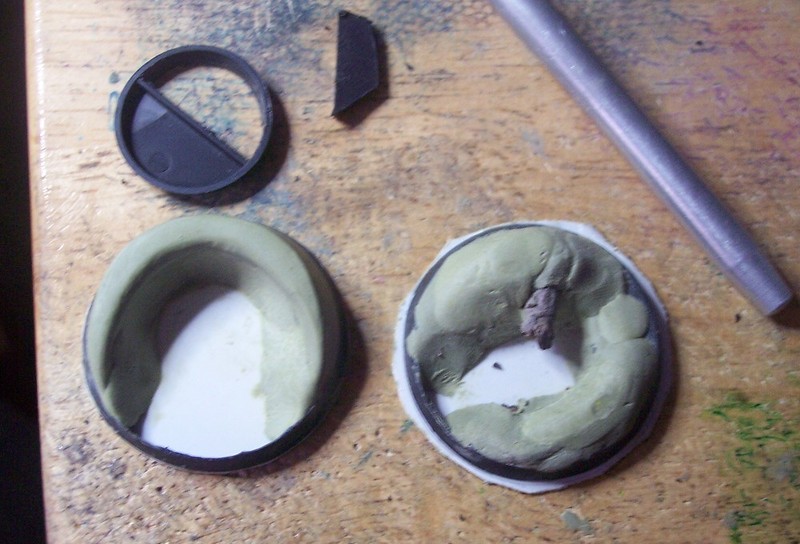
Step Six
Now after the milliput and super glue has dried, your base has more strength. So you can begin to take a knife and/or file to shave away the extra plasticard from the bottom of the base with little worry of caving in the edges.
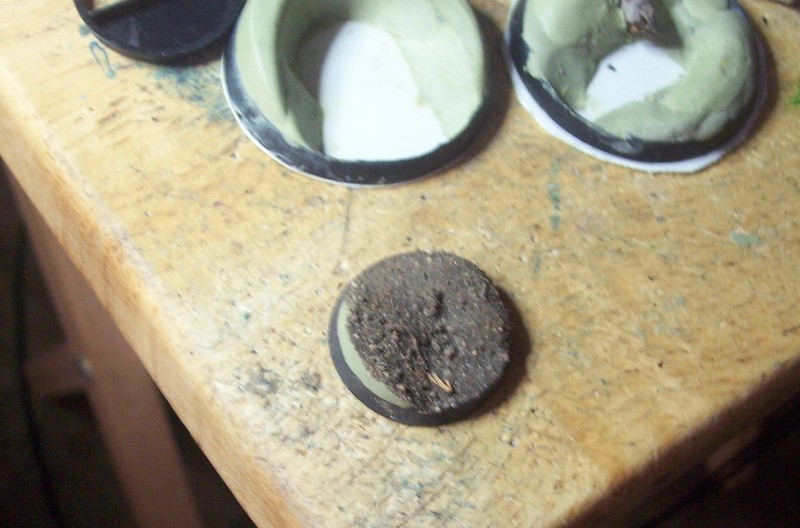
Step Seven
Apply your dirt mix (using your glue) so that everything is covered, even the reservoir. (Dirt exists underwater after all.)
You can also apply some random things that look swamp like (tall grass, cat tails etc) to the area where the resin will be applied.
Let it dry
Step Eight
Paint your bases. (Use lots of colour: blue, red, green, brown, orange, yellow, whatever.) Use the same idea as Step 6 of the Plasticard Bases with the big wet blend mess. Try to use colder or greener colours where the water would go.
Also highlight your base with a drybrush of a brighter colour. I usually mix a yellowy colour and a beige.
NOTE:
Before doing this, test with a piece of sprue on a spare base, I cannot guarantee whether or not your resin will melt the plastic or not. The chemical reaction in resin generates heat. (As it has not damaged my base, plasticard or anything else, I feel comfortable using it.) However, your brand of resin MAY BE DIFFERENT.
If you want your model standing IN the water, complete the entire model and base with paint, then apply the resin. When applying the resin, be careful not to touch the model. It will look wet and a bit thicker looking on him and might look weird. You can use gloss varnish to “wet” him.
Step Nine
MAKE SURE you have about 10 bases done before doing this!
You will need: two part resin, a cup to measure the mixes (preferably shorter as resin is thick, so you don’t want glass ketchup bottle syndrome), a cup to mix the resin (I used the bottom of a pop bottle with the 5 bumps). You need some water, cup, paint, and a crappy brush.
Mix the resin as it describes (mine is a 1:1 ratio mix) .
Mix some colours you want the water to be, but not too much. Dip your brush in the colours and mix it in with the resin. You MUST use the resin as soon as possible after mixing. Don’t let it sit too long.
Take your brush and apply the resin in dabs, let it settle then apply more. Repeat until its deep enough for you.
After doing all that, set them aside to dry and try and clean your brush up.
(My base wasn’t painted first and it created a few problems, but i had mixed resin for another base and had too much left to just throw away!)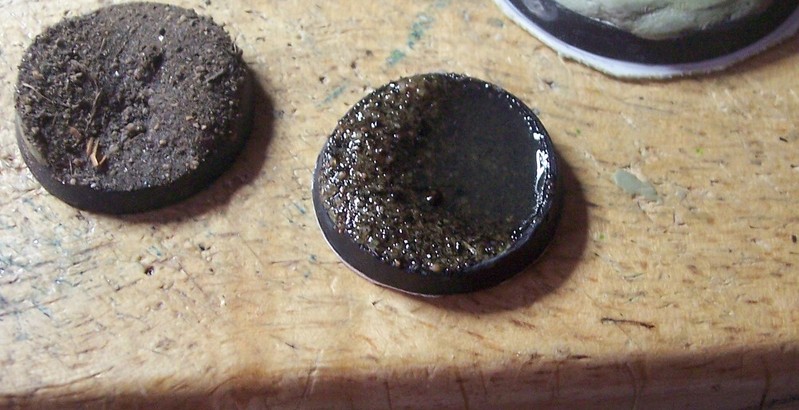
Step Ten
Apply Water Effects to give the water a more natural look. If you want calm water then just leave it.
Step Eleven
If you had the resin “overflow” onto your original dirt or flock, simply let it dry and apply another layer of dirt or flock over top: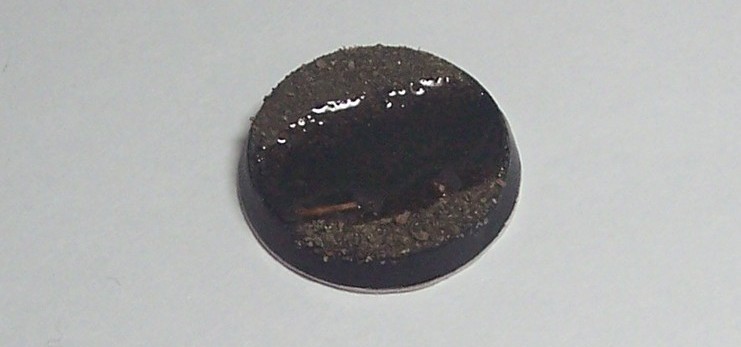
You are free to do what you like after that. Applying a couple thin washes over the dirt will help tone down the realism and blend it into your model more, just be careful not to get it on the resin or it will look weird.
Nebuchandnezzar:
thanks for all the tips, will be testing each one out to see which one I can model the easiest and quickest :cheers
p.s. what colours did you use for the dirt on those bases
Thorne:
p.s. what colours did you use for the dirt on those basesGarden soil from the garden oddly enough, Just make sure you dry it out in the oven for a while. A good measure is if you havent seen rain for a few days then you should be fine, If you have you will need to dry it out for a while in the oven 200 degrees for about 2-10 mins.
Nebuchandnezzar
Nebuchandnezzar:
thanks, i never thought of doing that  and it looks really good too, now all i need to do is buy some water effects and thats me on my way to starting my CD and WoC tamurkahn army. Watch out for the blog to come…
:cheers
Naagruz:
Working through some swamp base ideas myself. Great walkthrough Thorne!
Being lucky enough to live near a fair amount of riparian wilderness, I’ve made a few observations and decided that pulled GS makes a damn fine water border weed.
[attachment=2689]
Previously, I have been building the base up with putty & glossing over the flat “water” part with FFP. Not a bad way to convey water without much hassle.