The following introduction have been copied from Mantic’s Blog.
What is Kings of War: Vanguard?
With the new Vanguard two-player starter set now in stores and available to order from the Mantic website, we thought this was a great opportunity to revisit the game and explain exactly why it’s such a great narrative and competitive experience.
Over the next week we are going to be delving deep into the world of Vanguard. We’ll be covering how to build your warband, power dice, special abilities, the different factions, campaigns, advanced spells… the list goes on. Basically, if you’ve got even the slightest bit of interest in Vanguard and Kings of War, make sure you keep coming back to the blog every day to get the latest info.
Of course, you can always jump straight into the free rules, which are available here. But if you want to learn more, then make sure you read on and keep coming back for an in-depth guide.
WHAT IS VANGUARD?
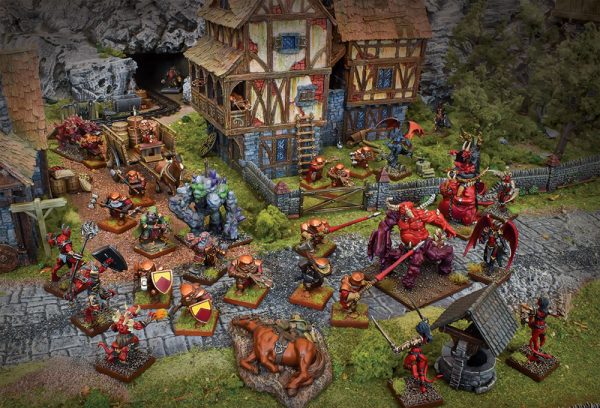
Well, that’s a good question, imaginary blog reader. Vanguard is a fantasy skirmish game that ties into our hugely popular Kings of War mass battle game. It’s set in the world of Pannithor – a fantasy realm that’s full of powerful magic, towering monsters, warring factions, brave heroes and wicked villains.
Of course, we know there are a number of skirmish games out there, so with Vanguard we tried to do something a little different. Rather than being set in a ruined city or specific location, Vanguard battles can take place anywhere across Pannithor. One minute your warband can be duking it out on the plains of the Mammoth Steppe, the next they’re in the shadows of the Forest of Galahir and then they’re heading to the Twilight Glades.
The reason for this is that Vanguard is focused around the elite troops sent ahead of the main army. These are the handpicked fighters that have been carefully selected to disrupt the enemy’s supply lines, light the warning beacons to show the way or even capture a particularly powerful giant that can be used in the war ahead. Each of these action-packed missions is told through the 12 scenarios included in the rulebook. Even better, each of these scenarios has its own hook to tie into larger Kings of War games… something we’ll cover in a future blog.
These are the brutal battles before the armies clash. The desperate struggles to gain the upper hand. If you can win these ruthless skirmishes, then victory will be yours. Ronnie compares them to black ops squads sent secretly behind enemy lines to try and complete the mission as quickly and effectively as possible.
Vanguard can be played in one-off games where you select your chosen units or you can play linked games in a campaign. If you fancy watching how the game plays, you can see Ash Barker playing through one of the Ice & Iron scenarios.
WHAT’S A WARBAND?
Oh, you’re back again Captain Questions. So, we realise that ‘skirmish’ is a term that can mean a wide range of game sizes. You’ve got something like Deadzone, which typically uses around 10 miniatures and is classed as a skirmish game. However, there are also games like Firefight that use about 30-50 miniatures but are also seen as skirmish games.
In Vanguard a 200 points warband will typically consist of around 9-12 miniatures, and is the standard size for games. You’ll have your leader, grunts (the low level troops), warriors and then a mix of support units, spellcasters and a large model or two. Once you’ve selected your troops, you can also give them different equipment to help boost their abilities.
This means it’s extremely easy to get a warband painted up in a short space of time – particularly when compared to the amount of time required to get a Kings of War army ready for battle. This was part of the reason for us making Vanguard in the first place. Since Kings of War has launched, the background has grown massively and so has the number of miniatures. We know that a lot of people are interested in playing fantasy games but the time required to paint an entire Kings of War can be off putting. Whereas the great thing about Vanguard is it’s super easy to get your warband up and running in next to no time.
However, if you’re planning to play in a campaign then you’ll have 400 points to create your ‘company’ of fighters. Then during games, you can draw from your larger company to choose the units and equipment you want to send into combat. By performing well, fighters will learn new abilities and you can even assign them special roles that will shape how they develop across the course of a campaign.
We’ll be covering campaigns in greater detail over the course of the next week.
CAN I USE MY KINGS OF WAR MINIATURES?
Yes, you most definitely can. Oh, you want a more thorough answer than that? Ok! When we were designing Vanguard we always knew that we wanted it to complement our existing Kings of War range and also bring entirely new units into the game. This is the sister game to Kings of War. Not only does it share the same miniature range, but it also has scenarios that directly tie into your larger games of KoW.
Since Vanguard originally launched in 2018, we’ve now introduced warband lists for every faction in Kings of War – even the ones in Uncharted Empires! Some are starter warband lists, which are a selection of units you’re likely to have from your Kings of War army, e.g. a spare hero or two. Then since launch, we’ve also got full warband releases for the following factions:
- Basileans
- Nightstalkers
- Northern Alliance
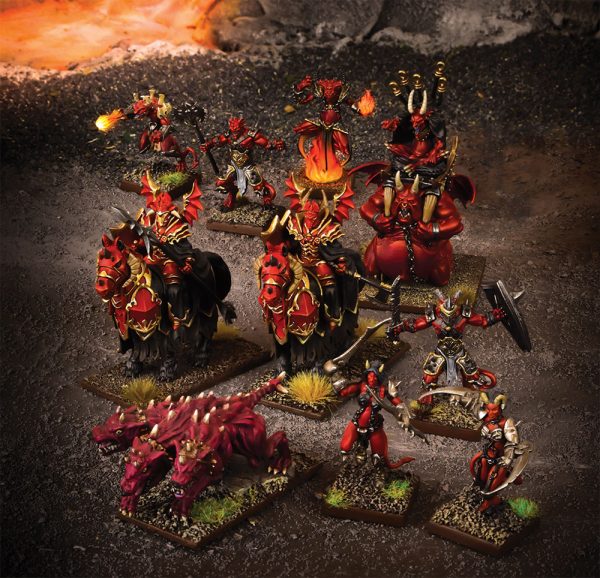
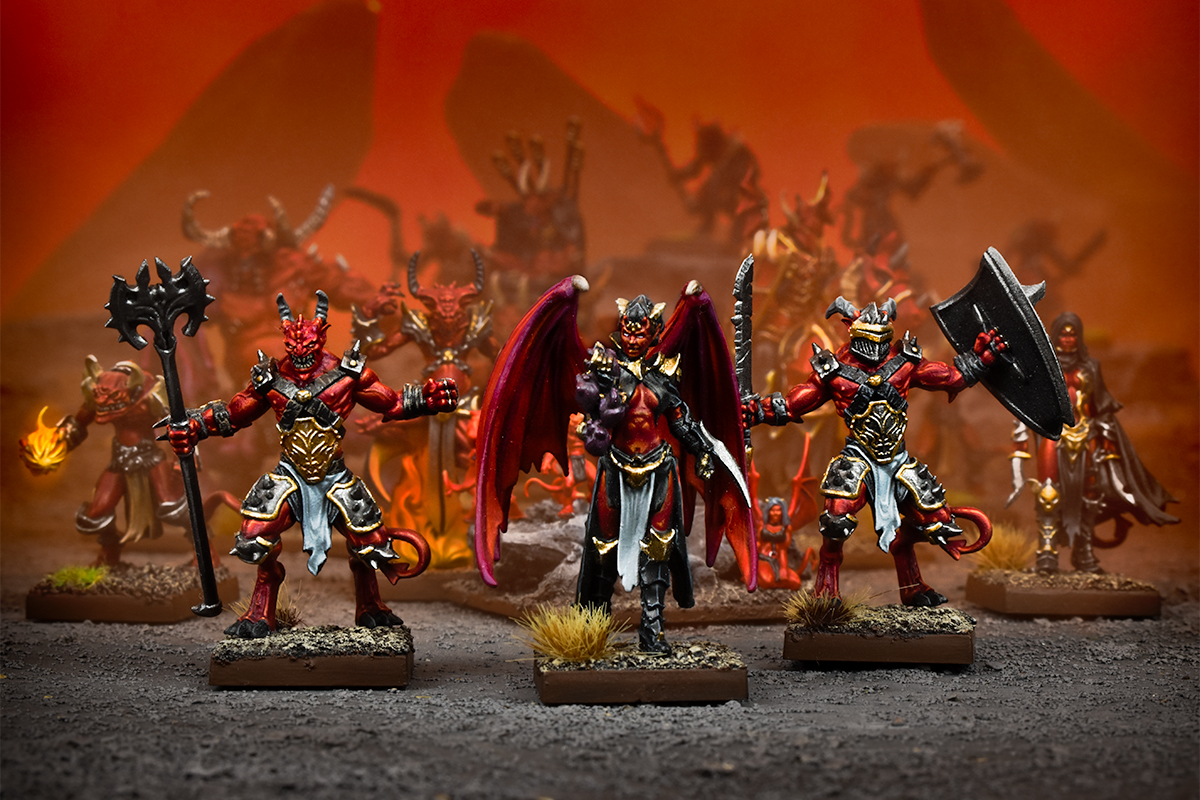
- Forces of the Abyss
- Dwarfs
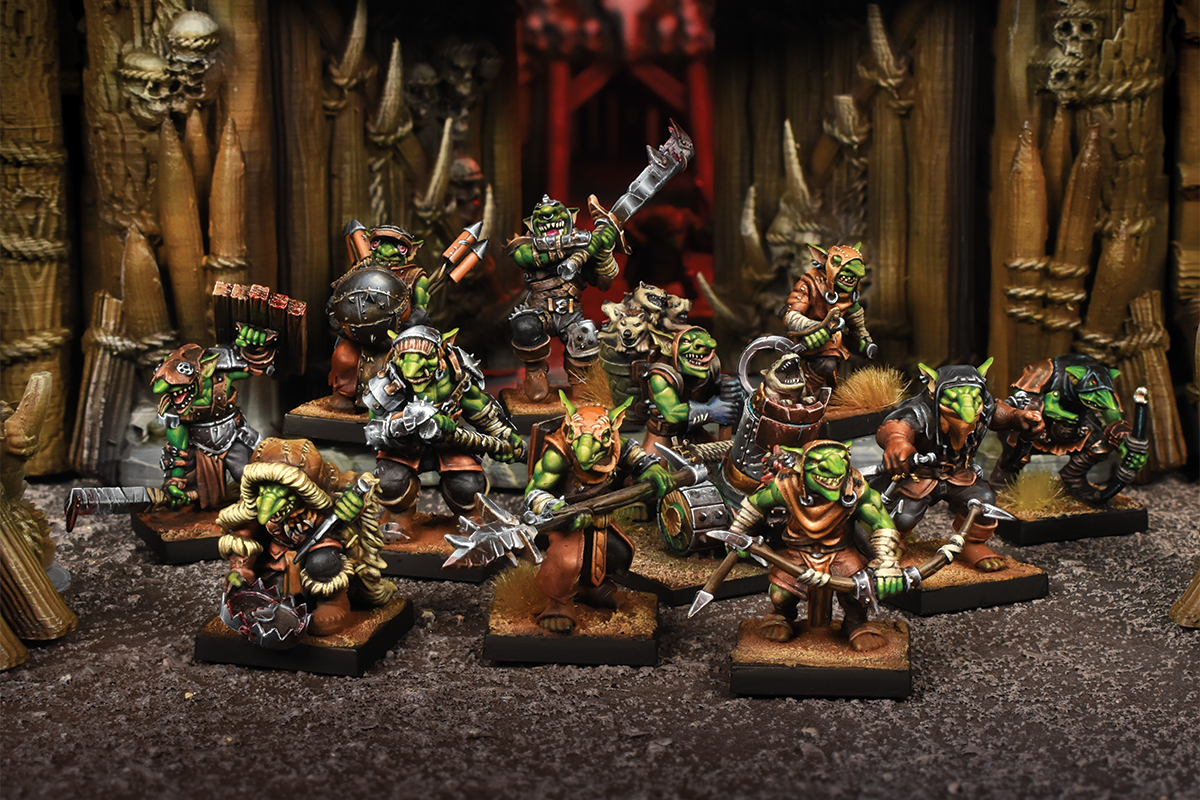
- Goblins
- Forces of Nature
- Abyssal Dwarfs
- Trident Realm
- Undead

When we do a full warband release – like the launch releases of Nightstalkers, Basileans, Forces of the Abyss and Northern Alliance – we’ll introduce more model options to fill out that initial starter list. These will be supplied via warband cards in the faction sets and faction boosters. You can download ALL the warband lists from the Mantic websites, and we’ve even included the cards, so you can print them out at home. Download the warband lists here.
There’s also a big cross over between Kings of War and Vanguard in terms of miniatures. Since Vanguard came out, it’s helped us introduce a load of cool new miniatures into Kings of War too, like the Warlock above or the goblin Banggit. Even better, we’ve extended the amount of Vanguard miniatures you can now buy separately if you just want them for your KoW army. Check those out here.
How to Build a Warband
Another important element is learning how to create your gang, so in this blog we’re going to discuss the ins and outs of creating a Vanguard warband. We wanted to make sure the process for creating your elite gang was as straight forward as possible, so there are only a few things to remember. You can also use the Easy Army website to make it even easier to compose your chosen group of fighters! The website contains all the factions and equipment – plus it’ll tell you if you’ve composed an illegal warband.
Firstly, let’s look at the different types of models:
COMMAND – well, you’re going to need someone to do all the shouting. Command units come in all shapes and sizes, from the massive Snow Troll Prime in the Northern Alliance list to the humble Stinggit in the goblin faction
GRUNT – these are the lowest of the low. Even in an elite warband, you need a little bit of chaff to throw at the enemy. However, when they’re not dying horribly, grunts are useful for claiming objectives. You can also give them one piece of common equipment, should you wish
WARRIORS – now we’re talking. Warriors are far more capable when it comes to getting stuck in and can choose two pieces of equipment from the full range of items. Plus, they’re a little harder to kill thanks to the Down and Out rule
SUPPORT – this is the catch-all name for a range of specialists that can add some extra oomph to your warband. Although some will be used to back-up your core troops, others (like the Forces of Abyss Hellequin) are ready to lead the charge when it comes to combat. Support units tend to have a special ability that can form the backbone of your squad
SPELLCASTER – as the name implies, these are your magic users. We’ll be covering magic in a future blog because Vanguard introduces some interesting new mechanics for the way magic works in Pannithor and each faction gets some unique spells! We’ll be covering that in a future blog
LARGE – Large models are the big guys in your warband. However, they don’t always just provide the muscle, because a large model can be a mix of types. This means you can have a Large Command unit (like the Snow Troll Prime), a Large Spellcaster (Forces of the Abyss Warlock) or Large Support (Ice Elemental)
Now, you can either read on to see an example warband, or take a look at the video below, in which the Weight of Fire crew take you through how to build a warband…
BUILDING YOUR WARBAND
So, now you’re up to speed on the unit types, let’s have a look at how to build a typical 200 points warband. Firstly, you must take a minimum of five Warriors and/or Grunt models and one Command model. To give you an example, we’re going to build a Forces of the Abyss list.
To start with, let’s choose the Grunts and Warriors:
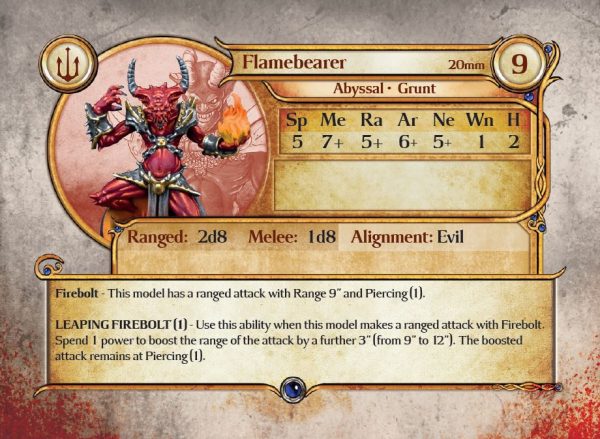
2 x Flamebearers (Grunts – 9 points each)
2 x Lower Abyssals (Grunts – 8 points each)
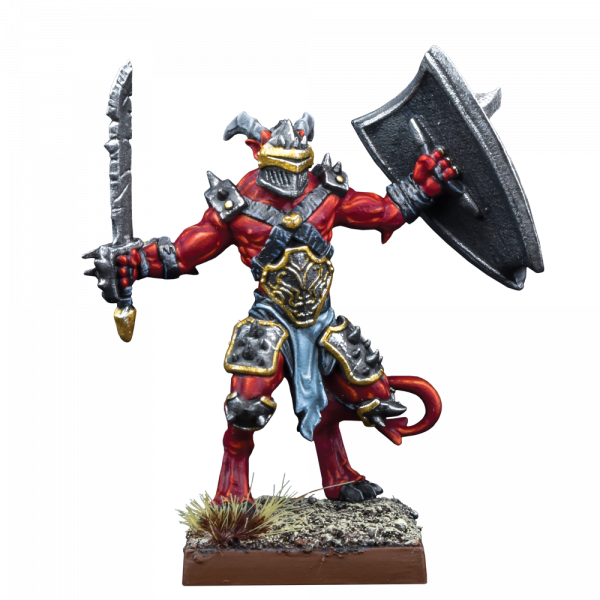
2 x Abyssal Guards (Warriors – 14 points each)

The above comes to 62 points, which means we’ve got another 138 points to spend. This is when we can start to have some fun with the other types of units. You see, for every three Warriors/Grunts in our warband, we can take up to one Command, one Support and one Spellcaster model. What’s more, for every 150 points in the warband, we can take one Large unit – although some factions have special rules that allow them to take more.
In our Forces of the Abyss warband we’ve got six Warriors/Grunts, which means we can add up to two Command models, two Support models and two Spellcaster models.
We still need a Command unit, so let’s add that to our warband.
2 x Flamebearers (Grunts – 9 points each)
2 x Lower Abyssals (Grunts – 8 points each)
2 x Abyssal Guards (Warriors – 14 points each)
1 x Seductress (Command – 45 points)
We’re now sitting on 107 points, so we’re going to have to think carefully about what’s next in the warband. Well, we can take up to two support units (because we’ve got six Warriors/Grunts, remember), so let’s add a Gargoyle and Hellequin to the list. Now our warband looks like this:
2 x Flamebearers (Grunts – 9 points each)
2 x Lower Abyssals (Grunts – 8 points each)
2 x Abyssal Guards (Warriors – 14 points each)
1 x Seductress (Command – 45 points)
1 x Gargoyle (Support – 18 points)
1 x Hellequin (Support – 29 points)


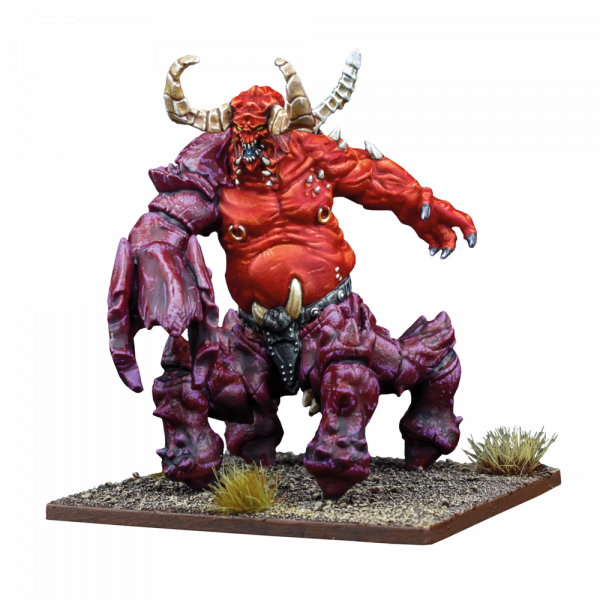
We’ve now got the maximum number of support models for our warband, but we can still add one more Command model or two Spellcasters. The Forces of the Abyss only have the one spellcaster: the Warlock. As well as being a Spellcaster, the Warlock is also a Large model – thanks to the chubby cherub carrying our tormented magic user.
This means that if we want to include a Spellcaster in our Forces of the Abyss warband, it will come at the expense of the Despoiler, because that is also a Large model. Decisions, decisions. Well, in this case, we’re going for the Crushing Strength of the Despoiler to hopefully cause our opponent some problems.
2 x Flamebearers (Grunts – 9 points each)
2 x Lower Abyssals (Grunts – 8 points each)
2 x Abyssal Guards (Warriors – 14 points each)
1 x Seductress (Command – 45 points)
1 x Gargoyle (Support – 18 points)
1 x Hellequin (Support – 29 points)
1 x Despoiler (Large – 37 points)
With the addition of the Despoiler, our total goes to 191 points, which leaves us 9 points spare. This could be spend on an extra Flamebearer or Lower Abyssal, or we can add some equipment to our warband to boost the existing units. Check out a future blog when we’ll run through the various options for giving your warband new equipment.
As you can see from the example above, you’re going to have to choose carefully when it comes to creating your warband because you’re not going to be able to cram everything in. Of course, when making your Company for a Campaign you’ll have 400 points to play around with, but you’ll still be forced to choose a 200 points list when heading into combat.
What are Power Dice?
In this blog we’re exploring one of key game mechanics: Power Dice. During the course of the brutal skirmishes between the small warbands, commanders will need to change their tactics on the fly. Battle strategies tend to get disrupted when a Despoiler is charging straight towards you! And so, to give players the option of adapting their best laid plans, we created the Power Dice.
These special dice come in three flavours (not literally, so please don’t eat them): red, white and blue. The red dice are the basic ones, giving you a maximum of two points of power to spend in a round, white also have a maximum of two points but you’ve got more chance of rolling a two and blue dice have a maximum of three points. At the start of each round you’ll automatically generate three red dice to spend during the course of that round. However, extra dice can be generated by the commanders, support and even spellcaster models in your warband, as you can see on the card below.

HOW TO SPEND ‘POWER’
Right, so you’ve rolled your Power Dice but what can you spend them on? Well, with the Power Dice we wanted to give Vanguard players the opportunity to increase their attacks, activate special abilities, use powerful Group Actions and lots more. In fact, there are eight different ways to spend your power during a turn. Take a look below:
- +1 Model Activation – catch your opponent off-guard by immediately activating another model in the same turn. This is great if you want to try and secure the first turn in the following round because the player that finishes a round first will get the first turn in the subsequent round.
- +1 Die – want to make sure your Basilean Sisterhood makes that all-important shot against the Nightstalker Spectre? Well, by using the Power Dice you can add 1 bonus die to any of your Shoot, Cast, Armour Save or Melee rolls.
- Forced Fatigue Action – Fatigue is something we’ll cover in detail in a future blog, but basically Fatigue allows you to give an extra ‘short’ action to a model that’s already been activated in a round
- Clear Fatigue – remove Fatigue from a model. Again, we’ll cover this in a future blog
- Group Defence (up to 3 models) – Group Actions will be covered in our next blog
- Group Shoot (up to 3 models) – see above
- Group Assault (up to 3 models) – patience!
- Warband or Model Special Abilities – these are another of the really exciting elements of Vanguard so we’ll go into this a little bit more below…
WARBAND ABILITIES
Right from the start of development on Vanguard we knew that we wanted warbands and units to have their own range of special abilities. After all, these are meant to be the elite troops sent roving across the countryside of Mantica, so it’s likely they’ve picked up a trick or two along the way.
Special abilities cost power to use and the more powerful an ability is, the more Power you’ll need to spend in order to trigger it. The Warband Special Ability can be used by multiple models in a particular faction and are unique to that faction. Let’s take a look at a couple of examples below:
UNDEAD

As you can see, most warbands have a number of special abilities that can be used or activated during a game. Some, like Deathless Bond, are always switched whereas others, like Surge, have a number after them. In this case the number is the amount of Power you’ll need to activate that ability.
GOBLINS

In keeping with the cowardly nature of Goblins, they can elect to Flee when an enemy charges into them. This is a great tactic for luring the enemy out of cover or into charging distance of another unit. To Flee you’ll need to spend 1 Power.
UNIT ABILITIES
Along with the Warband Abilities that can be used by various units in a warband, you’ve also got the option to spend Power on Special Abilities that are unique to particular units. These can be anything from increasing the range of magic spells to extra attacks or defensive moves to avoid blows.
We won’t be able to go through them all here, but we can give a couple of examples…
GOBLIN STINGGIT

Sticking with the goblins, above you can see the Goblin Stinggit. This is one of the command options for your warband and the Stinggit has a number of abilities that can be triggered with Power. For example, if you spend one Power before making a ranged attack with the Throwing Knives, you’ll get Piercing (1) – this means your opponent will find it tougher to defend against the attack. The Stinggit also brings one White Power dice to the table too, which should help generate some Power to trigger these abilities.
GOBLIN BANGGIT

For some units, their use of Power is a little more complicated. Take the Banggit, for example, it can make the strength of its grenades more powerful (but more likely to explode) by adding more and more Power.
As you can see, Power plays a huge role in the game and can often be the key to victory. Come back later Fanguards (still a hard pass on that one, ok) for our next blog when we explain how Power can be used to trigger Group Actions.
What are Group Actions?
We’re exploring the rules in detail and giving you an overview of why it’s so bloody brilliant.
And the great thing is that we’re only getting started. We’ve got a load of great Vanguard content planned for you, detailing the advanced spell list, combat, campaigns, etc. Anyway, before we get ahead of ourselves, what have we got in this blog? Well, following the previous description of Power Dice, now we’re talking about Group Actions.
“WHAT ARE GROUP ACTIONS?”
Oh, it’s the return of the quizzical blog reader! Hello again. Put simply Group Actions are activations that cost power to use, but allow you to activate multiple models at once. Going back to the early days of Vanguard, we always knew that alongside the powerful commanders and support units, there would be Grunts ready to do some dirty work.
However, to give the Grunts a little bit of a tactical advantage, sometimes they need to work together to overpower an enemy. This is where Group Actions come into play. Let’s see what the rulebook has to say about them:
Using Power, you can activate a group of models together. All models in the group must not have already been activated this Round. This is called a Group Action and all models are considered to be performing a long action for the Turn. Once the Group Action is complete, all models in the group are marked as activated.
To make a Group Action, nominate a model and then up to 2 more models within 3” of the first model. The selected models form the group. Some models have Special Abilities that are also Group Actions. The model with the Special Ability must be the nominated model of the group in order to use the ability.
Participating in a Group Action replaces a model’s normal activation for the Turn. You cannot activate a single model, move it to join a group and then attempt a Group Action involving that model, for example.
There are three different Group Actions to perform:
Group Defence – the members of the group each make a Walk and then a Brace action. Brace increases a model’s armour value by 1.
Group Shoot – the group members may all either Walk then Shoot, or Shoot then Walk. Models can then choose to all Shoot at the same target, or choose different enemies within 3” of each other. Group Shoot is particularly useful for some units, like the Dwarf Ironwatch, that actually gain a bonus when performing a Group Shoot action. So it’s important to keep them together.
Group Assault – the group members all make a Run action and Engage an enemy model. This is perfect for overwhelming an enemy with multiple attacks and also gaining a bonus for having friendly models involved in the same action. This will be particularly powerful when combined with the Swarm ability, which grants attackers two bonus dice for the outnumbering bonus, rather than the standard one.

Group Actions give you more tactical options when planning your actions. Do you commit to outnumbering the enemy with Group Actions, or spread out across the battlefield with your various units? It’s definitely worth bearing this tactic in mind when creating your faction list.
What is Fatigue?
After introducing some of the basic gameplay elements in our previous, we’re now moving on through more elements like combat, terrain, etc. Today we’re starting with another of Vanguard’s key concepts: Fatigue. A concept we may all be familiar with if you’ve had late nights trying to finish painting an army ![]()
As we’ve discussed previously, the core concept of Vanguard is based around small teams of elite fighters doing whatever it takes to get the job done. With this is mind we always liked the idea that individuals would push themselves to go above and beyond to take out that all-important enemy or grab an objective. This led to creation of Fatigue.
A little like Deadzone, when a model is activated it can be given two short actions (e.g. walk and shoot) or one long action (e.g. run). However, following either their two short actions or the long action, they can immediately be given another short action. For example, you could run (long action) and then shoot (short action). The restriction is that you cannot repeat an action already made during the activation, which means you couldn’t walk, shoot and then shoot again.
However, this extra short action comes at a cost and will Fatigue the model. In the following Round, a Fatigued model will have to spend a short action clearing the Fatigue before it can do anything else. As such, Fatiguing a model is a potential gamble because it limits their future options and could leave them open to attack – so you’ve got to make that extra action count!
Not all is lost though. Cast your mind back to our blog about Power Dice – or read it here – and you’ll recall that Power can be used to clear Fatigue at the end of the Round. Of course, the sacrifice here is that you’ll have to keep some Power in reserve, which means you can’t use all those sweet Group Actions or special abilities we talked about previously. Decisions, decisions.
FORCED FATIGUE
Talking of Power, you can also do something called a ‘Forced Fatigue’ action. Normally the extra Fatigue action is performed at the end of a model’s normal activation. However, you can also spend Power to re-activate a model that’s previously been activated that Round (and isn’t already Fatigued) to give it an extra Short action. This will then mark the model as Fatigued, like normal.
This is a very powerful move, as it allows you to give an action to a model your opponent thinks they no longer need to worry about. For example, you may activate a dwarf Ironwatch to walk and shoot during its normal activation. With the dwarf now appearing to be out of actions, your opponent could move one of their models from behind cover and into the open. Now with a clear line of sight, you could play a Forced Fatigue action on the Ironwatch and take a shot at the enemy unit.
Ah yes, another great benefit of Forced Fatigue is that – unlike a normal Fatigue action – you can use it to perform any short action, it doesn’t matter if you’ve used the same action that round. For ranged units, it could be another Shoot action, for a fighter it could be another melee action or for Spellcasters they could even cast another spell.
Fatigue and Forced Fatigue really help to make battles in Vanguard feel extremely fluid. You’ve got to keep thinking one step ahead of your opponent, and you should never take a unit for granted, until you see that all your opponent’s Power Dice have been used.
Will you be pushing your warband to the limit, or playing it safe?