Mate, that is neat! I am 100% sure thst when dry and painted wile sandstone or even a more exotic stone, it will look great!
2 Likes
Well, the point of this little doohickie is twofold, firstly to get my head around how to use this material, and second to have something to try out paint schemes on.
My fluff knowledge isn’t exactly extensive; I know in the real world these things were constructed of clay bricks but water is at something of a premium on the Plain of Zharr. I know a lot of CD fortresses are literally just made of obsidian, magically commanded into shape. But clearly those are bricks, so I’m guessing this one isn’t!
What do our resident Loremasters think? Should this thing be made of clay bricks, sandstone or obsidian blocks, or something else? I’m unsure at this point, and any help deciding would be appreciated.
I checked the website listing where I bought this stuff and it’s definitely air dry, but there are no instructions anywhere so I’m guessing leave it for much, much longer as it’s still basically the same consistency 8 hours later as it was last night.
Thanks for the kind words and the help, guys. You’re helping preserve my motivation and momentum.
1 Like
Any progress on drying time? Quite curious
1 Like
Obsidian, stone, mud bricks. Anything goes, really. Polluted water is plentiful in the River Ruin, so one can imagine lots of brickmakers and clay pits clustered around the river, with kilns and vast drying fields close to lava pits, and mechanized land caravans exporting bricks to dry outposts inland, perhaps as a statement of luxury.
“Look how mighty I am, who can afford a brick ziggurat in the middle of an ashen desert with scant water even for drinking. Do you know how much it cost and how many slaves perished just to transport the bricks here? Mwahahaa! We ground their bones and mixed into the mortar.”
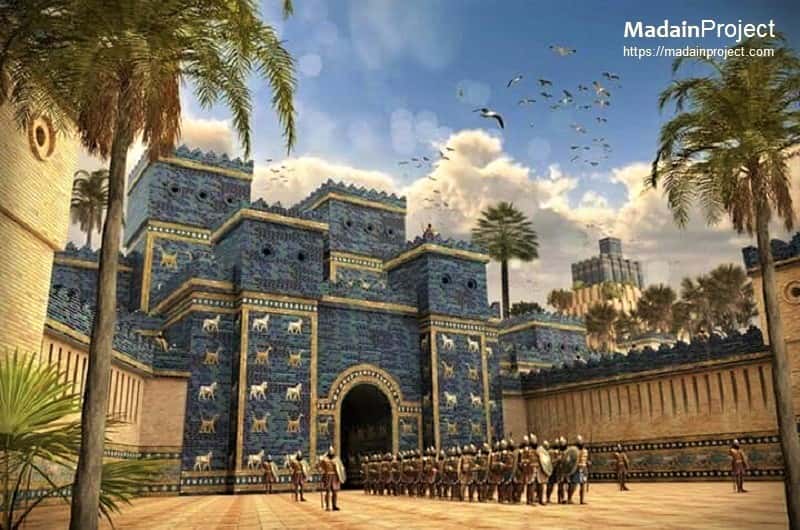
At the end of the day, go with rule of cool and what you think will look best: Perhaps glazed bricks as on the Ishtar Gate from Babylon? Or sandy-coloured mud bricks? Or magical obsidian? Or some dark grey stone, perhaps? You could even arrange a mixture of bricks or stones into simple staircase patterns by painting them in different colours, whether from glazes or material mixtures in the brick/stonework. 
Though if you have some particular location in mind, then you could possibly go with bricks if it’s close to the River Ruin, obsidian for that luxurious look, and stone works everywhere.
You could even do the unexpected, and paint stones as what we in Sweden call slaggsten, or slag stone, cinder stone. As a building material of industrial leftovers from all the furnaces in the Plain of Zharr.
The sky is the limit, and lots of fun can be had with picking or mixing materials. And you can always go the extra mile if you fancy it.
Whatever you decide upon, best of luck!
It took about 36 hours or so to dry, at a thickness of about 2-3mm. So quite a while.
Thanks for the advice @Admiral !
So the steep learning curve continues; I threw some primer on my test piece and it looked…weird. Thought nothing further of it, threw on a couple of coats and got to painting it.
The thing started bubbling, then started going soft. Major mistake number one.
Turns out (possibly obviously to everyone but me) that if you get air dry clay wet, it just soaks up the moisture and goes pliable again. Apparently you’re supposed to seal the stuff when you’re done drying it. So this thing has soaked up paint and ended up looking very sketchy indeed.
This is what happens when you’re too gung-ho to do a bit of basic research before you start.
So here’s how ugly it looked after I painted it. It’s also worth noting that I’ve now realised that, once painted, every little problem with texture, fingerprint and sculpting error becomes much, much more obvious.

(I kinda gave up shortly after starting on the bottom section so I only highlighted 2 bricks)
Time to make another test piece, and this time prepare it properly before starting to paint. I should also have some basic sculpting tools arriving today, so hopefully I will make the brickwork pattern a bit neater.
2 Likes
Good learning experience. Perhaps you could just seal it with a thin coat of super glue brushed over it with bits of paper and still use it? Bah, fingerprints are just stone texture. Don’t be dissuaded.
1 Like
This project seems hard…hope you persevere 
Hashut wills it! Build him a temple
1 Like
It’s all good. Motivation levels are still high; I’d be more annoyed if it looked this crappy and I had no idea why. The next iteration will work better.
Apparently you can seal the stuff with thin coats of PVA, or with varnish. This might sound like a stupid question, but what happens if you try to apply acrylic to varnish? I don’t think I’ve ever tried.
@Habitual_Lurker how I protect foam for scenery projects:
I mix cheap black paint, all purpose filler and pva in equal parts and base coat via brush. Afterwards it’s okay to spray.
Check my mordheim scenery project from earlier this year. Attempt one had melting but I learnt afterwards.
1 Like
Ah, cheers matey, I’ll give that a try.
I’ve kinda hit a bit of a standstill with this one, a combination of too much time at work and my brickwork roller being delivered here at the speed of glacial drift. But give it a week or so and I’ll actually have a day off work to get on with it.
2 Likes