[Archive] Chaos Dwarf Quest (Warhammer Quest)

Nicodemus:


See attached pdf below

I mentioned in a couple of previous threads (here and here) that I’m working on an expansion for Warhammer Quest that involves a Chaos Dwarf theme.

Thought I’d pass along a quick mention about it… I’ve no idea if many people on here still play WHQ (or ever did), but it’s what my friends and I primarily play these days.

The Chaos Dwarf Quest expansion is up to ~143 pages and is an overhaul of the Warhammer Quest Roleplay book and Adventure book, with everything themed specifically for Chaos Dwarfs: spells, traveling hazards, CD settlements and shops, treasure, adventures and on and on. I think it’s about 90% complete, but that’s a little fuzzy as I continually think of new things to add.

Igorvet, Baggronor and mattbird have graciously granted permission to adorn pages with their artwork. There is also some of the original Warhammer Quest artwork in there too. More to come…

~N

Nicodemus:

The draft has been updated (see the first post for the attachment).

The preview pdf is 96 pages (there are a couple of blank place-holder pages at the beginning still).

The Rulebook is nearing completion. It still needs some layout changes, but almost all of the content is there.

Finishing out the Rulebook (still to come) is i)the Bestiary section with updates for men, elves and dwarves - as the Chaos Dwarfs are more likely to be fighting them than Chaos Warriors, Ogres, or their own kind, and ii) the adventures. There will be 3 Adventures to start with in the Rulebook.

The remaining 48 adventures for the Chaos Dwarfs, as well as 6 adventures for the regular heroes (read: non-Dawi Zharr Warriors) will go into a separate Adventure Book.

Updates to follow in the next few days.

~N

Nicodemus:

So we had our first play-test of Adventure 1 last night. We got totally decimated (pwned?) in the Objective Room at the end. Now this can happen even in regular Warhammer Quest, so that’s not a big deal in-and-of-itself. After our post-game deconstruction our consensus was that it wasn’t un-winnable, we just had bad luck. We did come up with a few things from play testing:

1) The Sorcerer lucked out and got 9 points to put toward his spells, and he took Lifestealer which is the best one by far and really helped out. If he didn’t have that spell I don’t know what might have happened as the Warrior’s Stone Bread (heals 1D6 Wounds) is the only other healing item available in the beginning. In light of this the rules for the starting spells was tweaked so that after rolling the 3 spell dice to see what the Sorcerer’s options are for choosing spells he can either proceed with picking spells or disregard all of his rolls and take Lifestealer as his only spell. Lifestealer (casting cost 9) is insanely good for a low-level or beginner party so I don’t see a problem with limiting his spell choice if he elects to take it alone. Essentially it makes the Sorcerer want to be adjacent as many enemies as he can to damage all of them, so it’s incredibly hard-hitting, but it puts him at risk of there are enemies still standing. It’s also expensive and costs more Power than the Sorcerer can get in one turn at Battle-levels 1 and 2 and so he’ll have to burn through reserve to use it.

2) Don’t forget about using some of the characters abilities and special powers. I forgot to use the Sorcerer ability Dark Gift of Hashut to force-cast spells at the expense of stat points. Would have saved us for sure I think. We also forgot about the Daemonsmith’s Daemonic Axe which comes into play during Unexpected Events.

3) Some clarifications were needed for the Annihilator (blunderbuss character) for re-loading.

4) Monster tables and Bestiary entries need to be streamlined as it took too long to find everything. Regular Monster stats such as Giant Rats, etc. aren’t contained in the expansion and this was just a pain to have two sets of tables on the go. They will be combined (significant work is required for this). Objective room Monster Tables also need to be included as they will be different.

5) To-hit chart and other bits of rules in the regular Roleplay book need to be included in the expansion as we had to refer to the Roleplay book for a few details. While this is OK if we need to generate treasure or other things it’s still a pain.

6) Although we agreed that Adventure 1 did seem do-able and we just made a couple of mistakes and rules tweaks as we went, we were insanely lucky and had very few Monsters from Dungeon rooms or Unexpected Events. There were also a few annoying things such as the choice of Objective Room for the first Adventure - the Lair of the Orc Warlord has significant height differences and a difficult path to get to the highest level. With the reduced Move of Chaos Dwarfs this made it even more difficult to close ranks with the bad guys, and jumping up a level for a Dwarf is made with a -2 modifier, which meant that we needed to roll a 6 on 1D6 to make it (we never did). There was also a Wizard from Kislev in the final room on the top level. He just rained down Freeze on us every turn. Although Magic Resistance saved us from a couple of hits, having a Wizard along with a bunch of Barbarians in the 1st Adventure was a bit much. So the Wizard is out, as is the difficult terrain room. Going with the Barbarians and a more basic Objective Room like the Tomb Chamber.

5) The slow movement of the Chaos Dwarfs was an issue in long corridors and the Objective room, but for the rest of the Adventure it was not as bad as you’d think and we were happy with it. It really didn’t slow anything down as it still took 2 turns to get from one end of a long 2x6 corridor to the other than Explore the next room, which is the same amount of time it takes the regular Adventurers, it’s just that they often have to wast some Movement on turn two as they’re more than half way down the corridor.

6) On turns were there was excess Power for the Sorcerer, seeing as he doesn’t have Healing Hands or something that can use up excess Power between battles to heal it seemed like it would be useful to have a spell option that could still use excess Power, although Healing Hands or any direct heal-spell is out of the question. The solution was a new spell: Forced March

Forced March (Casting No. 3)

Pick any friendly unit on the board section (including the Sorcerer).  The chosen unit gains +1 Move this turn.  Due to the tiring effect this spell has on its targets, if any unit gains more than +3 Move through the application of this spell during a single turn then it will be too tired to move and may not make a Move action on the following turn.

This spell has also been used by cunning Sorcerers to tire enemy ranks during a charge.  If cast on an opponent more than 3 times, roll 1D6.  On a score of 1 or 2 the opponent will be unable to move on the turn following receiving +3 Move; on a roll of 3+ it may move as usual.


On balance issues with Forced March - The +1 Move is a significant boost for Chaos Dwarfs, so it needs to cost a little more than the equivalent Wizard Spell that adds +1 Move for 1 Power. Furthermore, given that it’s a Forced march, I put in the limit of +3 Move so that it’s more thematically correct - I imagined that a Chaos Dwarf Sorcerer would normally use it on his slaves, at their expense. It also occurred to me that because of the ‘unable to Move’ stipend after casting it too many times on one target the spell could be abused by players who cast it on enemies… and for 9 Power (3 castings) you’d lock-down a unit from moving for a turn. Against a flying dragon or a deamon later in the game this would be too good, so the rolling 1D6 is there so it’s not guaranteed to stop enemies.

I think that’s most of what we came up with. There were a few other bits and pieces as we went along (such as removing the choice of starting weapon for the Sorcerer) and putting in some rules clarifications here and there for things that came up.

Modified rules will be posted once some more significant changes have been made with Monster tables, etc.

Watch this space for more progress reports and updates.

~N

PS Rules for a (bonus) Hobgoblin Sneaky Git character are in the works. He just needs a few final tweaks.

Nicodemus:

Play through #2 Report

Completed a second play through of Adventure 1 last night with some of the modifications and rules adjustments. I can say this:

It’s still Warhammer Quest for sure, but it definitely has a Chaos (Dwarf) feel to it now! Below is a brief gaming session report.

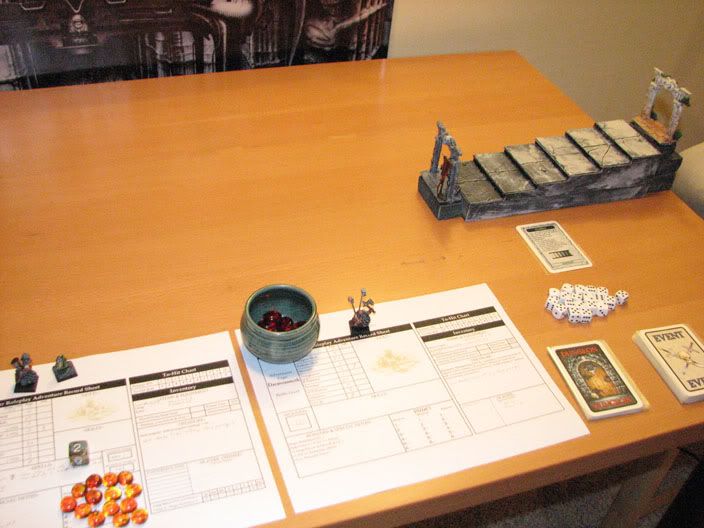
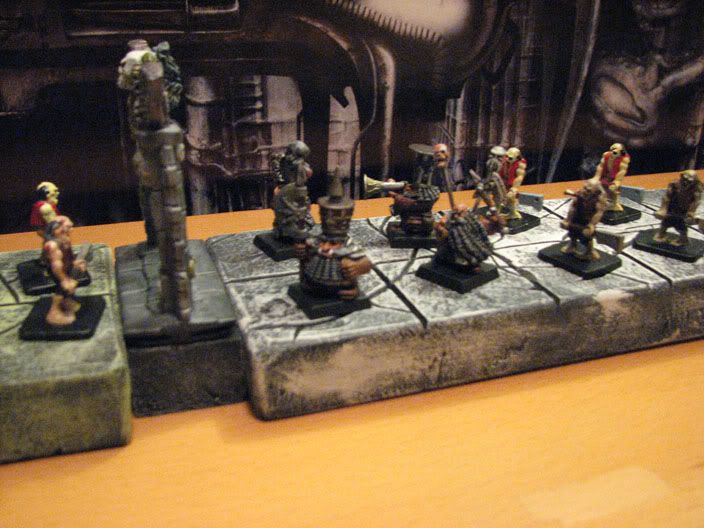
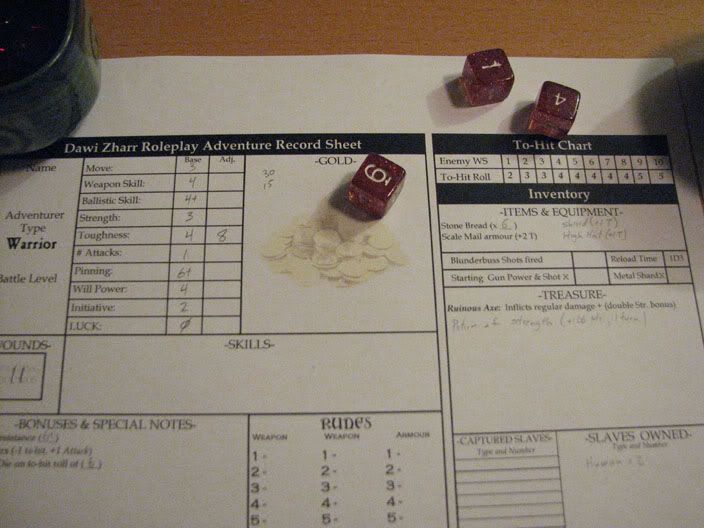
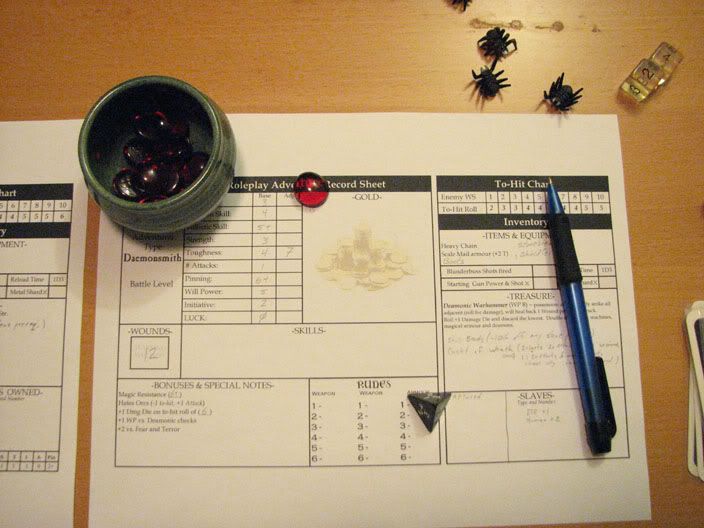
Generating the Adventurers

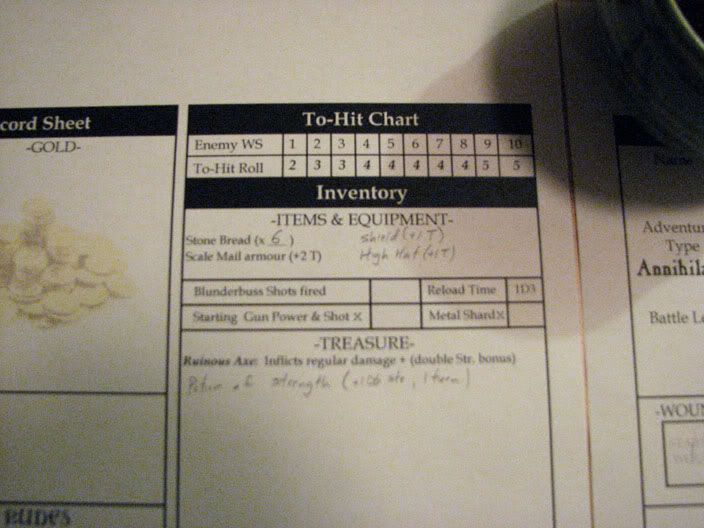
Getting the party ready to go was very fast. Using character sheet templates specifically made for the Chaos Dwarfs really helped speed things up, all of their abilities and Chaos Dwarf-specific notes are on there, as well as a section for keeping track of Slaves, which is a new addition to the character sheets and helped serve as a reminder to keep acquiring Slaves. But back to character generation.

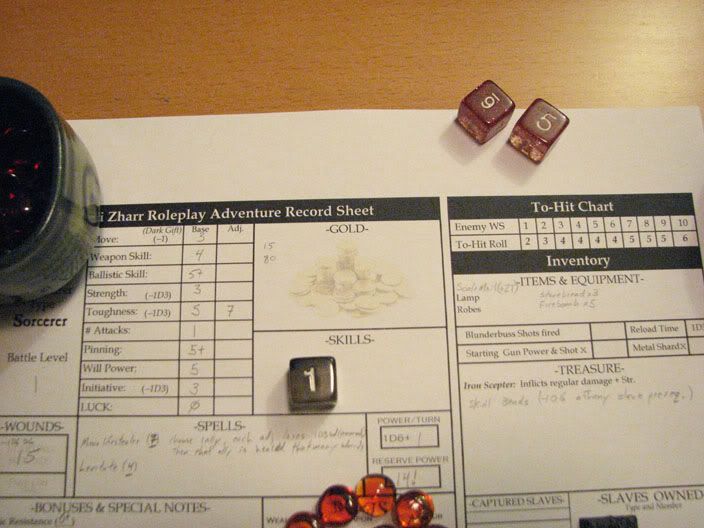
Roll for Wounds, everyone in the party starts with 2D6+7, which is a reasonable number for “Dwarfs” in general and didn’t seem to out-of-place at Battle-level 1.  The results - Warrior: 14, Annihilator: 17, Sorcerer: 15, Daemonsmith: 12. Next was generating the Sorcerer’s reserve Power and starting spells. For Power he starts with 2D6+2, more than the Wizard, but at higher levels the Wizard gets more. Anyway the Sorcerer started with 14 Power, wow! A good start for him!. Next was generating spells. Rolling 3D6 I got a 6, 4 and 1. I decided not to re-roll any. Now I could either combine those dice to come up with casting numbers or just take Lifestealer (as per the modified rules). I opted to take Minor Lifestealer (casting 7 = 6+1) and a defensive spell, Levitate (casting 4). The last thing to do as copy down each character’s starting Magic Resistance (6+) and starting equipment.

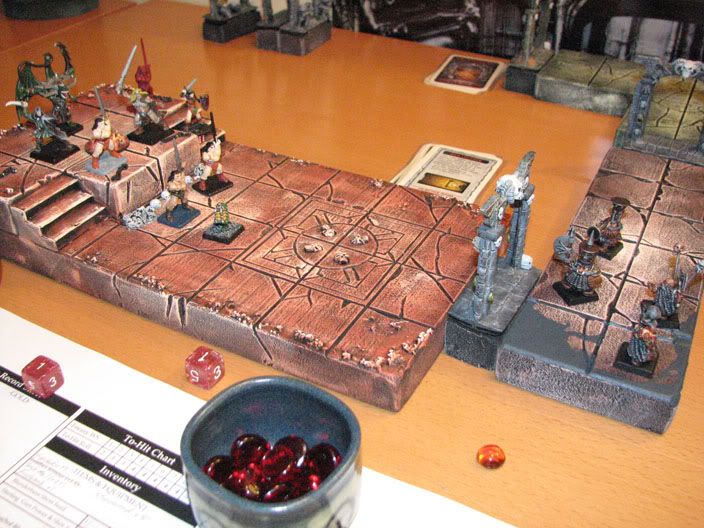
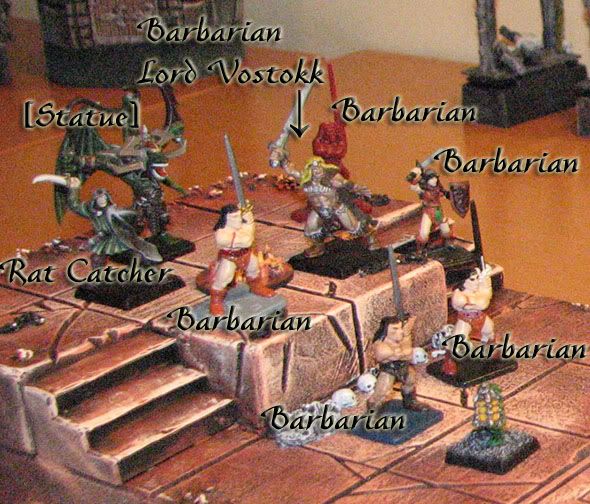
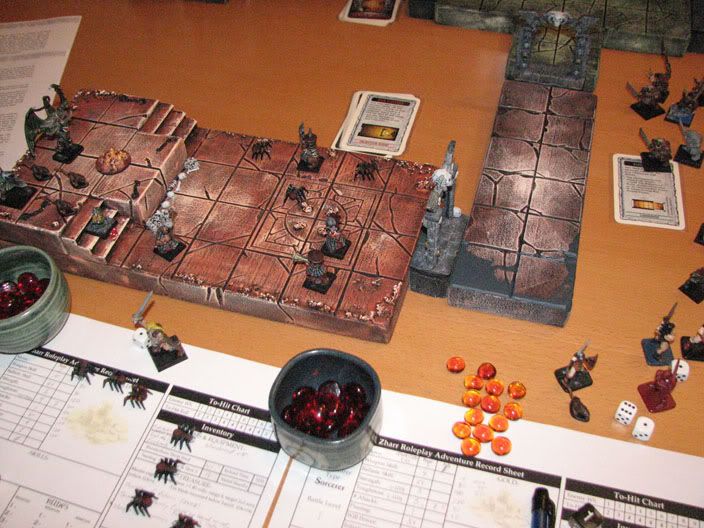
High Pass Dungeon (Entering the Barbarian Lord’s Lair in the Frozen Northlans of Kislev)

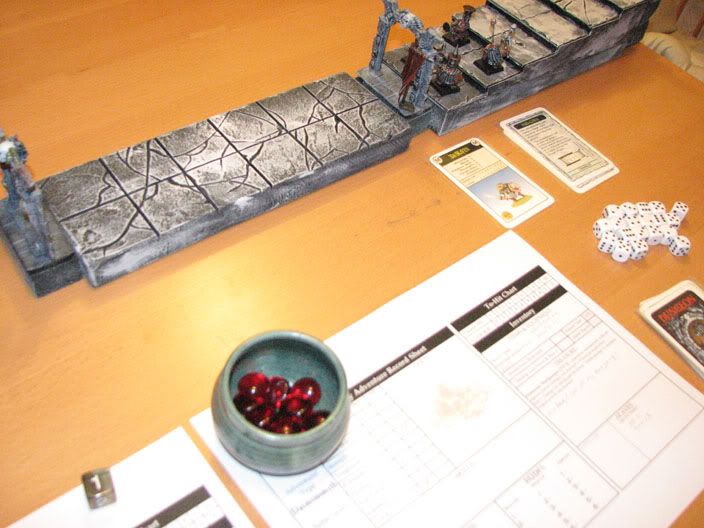
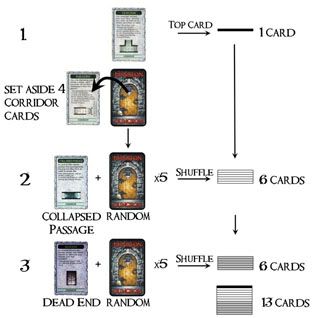
The first Dungeon card drawn is the corner section.

Corner Corridor

Rolling for Power the Sorcerer gets a 5. Smooth sailing. Moving first the Sorcerer decides to have his Lamp Slave “Hide with Master” and just puts him on his character sheet to represent this. The party moves up 3 spaces each toward the end of the board section. On the following turn the Power die still shows no Unexpected Event, and everyone arranges themselves at the end of the board section by the doorway. At the end of the turn the Sorcerer Explores and reveals a Dungeon room. It’s about to be “Go” time.
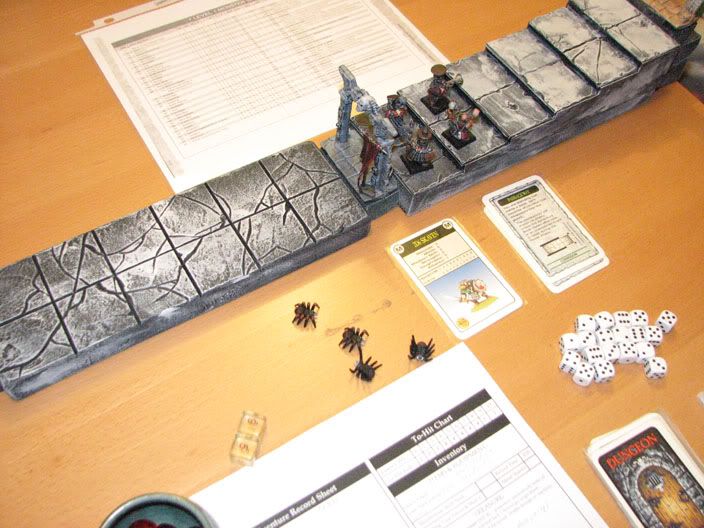
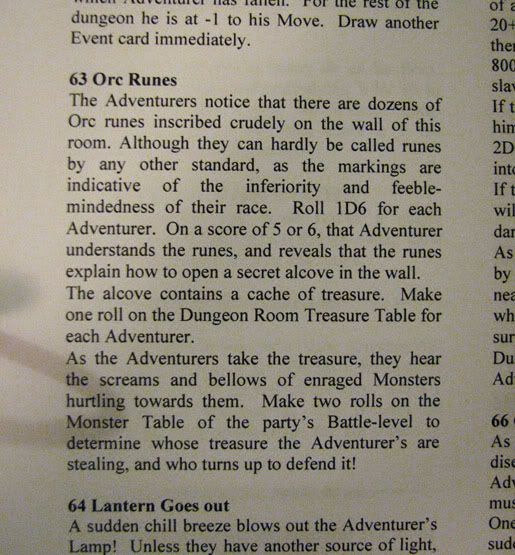
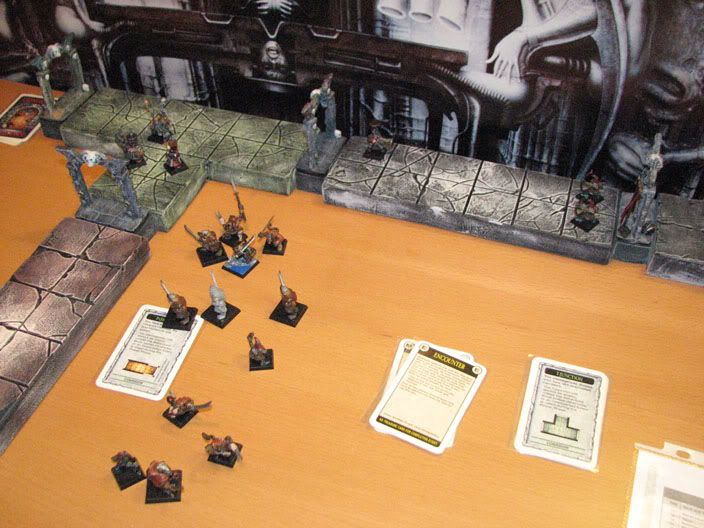
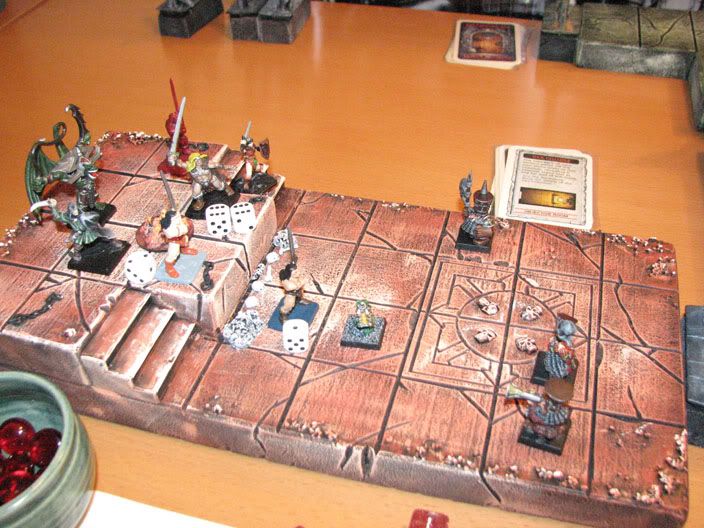
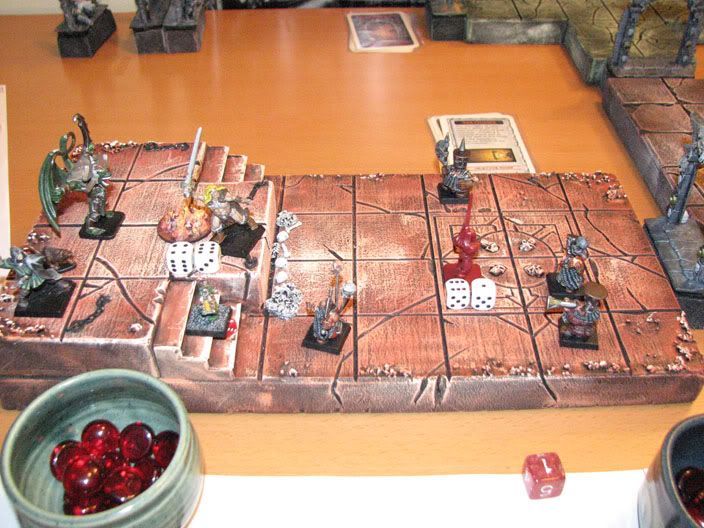
Dungeon Cell

Starting the next turn still no Unexpected Events, and the party moves in, taking up positions with the low Wound characters paired up with higher Wound characters, this time it’s Sorcerer/Warrior and Annihilator/Daemonsmith. Drawing an Event card reveals Monsters. Note that Event cards are only used to show which sort of Event takes place (Monsters or an event from the Dungeon Events Table). Rolling on the Level 1 Monster Table generates 5 Savage Orcs and Savage Orc Shaman. During the course of battle the Chaos Dwarf’s hatred of Orcs fuels their battle rage, giving them each an extra attack (but at -1 to-hit). The Annihilator manages to blast 3 of them and get them down from 5 Wounds to 1 or 2 Wounds each. The other Adventurers have mixed success and only inflict a couple of Wounds on each of the other Orcs. On the Orc’s turn the Orc Shaman casts Fist of Gork which gets through the Sorcerer’s Magic Resistance, hitting him for 3 damage. In general the other Savage Orcs that do manage to connect in hand-to-hand combat only inflict 1-2 Wounds due to the high starting Toughness of the Chaos Dwarfs. The Sorcerer, annoyed by the Orc Shaman decides to cast Minor Lifestealer at the very end of the turn. He has 6 Power this turn, and since healing spells can be cast at any time he uses 1 reserve Power, targeting himself. He manages to kill 3 of the Orcs and heals back his 3 lost Wounds.

By the end of the next Warrior’s phase all of the Orcs are slain, the Daemonsmith picking up the 590 Gold for slaying the Shaman, and unfortunately, although the Annihilator’s blunderbuss nailed 3 Orcs for decent damage early in the battle, he doesn’t finish any off. Knowing that the characters can sell Orc skulls at the Trademaster in Zharr Grungron Ankor a note is made on their sheets how many Orcs each of them slew.

Drawing treasure (from the Monster encounter) the Warrior gets a sword which is not usable by Chaos Dwarfs, but it’s worth 200 Gold if he sells it.

Before they can move on the Sorcerer rolls a 1 for Power. The Deamonsmith isn’t possessed, but there are 12 Goblins with bows attacking the party. It takes a few turns to clear them out, but in general they can’t inflict more than 1-2 Wounds due to the Toughness+armour of the party. The Sorcerer does use some reserve Power to cast Minor Lifestealer which clears our 5 Goblins in one go and heals the Warrior a little.

The Sorcerer is up next for Treasure and he gets to roll on the Chaos Dwarf-specific Treasure table! He gets Skull Beads, worth 150 Gold, and while they don’t provide a huge bonus, they may be useful in the long run as they reduce any pre-requisite number of Slaves by 10% (important for training and accessing certain shops).
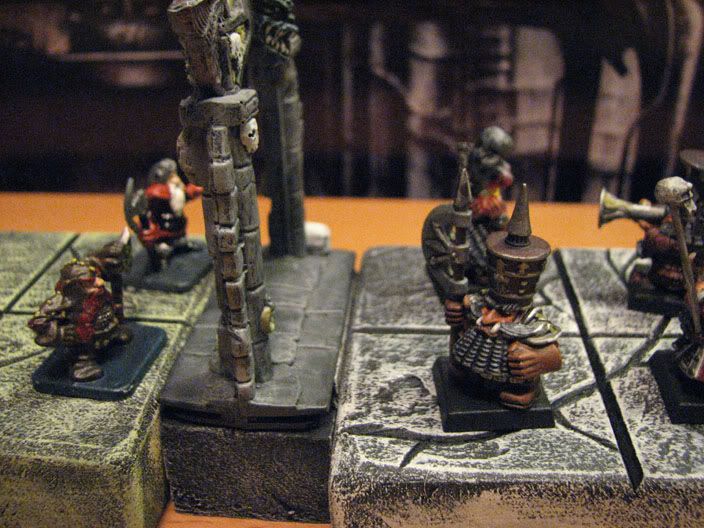
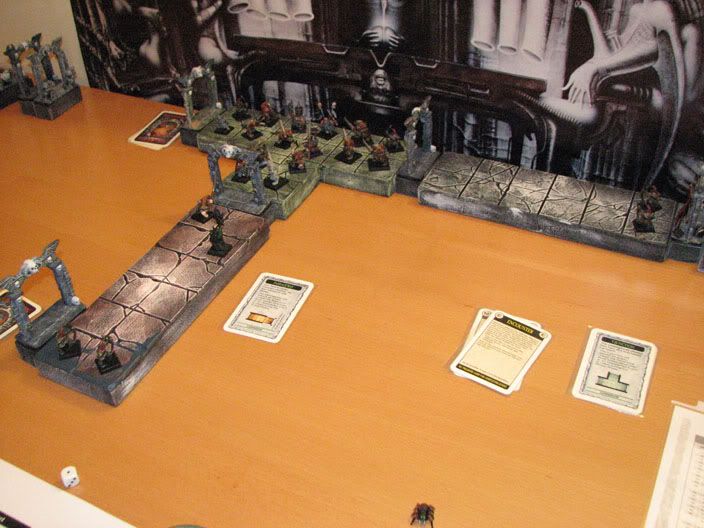
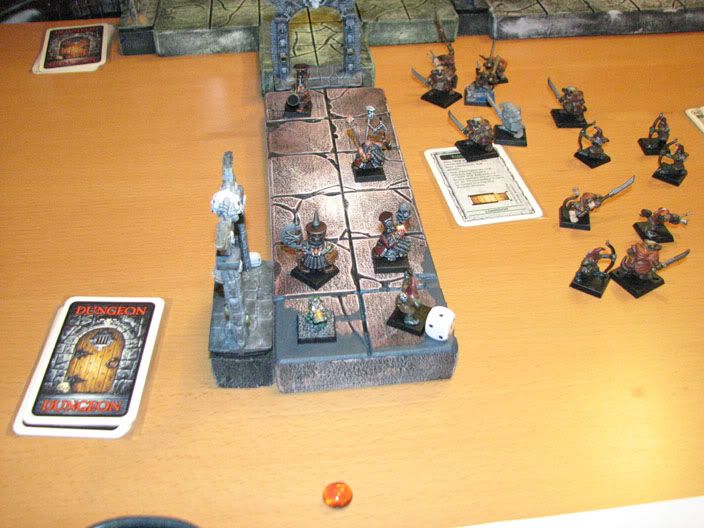
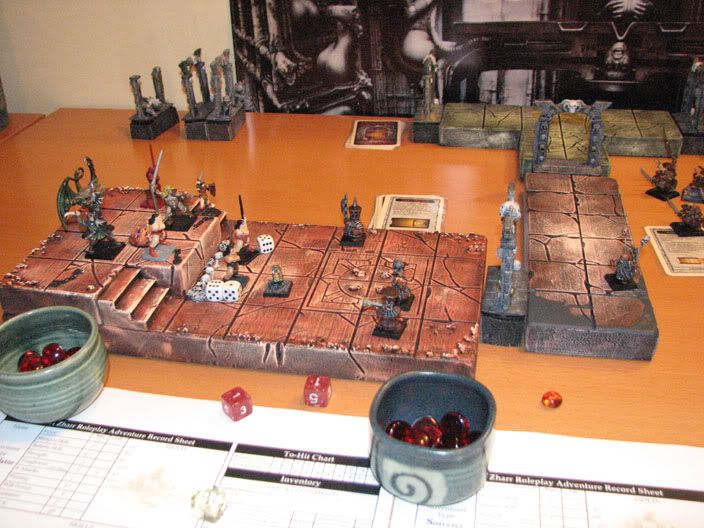
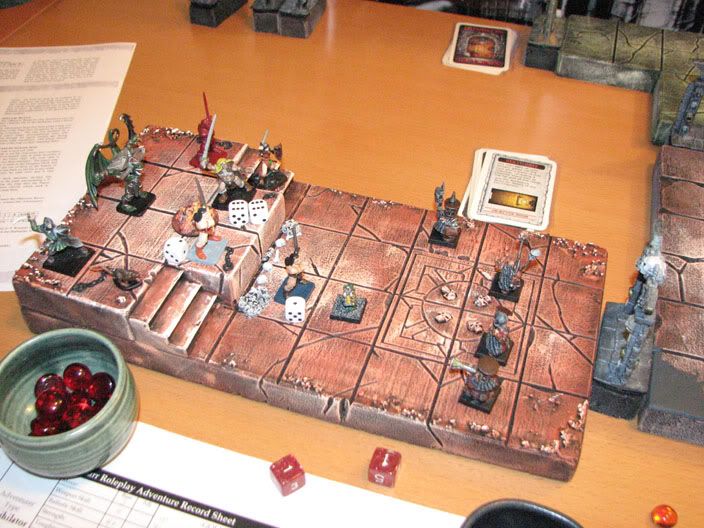
Guard Room

Another room with a guaranteed encounter. As the party moves in and takes up positions the Event card is drawn - more Monsters. This time it’s Snotlings - four of them gang up on the Warrior, surrounding him, another 3 gang up on the Daemonsmith. After their Ambush (which also ambushes magic) the Sorcerer rattles off another Minor Lifestealer targeting the Daemonsmith. The Sorcerer rolled 6 Power this turn and so had 6+1(from his Battle-level bonus) to cast it. All 3 Snotlings around the Daemonsmith are removed. On the next turn the party dispatches the remaining 4 Snotlings. The Annihilator draws a Treasure and gets another item not usable by Chaos Dwarfs.

As the Sorcerer is not adjacent the next doorway he can’t explore yet. Rolling for Power he gets a 1 - Unexpected event. This also means that the Deamonsmith’s Deamonic Axe attempts to gain control of him. The Deamonsmith makes a Will Power check, and rolls a 2. Adding his Will Power (5), as well as his +1 bonus for being a Deamosmith gives him an 8 - tied with the Deamonic Axe and sufficient to succeed. Close call!

Drawing an Event card reveals more Monsters - 10 Giant Bats. The party manages to clear a few of them out, but 7 remain and attack. In general they don’t do enough damage to get through the character’s Toughness and armour, however the Sorcerer (Toughness 4 and no armour) takes a number of hits. Without sufficient Power he can’t easily cast Minor Lifestealer on himself unless he uses reserve Power. Before the end of the turn he elects to use Hashut’s Dark Gift to draw some of his own life energy to cast a spell. Ahhhh the power of Hashut! He decides to use his Initiative, and subtracting 1D3 he rolls a 2! Not bad, his Initiative is down to 3 now, but he’s cast the spell and removed 5 Giant Bats and healed back as many Wounds.

The next turn the party clears the remaining Bats.

Once the bats are slain the Deamonsmith draws a Treasure and gets Skull Beads, same as the Sorcerer got, which is a big coincidence.
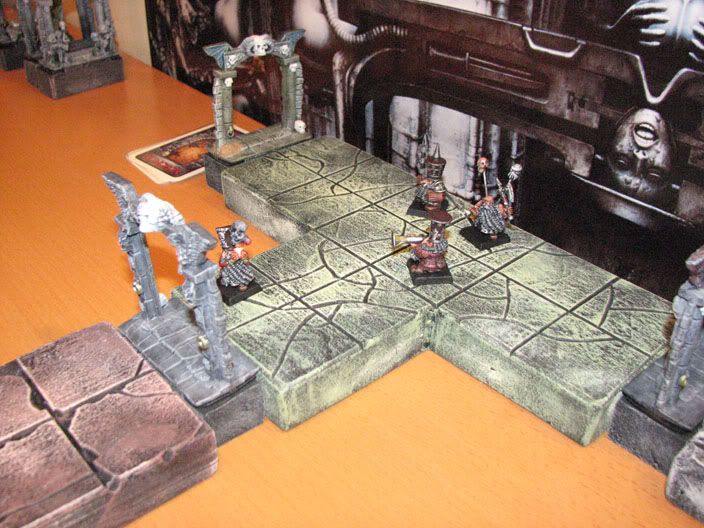
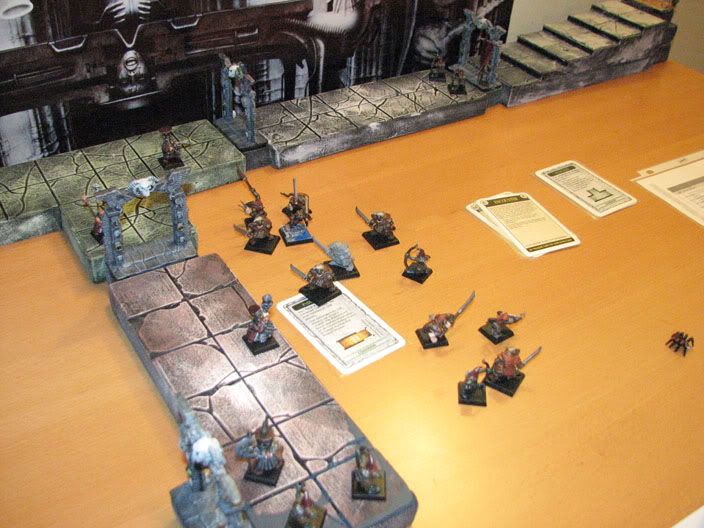
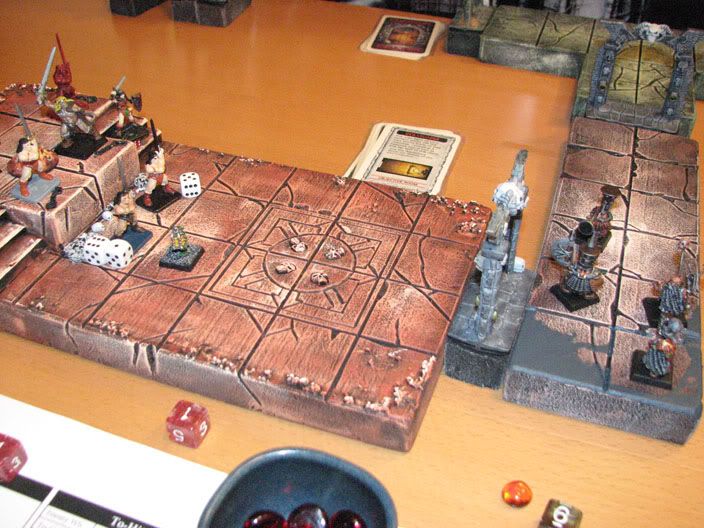
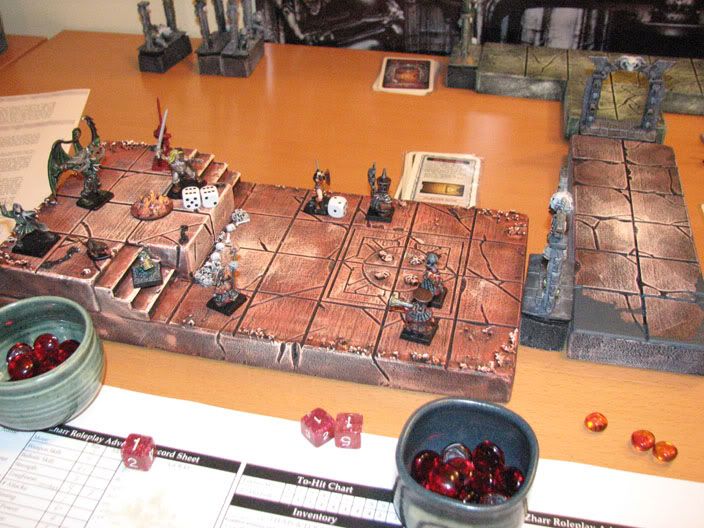
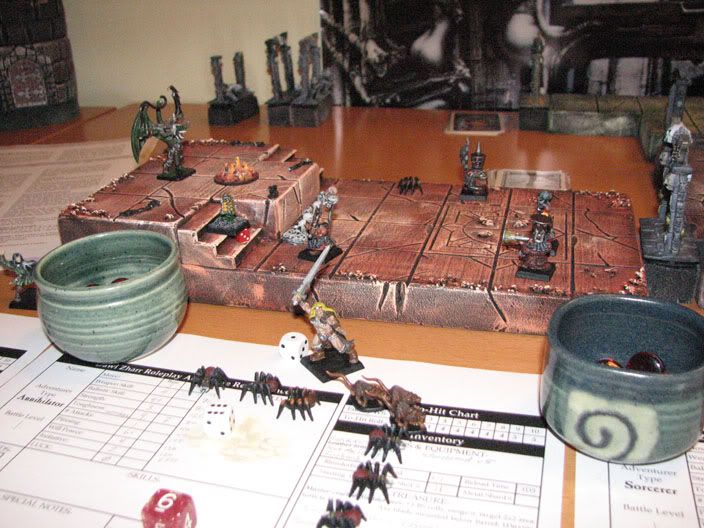
Circle of Power

As the party enters they encounter 3 Skeletons. The Sorcerer had enough Power to cast Minor Lifestealer again (requiring only 1 reserve) but it only took off 1-2 Wounds from each of them. Note to self: maybe Lifestealing should only work on non-undead? At the end of the turn the Skeletons regain their lost Wounds and are back at full. The Annihilator’s blunderbuss has been re-loaded for a while and he takes a shot at all 3 of them, but only takes off 2 Wounds each. When they’re down to only 1 Skeleton left a 1 is Rolled for Power - and other Unexpected Event, this time 9 Skaven Stormvermin, but the Deamonsmith is not possessed. The Sorcerer decides to soften the enemies up and try to finish off the Skeleton by using Hashut’s Dark Gift to cast Minor Lifestealer. Again he uses his Initiative to drain instead of Wounds total, Move, Strength or Toughness. Luckily, again it only takes 1 Initiative, bringing him down to 2.

It’s so tempting to use Initiative to access Hashut’s Dark Gift… I’m starting the feel the call of the Dark Father even more, it’s very appealing to not need my own Power to cast spells and just take a penalty to a stat for the rest of the Adventure instead. This is probably a real indication what the path to Chaos was like in the early days of the Dawi Zharr :wink: … and it’ll get worse later in the Adventure!

After a longer battle and everyone taking several points of damage the Sorcerer casts Minor Lifestealer again, using Hashut’s Dark Gift to try to regain some Wounds for the Warrior who is down to 5 Wounds. He has some reserve Power still, but he’s hanging on to it just in case. Again he Sorcerer uses Initiative, knowing that it could trigger a Transformation and block is access to Hashut’s Dark Gift if he goes to zero Init or below. Again, amazingly, only 1 is taken off. He’s at 1 Initiative now for the rest of this Adventure, and more importantly the Warrior gets a few Wounds back.

Once the Skaven are cleared the Warrior Draws a Treasure for the (Skeletons) getting Gold - rolling a handful of D6’s a bunch come up as 1’s, indicating that he doesn’t get anything. The Sorcerer draws a Treasure card for the Skaven and gets an item that can’t be used by Chaos Dwarfs, but it’s worth 250 Gold if sold.
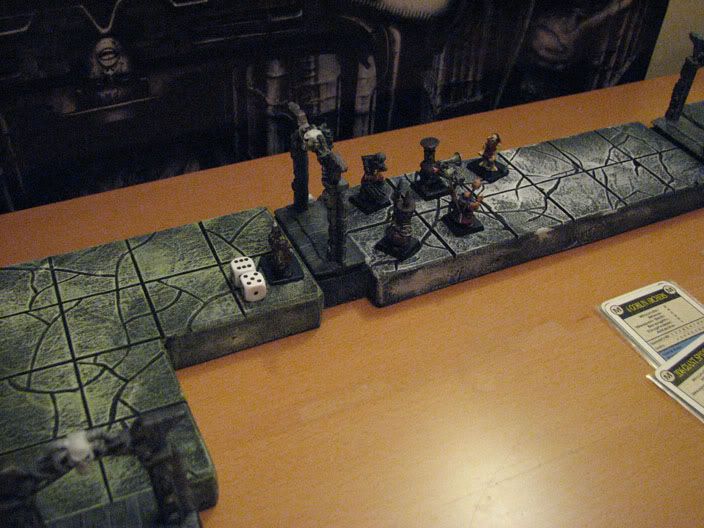
Corridor 1

The party moves along the long corridor, taking two turns to get to the far end. Unfortunately on the second turn the Sorcerer is rolling 5’s and 6’s for Power and there’s nothing to target with Minor Lifestealer.
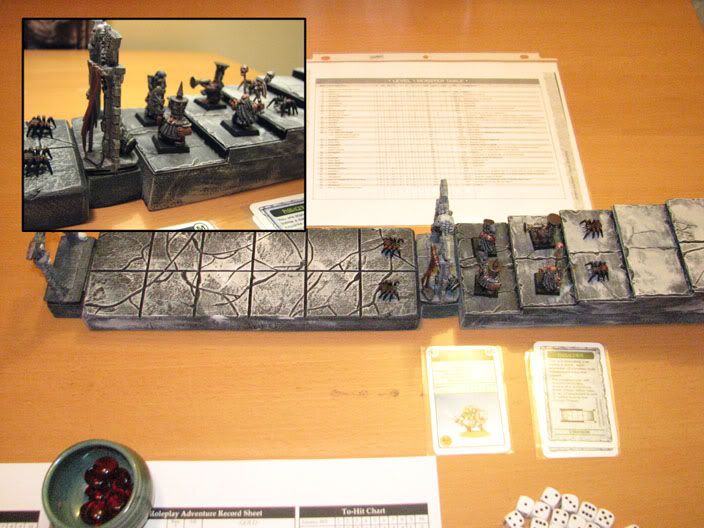
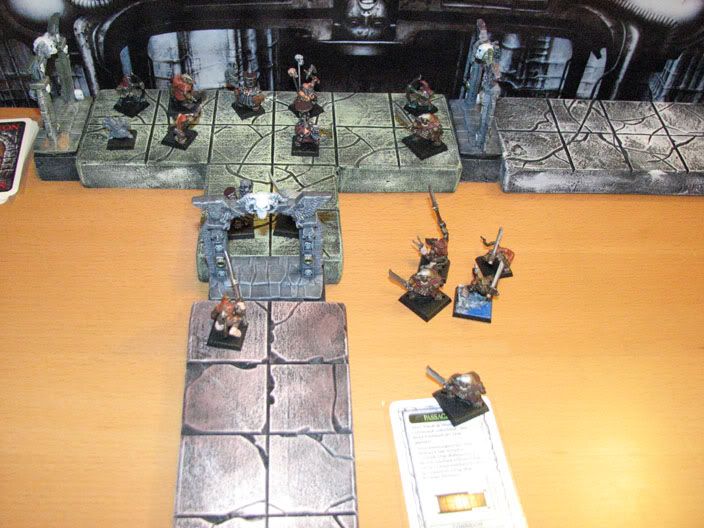
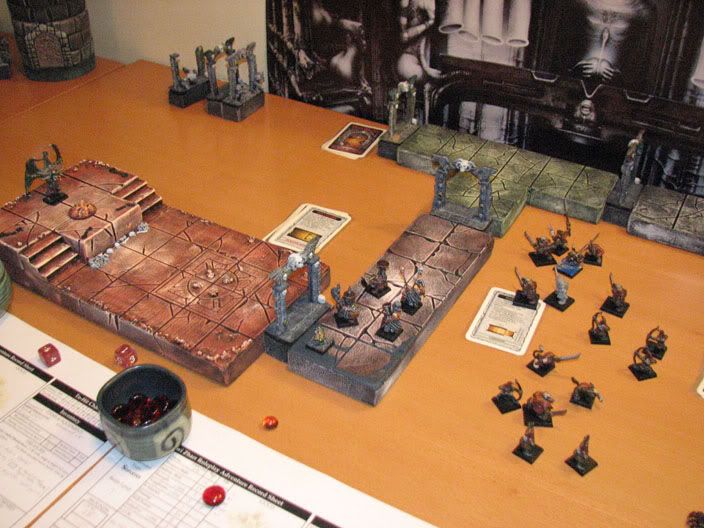
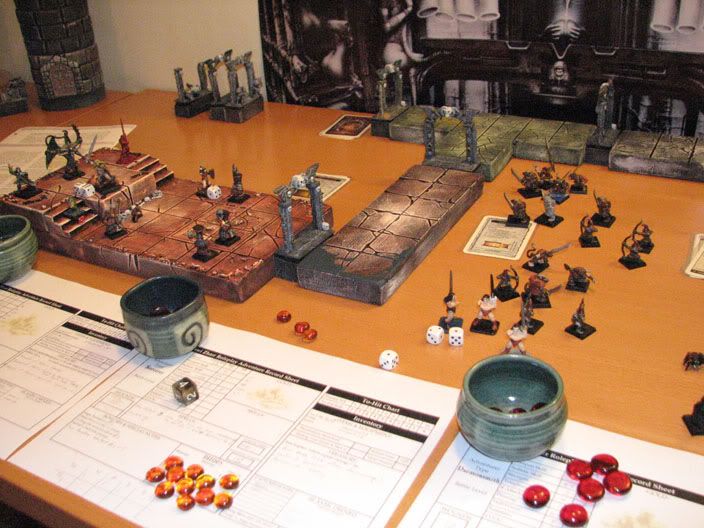
Corridor 2

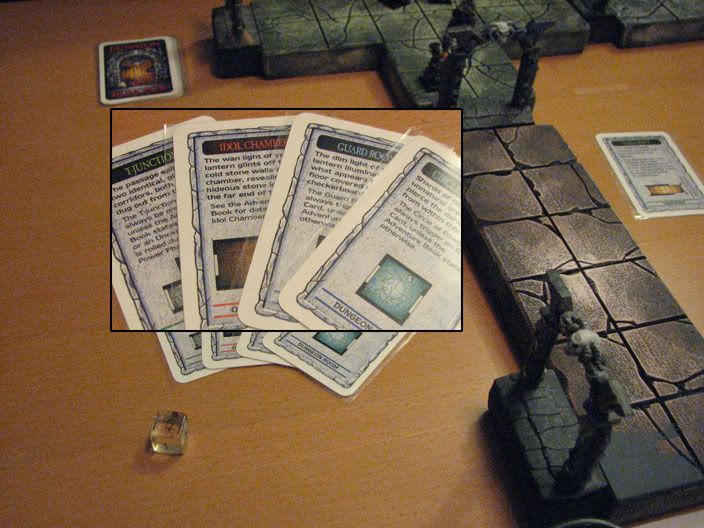
As the party makes it half way through the corridor it’s decided at it is time the party will use the map that they were given by the Sorcerer Conclave of Zharr Grungron Ankor - it’s a special item that lets them see what the next four Dungeon cards are, and they can put them back in any order. The four cards are two T-junctions, a corridor and the Torture Chamber Dungeon Cell. The two T-junctions are put on top and the Dungeon room last.

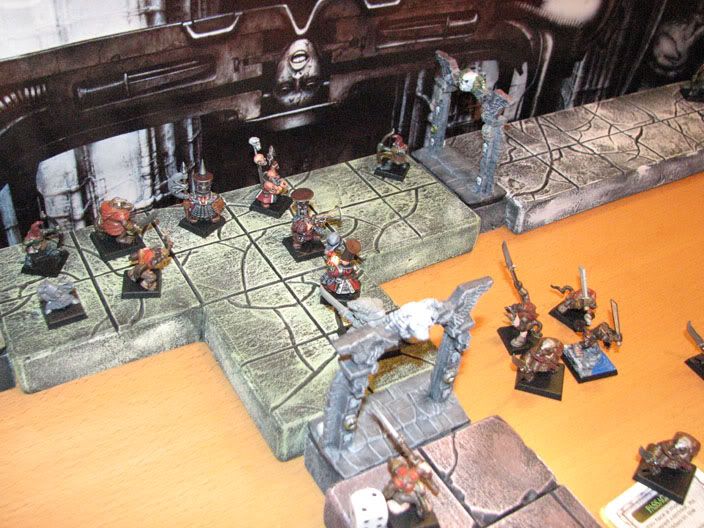
Next turn a 1 is rolled for Power, and it’s Monsters, again the Deamonsmith doesn’t get possessed. The party is also a little separated, with the Sorcerer and Deamonsmith half way up Corridor 2, and the Annihilator and Warrior on the last two squares of Corridor 1.

Rolling on the Level 1 Monster Table Ogres should be generated, except the Chaos Dwarf expansion Lv1 Monster Table says Ogres are one of the exceptions, as they are Chaos Dwarf allies, and instead a separate table is used - instead 3 Empire Swordsmen are generated: 4 Toughness, 12 Wounds, but luckily 1 Attack at 1D6+3. The Sorcerer gets hit, and hit HARD, as he was already Wounded he’s now down to 4 Wounds.

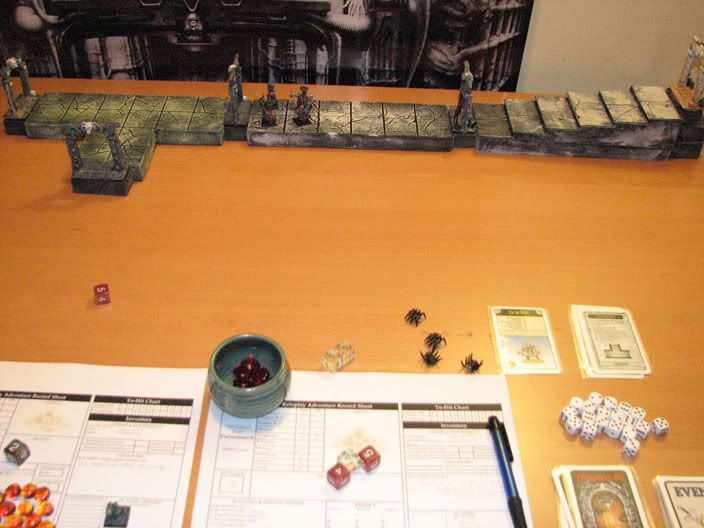
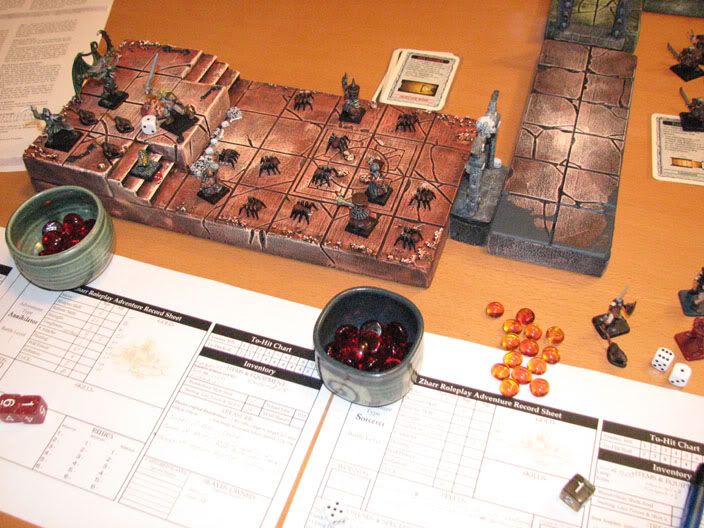
Next turn, another 1 for Power, double damn, luckily no possession for the Deamonsmith, still! It’s an ‘event’, luckily it turns out to be one that we roll to see what happens and we get a 5 - generating some Gold for everyone, but then we have to draw another event immediately, 10 Giant Spiders. The Sorcerer can’t take another hit from the Empire Swordsman so he tries to drain some life from him, only taking off 3, but he gets 3 back as well (Magic Resistance sill not a hindrance).

After another turn the party does well hammering the Swordsmen and Spiders both, including the Annihilator who gets off another good shot clearing out some spiders. The party manages to clear all but one Spider from between the two groups of Adventurers, making things a little simpler as getting caught up in a Web is bad news. The Annihilator is now reloading and it’ll take two turns.

On the “Monster’s” turn the Swordsman hits the Sorcerer again for a few Wounds. With the prospect of two spiders also hitting him the Sorcerer uses some reserve Power to Levitate and take himself out of range for 1 full turn.

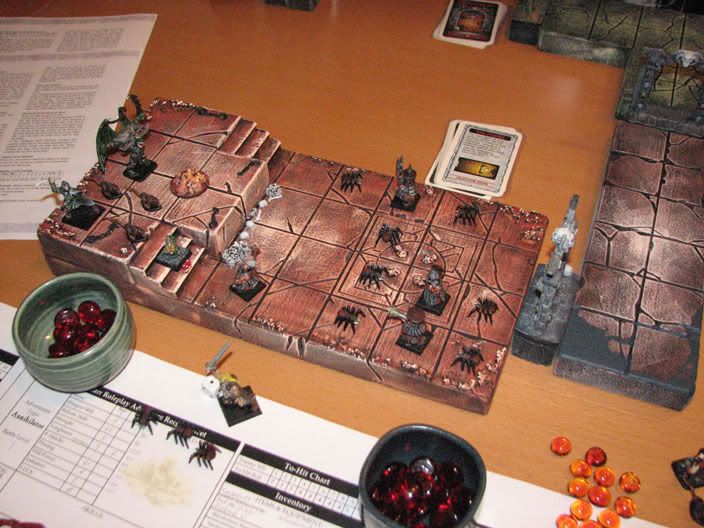
At the start of the next turn, yes, of course, another 1 for Power and another Unexpected Event and it’s an ‘event’ as opposed to Monsters. The Deamonsmith still shrugs off the Deamonic Axe’s attempts to possess him. The event results in the door ahead being locked and we don’t have lock pick tools or a key. We also have to draw another Event card immediately! Luckily it’s one that, again, might generate treasure, and it does. Each Adventurer gets an item of Treasure, however we now have to roll on the Lv1 Monster table twice, oh crap. 7 Giant Rats and 9 Skaven Stormvermin (again). Both Corridors are choked with enemies.

All of the party members are at half-Wounds or less, except the Annihilator who has only lost two right now.

Then begins a round of combat where everyone in the party misses their to-hit rolls, and since the Sorcerer is Levitating (remember it lasts 1 full turn, and he started it at the end of the Warrior phase, so he can’t attack in hand-to-hand). Instead the Sorcerer uses Hashut’s Dark Gift targeting himself and takes a -1 penalty to his Move for this Adventure. He regains 3 Wounds and managed to take out a Spider and a Rat and damage the Swordsman again, and then uses 4 more reserve to keep Levitating.

Everyone takes more damage during the Monster’s Phase, particularly from the Giant Rats, which do 2D6+2 Wounds. The high Toughness+armour is really keeping them on their feet. It’s good to be a Chaos Dwarf.

Then the tables turn, a 5 for Power! The Sorcerer waits and doesn’t do anything on his turn (Levitating). The Warrior takes out a Giant Rat and the Annihilator is now reloaded and blasts into the fray, hitting 4 Skaven. The Deamonsmith takes out the last remaining Swordsman who is on the Sorcerer, capturing him and making note of the ‘human slave’ in the “Captured” column of his sheet. (There have been a few other captures by various characters along the way, including a Skaven and a Goblin). Then the Sorcerer casts Minor Lifestealer on the Deamonsmith (who is down to 3 Wounds), clearing out two Giant Rats and another spider, and the Deamonsmith gets 3 Wounds back.

As the Spiders and Rats are starting to thin out the Skaven Stormvermin begin to advance.

The Sorceer rolls a 3 for Power, he has just enough reserve to cast Minor Lifestealer (3 for the turn, +1 for his Battle-level bonus, +last 3 reserve). The Sorcerer deals out some damage in hand-to-hand combat against one of he Skaven, and the rest of the party does well taking out the last of the Spiders and Rats.

The party, except the Annihilator, are all down to ~5 Wounds each. The Skaven Stormvermin all connect with their hits and roll 5’s and 6’s for Wounds (+4 Str), which gets through the Toughness and armour of everyone, and now we’re hurting. The Annihilator also gets hit for 7 Wounds as well. The Sorcerer uses his remaining reserve and also uses Hashut’s Dark gift (draining 2 from his Strength) to cast Minor Lifestealer twice, on himself and the Annihilator (who is in his line of sight, but the Warrior isn’t). It’s enough to take out one of the Skaven, and also heals a few Wounds back to the Sorcerer and the Annihilator.

Next turn, another bad roll, 2 Power for the turn. A few characters miss, but the Annihilator has already reloaded his blunderbuss and let’s a mighty blast tear into a group of Skaven in Corridor 1, he rolls 6 and adds the +6 bonus, those four Skaven are out of there!

By the time the last few Skaven are up, they’re ones that haven’t seen action or been hit yet and the Sorcerer gets hit, he’s down to 2 Wounds. Using Hashut’s Dark Gift he uses his Toughness, taking him down to 1 for the rest of the Adventure. Crap, how he has got to be kept out of hand-to-hand combat!

On the next turn the Sorcerer gets 4 for Power, but as he has no reserve Power he can’t use it except to Levitate. The Warrior takes a Skaven prisoner and Annihilator uses the axe blade mounted below the barrel of the blunderbuss to attack a Skaven - a to-hit roll of 6! Nice, his brute strength kicks in and he gets to roll an extra 1D6 damage… but it also means that he can’t “capture” the Skaven as he’s hit too hard. Watching the Skaven’s skull split open was satisfying enough. The Deamonsmith also rolls a 6, and rolls 3D6 damage, discarding the lowest roll, which is also enough to kill on of the Skaven.

There’s still a Skaven left on the Sorcerer, since he could easily kill the Sorcerer. The Sorcerer makes a preemptive strike and uses Hashut’s Dark gift, taking him down to 1 Move for the rest of the Adventure. Hell’s teeth! He regains 3 Wounds (Magic Resistance hasn’t caused a problem yet), and it kills the Skaven.

There’s been loads of Monsters and Events, so there’s a solid round of Treasure drawing - Warrior gets 230 Gold, and other Adventurers get items of Treasure not usable by Chaos Dwarfs, although they’re all worth 200 Gold or more if sold.

As the door ahead is blocked there’s nowhere else to go but back the way we came and restart the Adventure again (possibly arguing that there’s another way in to the High Pass Dungeon to reach the Barbarian Lord). But at 1 Move for the Sorcerer, it’s going to be painful.  All I can think of is that I’ll have to roll the Power/Event die once for EVERY square all the way back to the Dungeon entrance.

Without wasting time we start moving back the way we came, with everyone down to 5 Wounds or less. The Sorcerer also sends out the Lamp Slave. I figured that the Slave at least takes up a space on the board and if I keep him and the other Adventurers adjacent the Sorcerer it’ll protect him if Monsters show up. As they walk the Annihilator and the Sorcerer are each given the Warrior’s two pieces of Stone Bread. The Sorcerer has to skip moving for a turn to eat it, but it’s vital!

Guard Room (backtracking)

Surprisingly the party makes it more than half way (~10+ turns and an equivalent number of changes to get a 1). Then it happens, a 1 for Power. As has been the trend, the Deamonsmith does not succumb to possession by his Deamonic axe. The Event card reveals Monsters and we face 1 Minotaur, who is on the Sorcerer. Oh, Hell NO! Everyone takes a shot at him and we get him down a few Wounds. The Sorcerer doesn’t have much choice as he’s only got 1 Toughness. He uses Hashut’s Dark Gift, draining his starting Wounds number by 5 for the rest of the Adventure (I’m doubtful he’ll be able to get back up that high again for him to notice anyway). He takes 2 off the Minotaur and heals 2 (sill no Magic Resistance interference) and then does it again, taking another 2 off his max Wounds, and takes another 2 off the Minotaur, healing as many. The Sorcerer’s Wounds for the rest of the Adventure are now 8! Now I’m about ready to just give up and let the Minotaur have at 'er.

On the Minotaur’s turn he misses with his first attack, and the second one hits. It’s a low roll luckily, but damn, I forgot how much of a difference 1 Toughness makes! Ouch. He Sorcerer is down to 2 Wounds. Another Hashut’s Dark Gift, and another 1D6 Wounds off his max bring him down to 5 Wounds. Still he only gets 2 Wounds off the Minotaur and healed back to himself.

Next turn the Sorcerer has 3 Power. The Warrior misses wonderfully. The Annihilator takes off a few Wounds, and like the stellar performance of the Warrior, the Deamonsmith misses as well.

Now comes the Sorcerer’s choice: Hashut’s Dark Gift. His Move, Strength, Toughness and Initiative are all at 1, and his max Wounds at 5. Using Hashut’s Dark Gift drains -1 Move, -1D3 Strength/Toughness or Initiative, or -1D6 Wounds. And if the stat falls to zero there’s three penalties:

1) Hashut’s Dark Gift can’t be used again

2) the stat that falls to zero is adjusted back up to 1 for the rest of the Adventure and a PERMANENT penalty of -1 is applied to that stat (-1D3 if it’s Wounds that go to zero because of the Dark Gift).

3) The Sorcerer has to roll on the Sorcerer Transformation Table.

To Hell with it, using Initiative the Sorcerer uses Hashut’s Dark Gift - The Minotaur has 3 left, and Minor Lifestealer could kill him, but Levitate is guaranteed, so the Sorcerer Levitates. Hashut’s Dark Gift can’t be used again, his Init is 1 (max is now 3, down from 4) and he has to roll on the Transformation table. Could be so-so or it could be bad!

Transformation - Iron Hard Skin, although the Sorcerer thinks his body is beginning ot turn to stone it’s just his skin hardening, which is uncomfortable but not painful and doesn’t hinder movement. What’s more he permanently gains +1T. Wow. Lucky!! Max Toughness goes up to 5 and his current Toughness goes from 1 to 2 for the rest of the Adventure.

At the start of the next turn the Power die comes up as a 5. The Annihilator ultimately hits the Minotaur with a to-hit roll of 6, allowing him to inflict 2D6+Str(3) damage using the axe blade mounted to his blunderbuss.

The Annihilator draws a Chaos Dwarf Treasure - Banner of Slavery, which lets any Slaves accompanying the party who are on the current board section re-roll failed Psychology tests. Not bad, but not immediately useful!

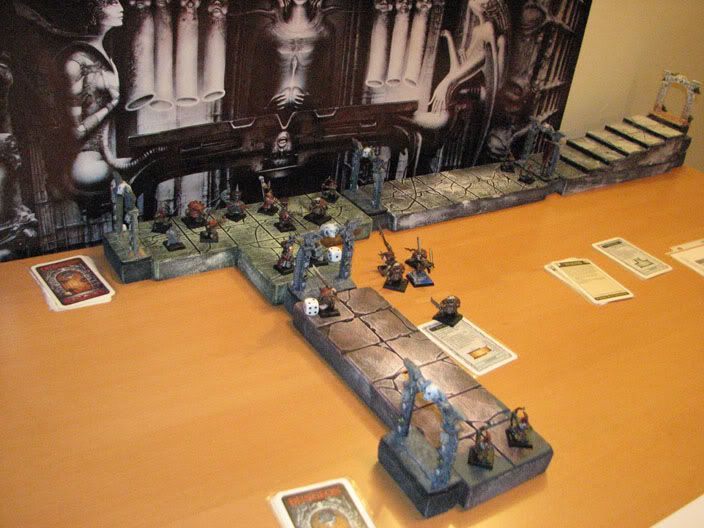
Corner Corridor (backtracking)

After many more rolls the party finally makes it on to the corner board section and the exit is in sight for the Warrior and Annihilator, bringing up the rear is the Sorcerer, Lamp Slave and Deamonsmith. We made it… we can go back to civilization and then come back when we’re fully healed!

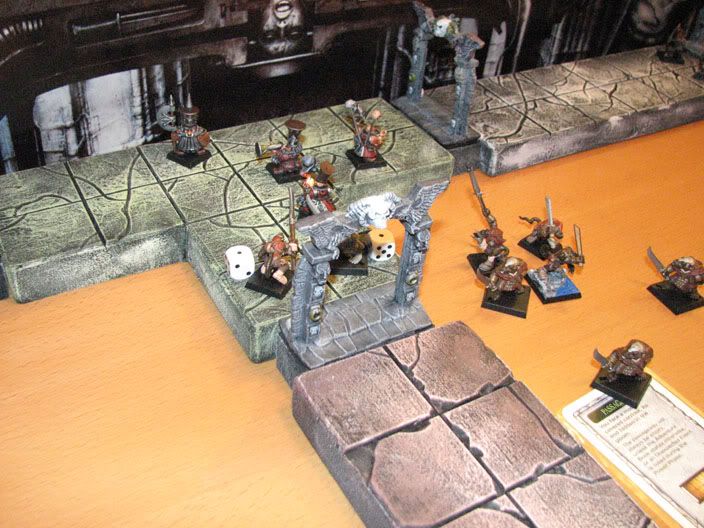
Rolling for Power … a 1! NOOOOOOO. The Deamonsmith just laughs at the tormented deamon entombed within his prized axe, but the Portcullis slams shut behind us! Then another event is drawn immediately, which turns out to be a dying Orc riddled with Arrows. We opt to leave him where he is and just watch him die instead of try attacking. It’s uncanny, but on his body we find the key to the locked door at the other end of the Dungeon, but the portcullis is in the way now! Luckily that’s it for events.

The next few turns go by and the Adventurers make a path for the Sorcerer who gets two spaces from the door.

A 1 for Power! Jeez Louise! The Deamonsmith is starting to sweat as he’s been lucky not to roll any 1’s. He’s standing beside the Sorcerer and if he’s possessed by his axe now there won’t be any laughing as he’ll automatically strike the closest units… and that’ll be it for the Sorcerer. Picking up the die with trepidation it’s rolled… a 2. By the skin of his teeth, he’s OK! Then the Event - Monsters, and like before it’s a replacement entry for the Monster table: 1D6 Elves of Loren Forest. Gladly, it’s just 1 Elf with a bow, who is targeting the Annihilator, so he’s placed as far from anyone as possible but still within sight of his target, which puts him on the board section this side of the Portcullis. We’re having none of it. The Annihilator lets another blast rip from his blunderbuss, it hits the filthy Elf for 12 Wounds! After Toughness deduction he’s got 4 left and the Deamonsmith moves in and captures the Elf! Good catch, they fetch a lot of Gold at the slave market if I decide to sell him.

The Sorcerer was up for Treasure and got a Blade of Leaping Copper (+1 Attack),… not usable by Chaos Dwarfs but it’ll be sold for its Gold value.

On the following turn the Power die was a 4, and the party managed to make it out of the Dungeon.

-±±±±±±±±±±±±±±±±±±±±±±±±±±±±±±

The Annihilator was by far the biggest “winner” in this mission. Mostly due to lucky die rolls and some good take-downs. He had 1460 Gold by the end of it, not counting ~500 Gold in Treasure. After him was the Sorcerer (~1100 Gold) then the Warrior (980 Gold) and the Deamonsmith (720 Gold). The best haul of slaves was the Warrior who captured 5 (the max that can be caught at Lv.s 1, 2 and 3), and then was the Sorcerer and Annihilator. The Deamonsmith only had the Elf, but they make good slaves later on or can be sold for 200 Gold, due to their rarity.

As the party journeyed across the countryside to Zharr Grungron Ankor they encountered a few Hazards, including a blizzard, where unfortunately a number of slaves froze to death, then Warrior’s backpack tore open and he lost all of his Gold. And finally the party came upon a small village that was hit by hard times and they took the opportunity to pillage and capture more slaves. And unfortunately the Deamonsmith was struck by lightning and it destroyed his Scale Mail armour and also burned off his clothes and boots (which he’ll have to re-purchase by selling an item of Treasure and spending all the Gold he got in the first Dungeon). The Warrior and Deamonsmith both caught 3 humans, while the Sorcerer and Annihilator didn’t catch any. In the end they made it back to Zharr Grungron Ankor, their home-city, where they’ll stock up on provisions and buy armour, etc. before heading back out to the High Pass Dungeons to find this elusive Barbarian Lord who has been interfering with the Chaos Dwarf trade routes!

So overall, it’s about average for a Warhammer Quest first mission. Mostly down to luck and things like that. It wasn’t impossible and remains a good challenge through out. The Sorcerer was powerful, but on the whole it wasn’t really any more powerful than the Wizard is at times at low levels. Thematically the Sorcerer is supposed to be an elite within Dawi Zharr society so he’s not supposed to be exactly equivalent to the other Adventurers. While the party had higher Wounds and Toughness and could do a tiny bit more damage than a group of regular Adventurers, they weren’t sweeping enemies off the board with every hit. The Armour and Wounds seemed fitting for the tanks that they are, and it’s vital they have higher Wounds and Toughness/armour because it’s very difficult for them to heal. Furthermore, it’s obvious that there’s a serious lack if Treasure that can be used by Chaos Dwarfs, but that’s not necessarily a bad thing. The Chaos Warrior character has a similar problem. His power derived from Chaos is off-set by the fact that a lot of magical items just stop responding when Chaotic characters pick them up! So while normally a group of dungeon explorers would be finding great stuff and equipping it, making themselves hit harder, etc. the Chaos Dwarfs aren’t ever going to be as lucky with every treasure find.

As for the adventure itself: The turning point was when the party got caught in the corridors and had Unexpected Event after Unexpected Event, that killed us. I’m not sure they could have made it through even if the doorway hadn’t been locked.  In all honesty it’s just pure luck that the party made it out after we turned around, what with the Sorcerer moving only 1 square per turn, there were 22 squares to the exit and he got all the way to the last board section, ~18 spaces with only 1 Unexpected Event, and if I’ve done my math right, there’s only a 3.76% chance of doing that.

In any event, it’ll be interesting to take the same group through a few more Adventures as the first one hasn’t been completed yet and there’s 3 introductory Adventures in total.

Stay posted for updates over the next month or so.

~N

Khan!:

Interesting report!  I’m glad you posted your rules, as I have been curious about how you would go about doing the Dawi Zharr.

I was thinking about how you allow the Chaos Dwarf characters to have the same damage rule for players as they do for monsters (ie 6 to hit adds +d6 damage).  I’m not sure it’s a good idea. If the Chaos Dwarfs are playing with non CD characters then it seems somewhat unbalanced at BL1 - I was thinking the same thing about the CD Warrior and his starting Strength of 6.  

However, in parties of all CDs it seems ok - particularly if (and I haven’t read this far in your book yet) healing is going to be a big problem.  It makes sense that the CDs will have to clear rooms faster if they’re going to make it through the dungeon with little or no healing.  

As for treasure, my WHQ group is all about it.  One of the serious problems we’ve encountered with the game is that the characters who are limited in the treasures they can use suffer at higher Battle Levels.  For example, as you mentioned, the Chaos Warrior, who has gobs of armour on his gifts table (mostly helmets, bizarrely) and very few decent weapons.  At higher levels he soaks up a lot of damage, but isn’t earning any gold because the wizard or the characters with weapons which add damage dice, etc are wiping the floor with everything (CW damage dealing is limited to extra S and one use/adventure items, yes?).  Similarly, the best a Warrior Priest for instance can ever hope for is the Hammer of Sigmar, which is not nearly as effective as the two or three swords that add +2d6 damage with every strike (and have other properties too).

Anyways, the point is that limiting the amount of treasure that characters can use has been, in my experience, kind of problematic.  That said, if every character in the party has the same limitation, then it’s not so bad.

Oh and my experiences have been playing without a GM, which makes a difference too I suspect.

Nicodemus:

Khan! Thanks for reading the comments over and your feedback.  I’ll try to go through things as best I can - keeping in mind that I’m still open to some rules changes.

I was thinking about how you allow the Chaos Dwarf characters to have the same damage rule for players as they do for monsters (ie 6 to hit adds +d6 damage).  I’m not sure it’s a good idea.  If the Chaos Dwarfs are playing with non CD characters then it seems somewhat unbalanced at BL1 - I was thinking the same thing about the CD Warrior and his starting Strength of 6.  

Khan!
I gave this some thought very early on. Here’s some of the thinking behind it:

1. As the Chaos Dwarfs are listed as “Monsters” in the Roleplay book for the core game (p 97 and 98) it lists the Chaos Dwarf Warrior type and Champion as getting an extra damage die on a to-hit roll on 6 (or 5+ for Champion).  Early-on I tried to stick with the basic entries for these characters as best I could and decided I liked this idea for a player characters.  So I’ll fully admit it was a personal choice to include it (justifications below in 2 and 3)

2. Being servants of Chaos (Hashut) I wanted a feel that the characters are imbued with chaotic powers which wax and wane, and sometimes their dark gifts will let them strike harder… so keeping in-line with the Chaos feel to them.

3. I also wanted to keep all the characters more or less the same starting out, so I gave them all the +1D6 damage on a to-hit roll of 6.

With regards to the Warrior’s Strength, his Strength is still 3, it’s just that his starting weapon, the Ruinous Axe, gives him a double strength bonus when he strikes, crazy good item, but it’s based off of an existing item of Treasure in the core game Roleplay book, so it’s not without precedent… I thought the Chaos Dwarfs being greedy and great hoarders would probably all have prized ancestral relics and artifacts like this tucked away.
However, in parties of all CDs it seems ok - particularly if (and I haven’t read this far in your book yet) healing is going to be a big problem.  It makes sense that the CDs will have to clear rooms faster if they’re going to make it through the dungeon with little or no healing.  

Khan!
Yes, mixed parties make the Chaos Dwarfs seem a little too good at low levels.  In all CD groups it does work fine.  This was a little intentional - the lure of Chaos and of being a servant of Hashut.  Healing is going to be a massive issue throughout at all Battle-levels.  They need to be heavy hitters and have maxed-out armour.  If a Wizard was combined with them they might seem unstoppable, but I tried to address this early on in the rules on mixed parties and stressed that it would be highly unusual for Chaos Dwarfs to adventure with any who are not their own kind.

Over the course of many games and increasing Battle-levels, the continued lack of healing options seemed to make the extra damage dice they receive  only a second-rate compensation.  Keep in mind too, their Magic Resistance hampers just about all healing effects as well so as they go up in levels their resistance can increase, making them even more difficult to heal.  The extra damage they do may seem like a heavy price for no healing later on…  but we haven’t play tested enough yet to really feel the hurt from this.  
As for treasure, my WHQ group is all about it.  One of the serious problems we’ve encountered with the game is that the characters who are limited in the treasures they can use suffer at higher Battle Levels.  For example, as you mentioned, the Chaos Warrior, who has gobs of armour on his gifts table (mostly helmets, bizarrely) and very few decent weapons.  At higher levels he soaks up a lot of damage, but isn’t earning any gold because the wizard or the characters with weapons which add damage dice, etc are wiping the floor with everything (CW damage dealing is limited to extra S and one use/adventure items, yes?).  

Khan!
Yes, treasure was a big issue in the last play test session (above).  Being used to playing with the usual Warriors who can use most things (or can trade with others in the party) I still had the misconception that after a few battles and lucky Treasure card draws that we’d have a few items to help us out.  It didn’t go that way at all!  Most things were only usable for their gold value later on.  This meant that when normal parties are half way through a dungeon and might each have some useful buff or get-out-of-jail free card the Chaos Dwarfs still had to rely on what they came into the dungeon with, brute strength and some abilities like Magic Resistance and hatred for Orcs, etc.
Anyways, the point is that limiting the amount of treasure that characters can use has been, in my experience, kind of problematic.  That said, if every character in the party has the same limitation, then it’s not so bad.

Khan!
I really tried to stick with the treasure limitations of:

a.) they’re dwarfs, so I kept the “Dwarf”-usable items in mind.

b.) they’re servants of Chaos (Hashut) and I therefore went to the Chaos Warrior’s profile for some guidance on how things ought to work.
Oh and my experiences have been playing without a GM, which makes a difference too I suspect.

Khan!
We’ve never used a GM either.  I suppose I function in a pseudo-GM capacity as I know the rules best, however I always recruit players so that someone is in charge of drawing Dungeon cards and dungeon setup, someone else is in charge of Events and Monster tables and someone else is in charge of keeping track of who drew the last treasure card as well as on-going stat bonuses and data on Monster (like magic weapons, how much Tomb Rot they do, etc.).   Anyway, what I’m saying is, we don’t use a GM either and the play testing went alright.

After thinking about your comments on how much damage is dealt I’ve made a small correction to the rules at higher Battle-levels, at BL1-4 (when they have 1 damage die) they get +1D6 on a to-hit roll of 6+.  Previously they got that bonus on a roll of 5+ at BL5-10… but this meant that they could be doing 4D6 damage at levels 9 and 10 when they get their third damage die.  I’ve now capped the bonus so that at levels 5-8 they get the +1D6 on a to-hit roll of 5+, but no extra damage bonus from to-hit rolls at levels 9 and 10.

It’s a very abstract concept but I’d be interested in visualizing the power curves for each of the character types, for example a Chaos Dwarf Warrior versus an Elf or Dwarf.  Once you factor in abilities, and probabilities for breaking pinning and dodge, and how more-or-less important each ability is it would be difficult to work out… but in my mind the Chaos Dwarfs are a bit more powerful at Battle-level 1 compared to any of the other characters (besides maybe the Ogre or Chaos Warrior), but I think some of the other characters, on average, would match-up or overtake the Chaos Dwarf characters at higher levels.  And speaking of such things, the Chaos Dwarf Warrior and the Chaos Dwarf Deamonsmith both start with Scale Mail armour, quite expensive, so if one were to convert starting equipment, weapons and armour into a Gold value I think the Chaos Dwarfs overall would tip the scales… but again, they’re Dwarfs through and through and we might expect that they’d have expensive equipment and money to spend!  The Annihilator totally blows everyone out of the water, however, if one were to factor the cost of purchasing a blunderbuss as well as the upgrades to it that he starts with.

I think in comparison with regular characters, the Chaos Dwarfs are similar to Chaos Warriors, in that they seem powerful at low levels and there’s an allure that the path of Chaos has some great riches and rewards.

More play testing tonight and Monday night.  I’ll try to get some pics of our session so that I can post a better play testing update with visuals ;)  Of course all the rules are still subject to change at this stage too!!

Thanks again for reading through and going over some of the rules - I apologize for all of the typos and bad grammar in the Roleplay book at the moment. I’ve been working like a deamon to get it all typed out and have just thrown caution to the wind until I have time to go back over it.  Play testing has also been a good time to catch little mistakes too :hat off

~N

Khan!:

Cheers, thank you for doing all this interesting work! I see the logic behind your choices for CDs. It could be a bit ironic if, in playtesting, the disadvantages in treasure and healing outweigh the “unbalancing” advantages in damage output.

Your limitation on the extra dice for BL 9-10 makes sense from a balance standpoint, but what would be the background justification? Maybe that’s not important, but it does seem a little odd to have this particular advantage disappear at the highest levels (even though, you’re quite right, base 4d6 damage is a lot)…

I think I’ll have to have a go with your rules in December when I’m back in close proximity to my WHQ gear (as opposed to sitting in my armchair half a continent away).

Have you taken any characters all the way to BL 10 without a GM? My group and I have gotten to BL 5 or 6, and then start to find that the games get a little ‘grindy,’ especially since at this stage everyone usually has good treasure and the treasure tables in the Roleplay Book don’t necessarily scale well for higher levels. So I guess the question is, how does one, in your experience, keep the higher level experience interesting without introducing the plot elements etc of a GM?

Nicodemus:

Your limitation on the extra dice for BL 9-10 makes sense from a balance standpoint, but what would be the background justification?  Maybe that's not important, but it does seem a little odd to have this particular advantage disappear at the highest levels (even though, you're quite right, base 4d6 damage is a lot)...

Khan!
A lot of Monsters have this extra bonus damage disappear later on as well, so it usually looks like at lower Monster levels a high to-hit roll lets them access the extra damage die before they would normally get it (if you think of converting them to an actual Battle-level like the player characters).  So for example the Chaos Dwarfs on p97 of the Roleplay book get the +1D6 right away, so on a to-hit roll of 6 they do 2D6 instead of 1D6; the Champions also have it on a to-hit roll of 5+ I believe, giving them 3D6 instead of 2D6; and the Chaos Dwarf Hero is just always 3D6.
So that's part of the justification.  I think as well, the various races such as Dwarfs, Elves, humans, Skaven, Orcs, etc etc, including Chaos Dwarfs, are capped at 3D6 for normal damage unless there's magic weapons or other skill bonuses involved.  After realizing that my characters would be doing 4D6 as their base damage at levels 9 and 10 I decided this was not in keeping with WHQ.  I realize I've changed lots of things and changed some rules, but this was one of those things I decided not to mess with.
I think I'll have to have a go with your rules in December when I'm back in close proximity to my WHQ gear (as opposed to sitting in my armchair half a continent away).

Khan!
Excellent!! Definitely let me/us know how you do.  I'm expecting to have version/edition1 of the rules posted well before then and I'd like to know your impressions and what the experience was like.
Have you taken any characters all the way to BL 10 without a GM?  My group and I have gotten to BL 5 or 6, and then start to find that the games get a little 'grindy,' especially since at this stage everyone usually has good treasure and the treasure tables in the Roleplay Book don't necessarily scale well for higher levels.  So I guess the question is, how does one, in your experience, keep the higher level experience interesting without introducing the plot elements etc of a GM?

Khan!
We've got a couple of characters up to BL 10 without a GM.  For sure we found that things dragged a little at the intermediate levels as the power of the enemies and Monsters was below ours, so the game just compensates by throwing huge numbers of them at you.  That just tends to slow things down, in my opinion.  I'm not suggesting that I'll be changing the game in a significant enough manner to alter that aspect, but I am working on the "Monster" tables, and some entries for things like Chaos Dwarfs, Hobgoblins, Dark Elves, Chaos Warriors, etc. will be replaced with Empire Swordsmen, Wood Elves, Dwarfs, etc.  These alternate foes will only comprise a fraction of the possible enemies a party will face, but it does afford an opportunity to re-balance some enemies without just adding twice as many of them.  For example, an Empire Wizard and a couple of heavily armoured Empire Swordsmen could put up a better battle for a Battle-level 5-6 party than the same Necromancer and his hoard of undead the party faced of Battle-level 4.  Usually at intermediate levels the game just adds more enemies and/or gives them an extra magic item.  

I've been toying with a few ideas for higher Battle-level parties that would go into the Adventure Book (which would be totally separate from the introductory adventures included in the Roleplay book).  One thought is adding a pseudo-random element of traps, kind of similar to HeroQuest.

My other idea that's already been worked on a little in the Adventure Book is that the Chaos Dwarf Adventurers will have a 5-6 missions where they're racing against a group of regular Warriors (the WHQ Barbarian, Dwarf, Elf and Wizard), whose strength and abilities will be scaled to the current Battle-level of the party. They'll all be after some important treasure or information that's part of a larger plot woven into the Adventure Book.  So I'm hoping some mission-specific enemies such as these can be more easily customized for those intermediate Battle-level parties.  

Another idea was just putting in pre-requisites for some missions, such as the party having an average Battle-level of 5, for example - then having custom Monster tables for some of those missions.  Pillaging a village within the Empire would suit such a custom "monster" table as the only foes would be peasants, guards and the like which can be tailor-made to be a challenge for a Battle-level 5 group.

Will keep you posted on our gaming session tonight...
~N

Khan!:

Having a rival group of “goody” adventurers sounds pretty cool. Now I’m even trying to think of how that could be implemented!

I look forward to reading about the next session!

Nicodemus:

Follow-up play test coming soon (with turn-by-turn pics), for now a quick summary of the four Chaos Dwarf games played:

Thus far the play testing has been satisfactory (in my opinion). Keeping in mind that regular Warhammer Quest itself (using the standard core game characters and Monsters) is incredibly difficult as it is, and over all our gaming group’s has had a ~50-60% survival rate for a first adventure (that number is a guess, but it’s definitely not more than 50%).  In the core game, as long as the Wizard has a decent healing spell starting out, and once a party gets a few items of treasure to help boost their attacks and defence their chances of survival significantly increase.

So from the Chaos Dwarf play testing, here is a summary:

Game 1 (2 players, each with two Chaos Dwarf Adventurers): Slain at approximately the half-way mark in the High Pass Dungeons of the Barbarian Lord. Just bad luck. Not uncommon in any first Warhammer Quest Adventure.

Game 2 (1 player, all four Adventurers): Got half way through the High Pass Dungeon, blocked by a locked door and had some serious bad luck with Unexpected Events. Had to back-track. When they reached the first room the rest of the Dungeon was blocked by the Portcullis. They didn’t find a lot of Treasure useful to Chaos Dwarfs, mostly things they would re-sell. The Treasure they did get that was useful was a Potion of Strength, two sets of Skull Bears to be worn in their beards (fluke that two of them got this, and it’s only useful in Settlements) and a Banner of Slavery (only useful if Slaves are present, which they are not early-on in the game). Adventurers took their Gold and Treasure and used it to buy a few things like shields, High Hats (count as helmets), and Stonebread for everyone.

Game 3 (2 players, each with two Chaos Dwarf Adventurers): Slain in the fourth room, which was an Unexpected Event that led to a separate Objective Room with treasure in it. The Greedy Dwarfs quickly met their match at the hands of several Centaurs and Minotaurs (and unfortunately some very hasty hit and damage rolling for one of the Monsters on the Sorcerer before the other player could declare that he was going to cast Lifestealer). Bad luck on the part of getting tough Monsters to face, but we were greedy, and the entire party was killed within one turn after the Sorcerer was slain by a hasty Monster hit. In my books you have to declare things like this before the to-hit roll is made, because technically speaking: I could have let myself cheat and decide after I saw that the Monster missed that I’d continue waiting to heal myself, or see that he successfully hit and then healed myself.  Once they’d rolled to hit the application of damage is a continuous part of that action.

Game 4 (1 player, all four Adventurers): Same group of Adventurers from Game 2 above and accounted in detail below. Quick summary: A second attempt at the High Pass Dungeon (assuming there was an alternate entrance to complete this Adventure as the previous paths were blocked). The party’s extra few points of armour really paid off, partly due to some lucky rolls on the Monster Table which generated foes who could only hit for 1-4 Wounds at most, once the hits got through the Adventurer’s Toughness. They were also lucky to continually get items of Treasure that were usable immediately, such as incredibly good armour and items (including one that lets the Sorcerer re-roll the Event/Power die, thus avoiding one Unexpected event). This might have been enough for the party to survive anyway, but the party was also very lucky to encounter a T-junction early on and chose the path which took them to the Objective Room as the 6th Dungeon board section (by this time Lifestealer ensured that all but one of the party was at full Wounds). They dispatched the Barbarian Lord and ensured that the Dawi Zharr trade route into the Northlands would remain open.

.

.

.

.

Game 4…


Stay tuned… it’s going to take a while to organize!!


~N

Xander:

Great stuff dude! I was a big HeroQuest fan, but never played WHQ.

When the rules are done, be sure to let me know and I will put them on the main site. :slight_smile:

Nicodemus:

Chaos Dwarf Introductory Adventure #1 (second attempt)

So to save you reading the already lengthy play test of the new rules above - The first mission with this group of Adventurers did not go so well.  They survived, but by the skin of their teeth, so-to-speak.  They got half way and then encountered a locked door, and it being their first mission they didn’t yet have any tools or other means of opening it, so they had to leave.  They also got soundly trounced, but did manage to kill everything, but only barely.

After escaping they made their way back to the hidden city of Zharr Grungron Ankor below the Black Mountains.  There they sold some Treasure they found and purchased a few armour upgrades, so this re-play of Adventure 1 might seem a little easier as they all have 1 or more more Toughness above the normal starting characters.

Adventure 1: Trade Routes

In brief: Far in the frozen Northlands are a group of marauding North men who worship the Chaos Gods and wish to start trade relations with Zharr Grungron Ankor for weapons and armour in exchange for slaves and precious metals, however, only a few of their scouts and traders can get through the valley that leads out of the mountains.  The problem is that the narrow valley leads through the lands of a rival barbarian horde whose leader and Lord is loosely allied with Kislev, and has sworn that he and his barbarian hordes are enemies of all who follow the path of Chaos.

The Adventurers are to travel to the frozen North of Kislev, and into the High Pass Dungeons.  Within the High Pass Dungeons is the Barbarian Lord who commands over the entire valley.  He must be slain as an example to his tribe, only then can the trade routes be opened.  The Conclave also reminds the Adventurers that this will be a most opportune time to bring slaves back as well �?" as fitting examples of the horde�?Ts defiance and stubbornness in the face of the Dawi Zharr empire!


Entry Point - Stairway


The Sorcerer rolls a 2 for Power. The Sorcerer has the Snotling Lamp Slave “Hiding with Master” (and therefore placed on his record sheet for now).  As the Sorcerer is the party leader he goes first, followed by the Warrior, Annihilator (w/blunderbuss) and the Deamonsmith. The party enters the dungeon, making their way to the middle of the board section.

On the following turn, still no Unexpected Events, and the group reaches the end of the board section.  


At the end of the turn during the Exploration Phase, because there are no Monsters on the current board section the Sorcerer can reveal the next Dungeon card.

Dungeon room 2 - Corridor

At the start of the next turn a 1 for Power - An Unexpected Event.


Drawing an Event card reveals Monsters (as opposed to a trap or encounter).  Because we’re using the Monster Tables we ignore the specific Monsters on the Event card and instead roll D66 on the Level 1 Monster Table.  


The D66 roll is 5,3 - 2D6 Giant Spiders.  Luckily there are only four of them, and according to the one-on-one rule of Monster placement in the core game each Adventurer has a Giant Spider adjacent to them and will be attacking them.  As the Monsters are placed during the Power Phase of the turn the Adventurers may attack on their turn, followed by the Monsters.


The Giant Spiders have a Weapon Skill of 2, and each member of the party only needs a 3+ for a successful to-hit roll.  


Giant Spiders have 2 Toughness and only 1 Wound, and luckily each Adventurer takes out his foe and gets a Deathblow, but they miss on the follow-through.  Since each character inflicts a minimum of 1D6+3 Wounds (similar to most of the core WHQ characters) if they strike it’s not surprising that there aren’t any spiders left.


With the group of Giant Spiders slain the Deamonsmith was next up for Treasure. He ended up rolling on the Weapons and Armour subtable in the core WHQ Roleplay book (so it’s the kind of treasure the non-Chaos Dwarf characters can easily use, but not necessarily usable by Dawi Zharr).  The Deamonsmith rolls 6,3 - Circlet of Wrath.  


It’s something that Chaos Dwarfs can use, luckily but it’s a mixed bag.  Once per Adventure there’s a chance the wearer can get double his number of attacks, and he can’t be pinned, but there’s a 16.7% chance that he will gain these bonuses but fly into a rage and attack the nearest ally instead!  My thought - if he’s totally surrounded by enemies or blocked from getting to an ally, it’s a no-brainer to use it!

The party makes their way up to the end of the next board section without any altercations and the next board section is revealed to be a T-junction.

Note that at a T-junction the Dungeon deck is also divided into two, one for each doorway, by alternating the dealing of cards from the bottom of the current deck into two piles (as per core game rules).


At the start of the next turn the Sorcerer once again rolls a 1 for Power, indicating that an Unexpected Event has occurred.  This time there are 6 Ghouls, who have Fear 4 and Break.


The ensuing battle goes well, even though all but the Annihilator and Deamonsmith are at -1 to-hit due to Fear.  After two rounds of combat taking out some Ghouls they still haven’t broken and ran, but luckily the Warrior rolls a 6 to-hit.  For Chaos Dwarfs their brute strength and might imbued by Chaos gives them a damage bonus on a to-hit roll of 6 - in this case the Warrior attacks with his Ruinous Axe (special starting weapon), and instead of dealing 1D6 + double his Strength (Ruinous Axe confers the double Strength bonus to him) he rolls 2D6+6! Cutting town a Ghoul easily in one hit and getting the Deathblow, cutting through the neighbouring Ghoul as well.


When they are down to the last Ghoul he finally Breaks, leaving the party.  Luckily the Deamonsmith was the only one damaged, and it was only 1 Wound.

The Warrior is up for Treasure and draws another Circlet of Wrath like the Deamonsmith had done (a big fluke considering the number of possible treasures available).


On the following turn, again the Sorcerer rolls a 1 for Power, and again Monsters are generated.  


This time the core game Level 1 Monster Table indicates Hobgoblins, however, the Chaos Dwarf expansion does not allow Hobgoblins as enemies (they’re busy toiling for their Masters elsewhere), and instead the party rolls on a subtable specific to the Chaos Dwarf expansion.  The result: 1D6 Worlds Edge Mountain Dwarfs.  Only two are generated and rolling 1D4 to determine who they are targeting it is determined that the Warrior and Sorcerer are facing the Dawi Skruff! Off with their beards!!.


The Dwarfs are somewhat tougher than many other foes on the Level 1 Monster Table at this stage, but still not as bad as facing a Minotaur.  The Annihilator also has line-of-sight to the Dwarfs (remember that models do not block line-of-sight as it is assumed that they are constantly moving within their space), and fires off a blast from the Blunderbuss.  After a few rounds of combat with the Sorcerer and Warrior both focusing on one opponent they manage to whittle the Dwarfs down.  Unfortunately the Dwarfs’ Gold value for killing them is too high to allow the Adventurer’s to attempt capturing them as slaves (enemy Gold value is used as a measure of how difficult they are to subdue).  The Gold value limit for capturing is 100x the Adventurer’s current Battle-level, so anything worth 100 Gold or less can be captured and enslaved.  


Once the Dwarfs are slain the Annihilator is up for Treasure and gets to roll on the new Chaos and Chaos Dwarf-specific Treasure table in the Roleplay book.  He gets a Chalice of Darkness which allows the Sorcerer to re-roll the Power Die once per Adventure, possibly avoiding an Unexpected event in the process.  As they are adjacent and neither Adventurer is pinned the Annihilator gives it to the Sorcerer. The party then moves into the T-junction room.  

Dungeon room 3 - T-junction

Realizing that one doorway has 4 Dungeon cards and the other has 5, it is decided that the Dawi Zharr can do a little dungeon crafting.

They were given a map of the High Pass Dungeon at the start of the Adventure by the Sorcerer Conclave of Zharr Grungron Ankor.  There’s a 33% chance that the map the Dawi Zharr scouts made of this area is useless (rolling a 1 or 2 on 1D6), but if it turns out to be accurate (rolling 3+) the party can pick up the top 4 cards from a Dungeon deck, put one on the bottom and the rest back in any order.

Moving up to reveal the next board section from the T-junction, the 5-Dungeon card deck reveals the next room is another Corridor! We’re exceptionally lucky there haven’t been any Dungeon rooms which guarantee an Event!

It’s at this stage the High Pass Dungeon Map is brought out and examined.  The roll is a 4, the map is accurate, and looking at the remaining 4 cards reveals a T-junction and the Objective Room as well as two Dungeon Rooms.


Putting the T-junction on the bottom, and leaving the Objective Room on top, the party is ready to proceed to a quick finish (or so they think!).


Rolling for Power on the next turn - a 1!  Drawing an Event card reveals an Encounter.  As the Event cards are written for the core game party (which are designed to be good-guys, the situations are inappropriate for Chaos Dwarfs), the party rolls D66 on the new Event Table in the Chaos Dwarf Roleplay book.  The result - 6,3


Rolling for Treasure the party finds some insanely good stuff (except the Sorcerer):

Sorcerer - Finds Gold and gets to roll as many D6 as he likes, multiplying the result by 10, but if any 1’s come up he gets nothing. Rolling 5D6 the Sorcerer gets 180 Gold.

Deamonsmith - Chaos Armour, insanely good Treasure item, as good as Scale Mail, but also confers Magic Resistance 5+ (better than his starting MR of 6+) and it allows him to ignore blows each turn on a roll of 4, 5 or 6. (note that this will likely be changed to either 5+ or just a 6, as it occurs to me that 50% is too good for regular Treasure, maybe even too good for Objective Room Treasure.).

Warrior - Gauntlets of Bazhrakk the Cruel, which add +1 to his base Strength (excellent for him as his Ruinous Axe confers a double Strength bonus to hand-to-hand strikes), but on a to-hit roll of 1 he will strike an adjacent ally instead.

Annihilator - Stovepipe of Imperious Might (a superb High Hat) which confers the same armour bonus as a Helm and also gives him Ignore Pain 1 (letting him ignore the first 2 Wounds that make it through his Toughness and Armour).  (note that this will also likely be changed.  Maybe to Ignore Pain 1 at best, or to some other buff that’s not as over-powered).

Then the owners of the Treasure cache arrive, and it seems that two groups are laying claim to the treasure: 10 Skaven Clanrats, who are placed in hand-to-hand combat first according to the one-on-one rules and then 7 Goblin Archers accompanied by a Goblin Shaman.  As the archers are ranged they are placed as far away on the current board section as possible so they can attack or on an adjacent board section (there they are placed as far away as well).


As that all happened during the Power Phase the Adventurers now take their actions.  Unfortunately the Sorcerer and Warrior miss spectacularly against the Clanrats.  The Annihilator, long since having re-loaded his blunderbuss after having attacked the Dawi Skruff earlier can’t use it as he is pinned in combat with adjacent foes.  Using the axe blade mounted beneath the barrel of his blunderbuss (this is his starting weapon combination) he can still attack in hand-to-hand combat instead of shooting.  Wanting to clear some room so that he can re-position and give this filth a taste of Dawi Zharr black powder and molten lead, he attacks some of the Clanrats in the middle of the room.  With a lucky to-hit roll of 6 his brute strength increases his damage dice, inflicting 2D6+3 damage, which ended up being enough to kill the Skaven outright and getting a Deathblow.  The next hit struck and cleaved that sewer scum in two as well, carrying on the Deathblow into the next Skaven, hitting him too.  All in all, three Skaven were taken out by the Annihilator in one turn.  During the Monster phase the Goblin Shaman manages to slam the Sorcerer with a Fist of Gork spell, and only one other point of damage is inflicted on the party.


After another turn a few points of damage are dealt across the party by the Skaven and Goblins.  In general it’s tough for these Monsters to hurt the party as their Toughess+armour is quite high. During the Warrior Phase the Sorcerer and Warrior still can’t seem to get it together and miss entirely.  The Annihilator and Deamonsmith, however, manage to each kill a Skaven.  


After this another Skaven advances on the Annihilator, so unless the Annihilator can break pinning and move to a spot where’s he’s not pinned in hand-to-hand combat he’ll have to wait longer to fire his Blunderbuss.

On the following turn the Sorcerer rolls a 6 for Power, as he gets his die roll +1/Battle-level he has 7 for the turn (and 14 in reserve, as he starts our with 2D6+2 and amazingly got full Power initially).  The 7 Power is enough to cast Minor Lifestealer without burning reserve and he casts it on his turn. Targeting himself, hoping to clean out his adjacent foes, the 1D3 life drain isn’t enough to kill the Skaven.


After another Monster Phase which only inflicts a few Wounds, on the next turn the Sorcerer manages to Break pinning to assist the Annihilator, and instead of killing the Skaven, manages to capture him.  


Not surprisingly, the Warrior misses his to-hit roll and is getting a bad rep.  On the Annihilator’s turn he wheels around with his blunderbuss loaded for bear.  


After all this work a miss would be terrible - the roll, a 5, a successful hit on the 2x2 board section containing the Goblins and Skaven.  Rolling 1D6+6 for damage the blunderbuss inflicts 12 Wounds!  Rolling 1D3 to see how many turns he needs to re-load the Annihilator rolls a 2 - so 2 full turns to re-load his blunderbuss, during which time he may not switch weapons, but is allowed to attack with the axe blade mounted under the barrel if necessary.


The Deamonsmith moves in to take out the closest Goblin Archer that’s been pinging him with arrows for the last few turns, capturing him easily.  On the Monster’s turn the two Skaven move up and are pinned on the Sorcerer, and both attack, but miss!


On the next turn the Sorcerer (who still has managed not to roll another 1 for Power) kills a Skaven but misses on the Deathblow.  Finally the Warrior moves up and captures the remaining Skaven.  The Annihilator also moves into position on his turn to take out the ranged enemies further back in the dungeon.  At times like this a ranged Adventurer is important as the slow Move rate of the party makes catching up next to impossible!


With the closest enemies taken out there are still two other Goblin Archers at the far end of the Corridor leading to the Objective Room who have been firing on the party this whole time as well.  Now there’s a dilemma: The Sorcerer has the Lamp (carried by the Lamp Slave), and if any Adventurer is more than one board section away from the Lamp he is subject to being lost in the dark, and could be gone forever.  At this time the Sorcerer, instead of releasing the Snotling Lamp Slave onto the T-junction board and moving on ahead himself decides to stay where he is so that the party isn’t spread too thin if another Unexpected Event occurs!  The Warrior, however can advance onto the next Board section.

Dungeon room 4 - Corridor

After the Warrior Advances half-way the Annihilator decides to move back into the T-junction so consolidate the party, while still keeping the Goblin Archers within range of his blunderbuss.  Now the Sorcerer will be free to move ahead another board section.  The Goblin Archers only inflict a single Wound on the Sorcerer and none on the Warrior, while the two Archers who have the Annihilator within their sights both miss their mark.  On the following turn the Sorcerer moves up and then the Warrior closes ranks with the Goblin Archers and kills one of them, but missing the other on the Deathblow follow-through.


On the Annihilator’s turn he’s re-loaded and hits a 2x2 area containing the Goblin Archers, killing them both.  This time he’ll need 3 turns to re-load.  The Deamonsmith spends his turn bringing up the rear, as it’s difficult to maneuver in narrow corridors, especially when you go last in the turn sequence.  On the following turn the Sorcerer deploys the Lamp Slave to an adjacent space (planning to use the Snotling Lamp Slave’s ability to “Explore” the Dungeon during the Exploration Phase).  The Sorcerer strikes the Goblin Archer, but doesn’t inflict enough damage to kill him.  


The Sorcerer then immediately uses his Power for the turn (5+1) plus 1 reserve Power to cast Minor Lifestealer, targeting the Goblin adjacent himself and returns 1 Wound the Warrior (who happily failed his Magic Resistance 6+ roll, allowing the healing to be applied).  As there are no Monsters left on the Board section (and remembering that these Monsters were in response to an Event and therefore don’t generate additional Treasure) the Lamp Slave Explores the next Dungeon section during the Exploration Phase, revealing the Idol Chamber Objective Room.  After an additional turn everyone has caught up and the Annihilator needs two more turns to re-load.  Before entering the Objective Room and triggering the generation of “Monsters” the party skips two turns.  On the second turn the Sorcerer rolls a 1 for Power, but uses his Chalice of Darkness to re-roll, getting a 4 instead (die not shown).


Dungeon room 5 - Idol Chamber Objective Room

In keeping with Dawi Zharr mentality the party decided to send in the whelp carrying the Lamp first.  He has more Movement than the Chaos Dwarfs, Dodge 4+ and breaks pinning on 2+, and will only be attacked if there are no other Adventurers or their allies on the board section.


We’ve located the meddlesome Barbarian Lord and his tribesmen (and woman? HQ Barbarian Quest Pack anyone :wink: )


Then it occurs to the Sorcerer (and to me) that the Snotling Lamp Slave is excellently positioned to use as the locus for Minor Lifestealer, which will target units adjacent him…  Mwahahaha!!!


The Adventurers then begin moving into position.


And as the Annihilator moves up into position he gives the Barbarian Lord a taste of Hashut’s hot fiery breath… BOOM… 10 Wounds total, and after Toughness and armour deductions one of the Barbarians is removed and the other group of 3 are reeling the heat.  He’ll need 2 turns to reload.


The Deamonsmith moves from the corridor into position.  During the Monster’s Phase the Rat Catcher moves back and uses his ability to summon 1D3 Giant Rats (in this case 1) which must wait until next turn to take action.


The Barbarian Lord stays where he is (keeping his higher ground bonus of +1 to-hit), while one of the Barbarians moves on the Warrior and attacks, inflicting a few Wounds.  On the Sorcerer’s turn his Lamp Slave breaks pinning and moves to the stairs adjacent as many units as possible (Sorcerer will wait until the end of turn before casting Minor Lifestealer to save on reserve Power).  The Sorcerer stays put.  The Warrior engages the Barbarian and strikes for 10 Wounds, brining her down to 2 (after Toughness&armour deductions).  The Annihilator stays put and is reloading, preparing another blast.  The Deamonsmith moves up and manages to strike one of the adjacent Barbarians, killing him and getting a Deathblow, which carries on into the following Barbarian, killing him as well.


During the Monster’s Phase the Barbarian Lord moves to attack the Deamonsmith, and 1 of his his 2 attacks land, inflicting 2D6+4 Wounds, which removes 6 Wounds from the Deamosmith (as indicated by the bloody spatter of bead tokens across his record sheet). Unfortunately his Chaos Armour did not negate the blow.  The Giant Rat also moves around to attack the Deamonsmith but it luckily misses and is not killed during its suicidal Deathleap.


The remaining Barbarian charges the Sorcerer (we have a house rule for some instances where if a Monster is targeting a specific character they can break pinning on a roll of 6).  The Barbarian breaks pinning with the Deamonsmith and reaches the Sorcerer (pinning both the Sorcerer and the Annihilator, but luckily misses the Sorcerer.  The Rat Catcher summons 1 more Giant Rat.  The Sorcerer uses some reserve Power and casts Minor Lifestealer on targets adjacent the Snotling, which kills the Giant Rat adjacent the Deamonsmith and takes 2 Wounds off the Barbarian Lord also.  Unfortunately the Deamonsmith’s Magic Resistance kicks in and he isn’t healed.  

On the following turn the Sorcerer strikes the Barbarian for 1 damage, and the Warrior captures his Barbarian opponent.


The Sorcerer follows up using more reserve Power to cast Minor Lifestealer, taking Wounds the Barbarian Lord, and the Deamonsmith is healed for 2 Wounds.  The Sorcerer then uses Hashut’s Dark Gift, which drains 1 from his Initiative for the rest of the Adventure, and casts Minor Lifestealer again, taking Wounds from the Barbarian Lord and healing the Warrior to full Wounds.


The Annihilator can’t break pinning to use his blunderbuss and kills the Barbarian attacking the Sorcerer with a to-hit roll of 6.  The Deamonsmith, meanwhile misses the Barbarian Lord as he is at -1 to-hit.  

At the start of the Monster’s next turn the Barbarian Lord luckily misses the Deamonsmith twice(!) and the Rat Catcher summons 3 Giant Rats.  

On the following turn the Sorcerer rolls a 1 for Power. The Event reveals Monsters and this time it’s 10 Giant Spiders.


With no reserve Power left and a strong desire to finish off the Barbarian Lord quickly the Sorcerer callus upon Hashut to aid him.  Minor Lifestealer only does 1D3 Wounds, but it’s direct damage and is the perfect spell to use against 1-Wound foes.  Using Hashut’s Dark Gift and taking a -1 penalty to his Move characteristic for the rest of the Adventure, each Monster adjacent the Deamonsmith is hit for 1D3 Wounds, removing all of them from the board.


The Sorcerer then uses ashut’s Dark Gift again, applied to his Move characteristic (Move is now 1 for the rest of the Adventure) and drains 1D3 Wounds from all Monsters adjacent himself.


In hand-to-hand combat the Sorcerer kills one of the spiders between himself and the Warrior, and the Warrior also kills a single Spider.

The Annihilator, finally pinned and reloaded, fires his blunderbuss at the Rat Catcher in the back corner (we’ve been very lucky the Giant Rats haven’t posed more of a problem!).  His Ballistic Skill roll is successful and rolling for damage, again, maximum - 12 Wounds!  That clears all of them off the back 2x2 section.


On the Deamonsmith’s turn he slays the remaining Giant Spider easily to complete the Adventure.


-±±±±±±±±±±±±±±±±

Post-Dungeon journey back to Zharr Grungron Ankor.

Travel time was 3 weeks, requiring 3 rolls on the new Travel Hazards Table (which are essentially Chaos Dwarf versions of the Hazards in the core game).

Week 1 - The party located a chapel inside a cave in the mountains. After deciding to desecrate it they moved on without altercation.

Week 2 - Encountered a town which was heavily guarded by a night watch and we decided to avoid it.

Week 3 - The party game upon an Elf village that was ravaged by a fire. Taking advantage of the chaos and disarray the Adventurers looted and pillaged. The Warrior and Sorcerer both found some Gold. The Deamonsmith was able to find a cart that was suitable for use as a Slave Card (allowing him to capture more slave to bring back with him) and each of them managed to capture a number of Elf slaves.

They safely made it back to Zharr Grungron Ankor and await their next summons before the Sorcerer Conclave to learn how they might serve Hashut and the Dawi Zharr empire.

~N

Nicodemus:

If there are any interested parties here who would like to contribute to this project by reading through some text (looking for typos or things that don’t make sense) or better still, those who would like to play test, please send me a PM with how you would like to contribute - note that content and missions are complete.

The Roleplay Book is up to 137 pages and is nearing completion, and includes 3 introductory Adventures for the Chaos Dwarf party.

The Adventure Book is sitting at 50 pages (includes the bonus Hobgoblin Sneaky Git character) but it’s just a framework of story lines and missions, no specific details yet.

I will get the most up-to-date copy of the pdf to anyone who wants to contribute. If you do end up contributing, your name will go into the credits on the 1st page.

~N

P.S. If you would like to play test, but don’t know anything about Warhammer Quest and don’t have a copy there are files and content on-line in various places. While I can’t distribute these myself I can probably point you in the right direction and can give tips on printing out your own copy of the cardboard sections/rooms, etc., as all you need are the boards, rules pages and some minis … and probably lots of proxies for the less-common Monsters :wink:

Nicodemus:

We played the second introductory adventure last night: Forging a new Alliance - Adventurers are sent to the Mountains of Mourne to aid a group of Ogres in taking over an Orc-controlled mine.

The adventuring aside, we found a lot of things that need updating in terms of character rules, game mechanics, items in treasure tables, etc.  Some of the larger changes include rearranging and consolidating related sections of the Roleplay book, making specific sections of the book easier to find when flipping through the hard copy, and massively stream-lining the required reading for each adventure so that it’s closer to the amount of text in the main game Adventure book. The last one is no small task given that I was hoping to do some more interesting things with Adventures.

One example of streamlining the setup text for each adventure just shows the Dungeon Deck setup graphically and saves a good-sized paragraph of reading:

Intro Adventure 1


Intro Adventure 2

Loki:

Awesome work NIcodemus , i confess that i have not had a chance to read all you have written yet but i can see that you have put an amazing amount of work in to this well worth some slaves in my book :hat off

centauro enano:

Great report, I have always attracted much warhammer quest. and play on that board should be a last

:hat off

Nicodemus:

So there may be some slight delays as I make further sweeping changes to the Roleplay/Rules Book so that it doesn’t run afoul of GWs IP rights.  I was sort of keeping that in mind, but I re-read their entire legal section of their website last night and it’s obvious that I need to make some changes unless I want a C&D letter in the future.

Oh, and most of our avatars and in breach of IP law, not to mention the fact that ever time we show one of their figures (painted/unpainted or conversions) we should be including a GW-approved statement ;)  Oh my oh my!

Here’s the snipets:

Photos of Painted Models

We encourage fellow hobbyists to show off their painting skills by taking photos of their miniatures and putting the on the site. Please remember to correctly credit the IP - "miniature © Games Workshop 2003. All rights reserved. Used without permission - model painted by xxxxxxx"

Avatars

Avatars and similar monikers are now commonplace on nearly every forum or chat program that you come across. As cool as they may be, they can cause problems if the use our trademarks since we need to maintain the distinctiveness of our trademarks in relation to their origin.

If you want to use avatars and similar monikers, create them yourself and credit the origins of the IP in your message sign off.

Nicodemus:

Just a heads-up for anyone who may have been checking in…

I haven’t forgotten about this project. I’m still working on it off-and-on, work stuff has taken over a little more at the moment but I’ll be back at it with a vengeance soon.

Planning on a full draft of the rules to be published within the next 6-8 weeks.

~N

Nicodemus:

I’ve done some major edits to the Chaos Dwarf expansion for WHQ tonight. We also did some in-depth play testing not long ago and I subsequently ended up with notes written on almost every page of the draft version of the Roleplay book. A number of things are going to be slightly modified, mostly to speed up game play but also to address some balance issues that became apparent.

I also got most of the artwork in there and the formatting is nearly complete.

The final parts that need updating are:

Table of Contents (this will be last)

Update internal references to page numbers

Hazards Table for travel to Zharr Grungron Ankor (special Dwarf Underway Hazards)

Monster Tables 2 & 3 (4+ will be in the Adventure Book)

‘Monster’ entries for Men, Elves, Dwarfs, etc.

Magic Item/Weapon/Armour for the Elves, Dwarfs, etc.

Finalize list of “Actions” for roleplaying

Clean up the text and rules for the four intro Adventures

RapidShare allows up to 10 downloads so if anyone wants to see the draft version of the document (138 pages, ~17MB) here’s the link:

http://rapidshare.com/files/369438092/WHQ_CDQ.pdf.html

~N

Nicodemus:

I see that the Bull Centaur and the Hobgoblin are now each tied for 33.3% of the votes. It’s been a close race for a while and the Hobgoblin was in the lead for some time. I already have rules drafted up for the Hobgoblin in the Adventure book, although perhaps now I should be thinking about a Bull Centaur.

Does anyone have any thoughts on a Bull Centaur character for Warhammer Quest? If I’m to create a new character I think a general all-around “Warrior” type should be the goal. I think it’s obvious that Movement be higher than the regular on-foot characters, however it also seems that a Bull Centaur could easily be too over-powered relative to the other characters and this would need to be worked in thematically with the character.

Some initial thoughts:

Movement: 6 (other Chaos Dwarf characters have Movement 3)

Ballistic Skill (maybe -1 from the average value of the CD characters)

Can use any treasure normally usable by Chaos Dwarf characters, such as hand-weapons, helms, rings, pendants, gauntlets. Armour may also be worn, provided it is upper body armour. No lower-body components of armour may be used. Furthermore boots and other such items are unusable by Bull Centaurs.

As they are so fiercely devoted to Hashut perhaps they should have an opportunity once per Adventure to get some kind of buff, granted by Hashut for their loyal service?

In terms of advancement there is also the opportunity to have them gain mutations and enhancements to their physiology, in line with their possible transformation to a Great Taurus or Lammasu, although I don’t think there’s a need to have them transform all the way… on the other hand… a rare chance to transform into a Lammasu at high levels could be a cool route, although they’d lose the ability to wear any armour and probably couldn’t wield weapons either.

Thoughts, suggestions?

~N

P.S. Anyone know how to close a poll, like the one associate with this thread?