Kera foehunter:
I like watching this link grow there always a lot of cool stuff
Kera foehunter:
I like watching this link grow there always a lot of cool stuff
Nicodemus:
Time to crank 'er up a notch.
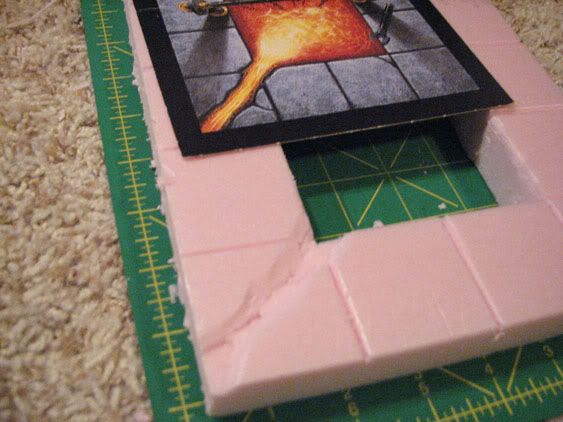
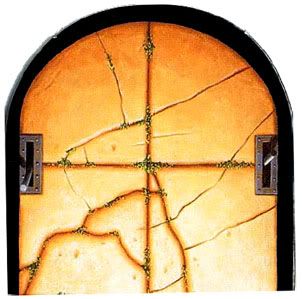
This is a tile from White Dwarf #201. From what I gather the same artist who did the tile design for Warhammer Quest also did the artwork for this tile. It was used in a Dwarfs vs. Chaos Dwarfs battle scenario. I only have up to WD#196, so I’ve had to rely on others to relay the details. Apparently there was a side-objective to the battle that required the Dwarfs to make it to this room and destroy the anvil.
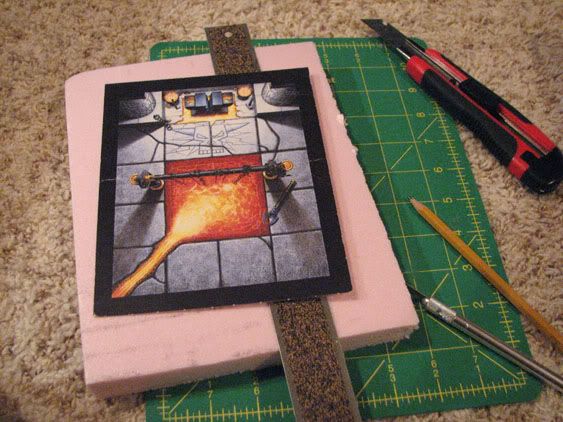
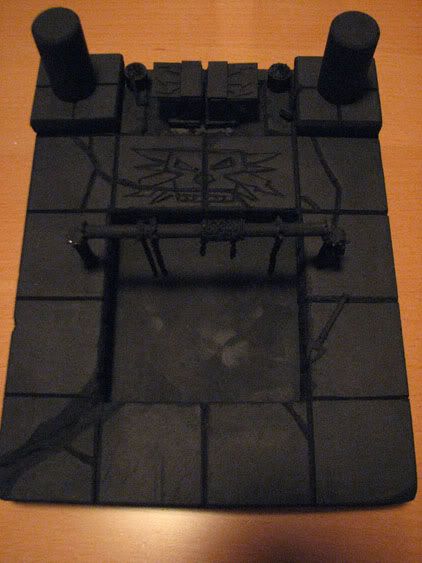
I give you… The Furnace of Hashut
And I’m going to post real WIP photos (as opposed to staged ones like before) of its creation over the next few days… or how ever long it takes, time permitting.
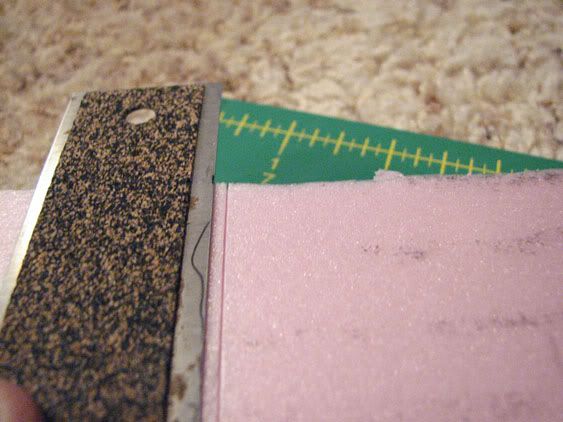
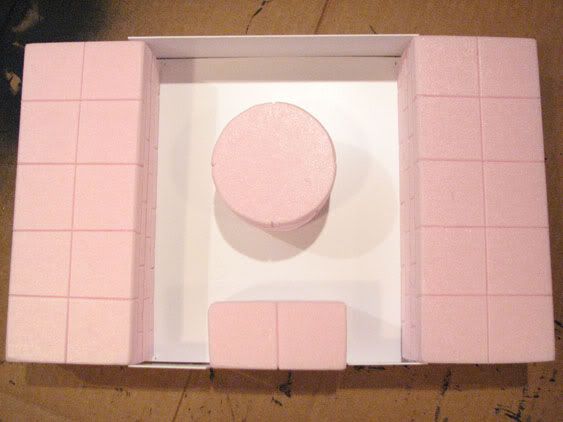
Here’s where we start: The Furnace of Hashut tile, 1" thick extruded insulation foam, X-acto blades of various sizes, a ruler, and something to mark measurements on the foam with.
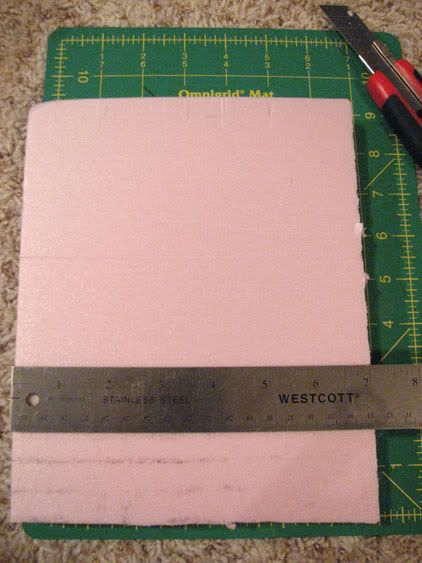
Start out by measuring for the dimensions you want and cut the basic outline accordingly. The Furnace of Hashut tile is 4x5 squares, and I’ve chosen to make my squares 1 3/4" (~45mm) which is 50% larger than the original size. This means the foam will be 7"x8 1/2". We use metric here in Canada, so all this inches business messes me up, but I digress.
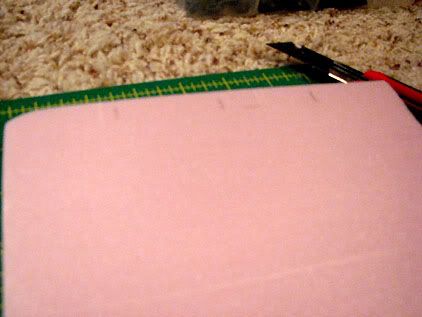
Next stage is to mark off with a pencil or pen where your squares are going to be. My squares are 1 3/4" so I mark at that interval. Note that I mark both the top edge and bottom edge (of the face-up side), but just the top edge is shown in the picture.
Now you can line up your ruler with your marks and you’re ready to cut.
Important: 1) Use a fresh sharp blade, otherwise you will tear the foam instead of cut it.
2) Align the ruler slightly off-centre with your mark, we want the gap between the tiles centred on your measurements, not the edge of a particular row of tiles.
3) Make your cuts on a ~45 degree angle from the top surface, don’t cut straight down!
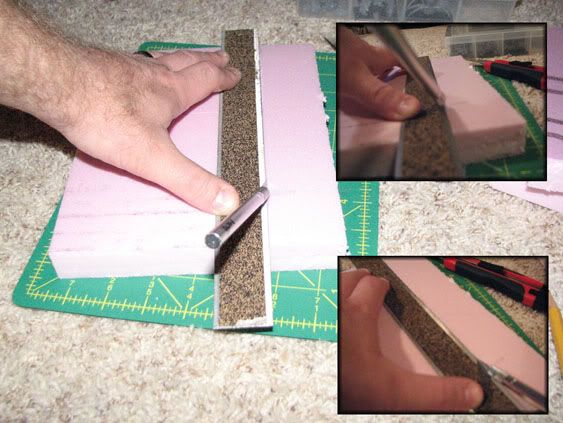
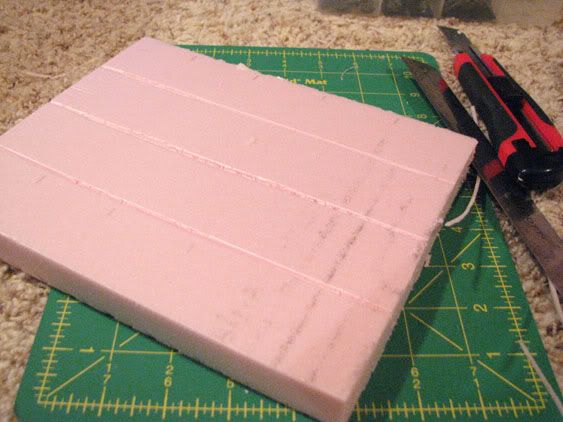
With the first line cut, flip the board over and re-position the ruler again slightly off-centre from where you measured your width of the square, again cutting at ~45 degree angle from the surface.
When you’re done you should have a V-shapred trough running top to bottom:

Repeat all the way along. Note that in this picture the centre lines that I cut chewed up the foam pretty badly, despite having a fresh, sharp blade. This happens from time to time. I think it happens most often if the foam has been compressed (like someone at the warehouse stepping on it before you buy it, or someone dropping something on it). Anyway, you’ll see we can still work with this.
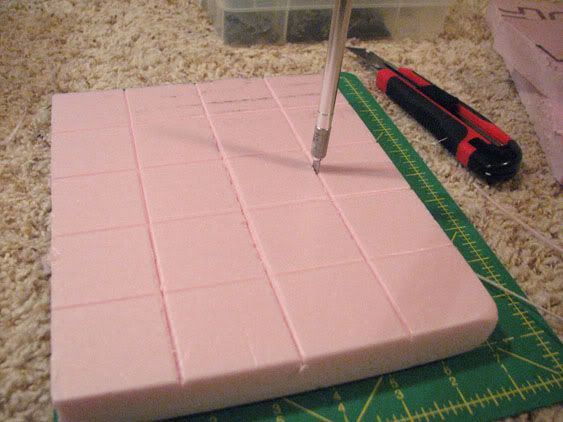
Now we repeat the process along the other edge, making our grid pattern.

So that’s the basic layout.
Now looking at our tile:
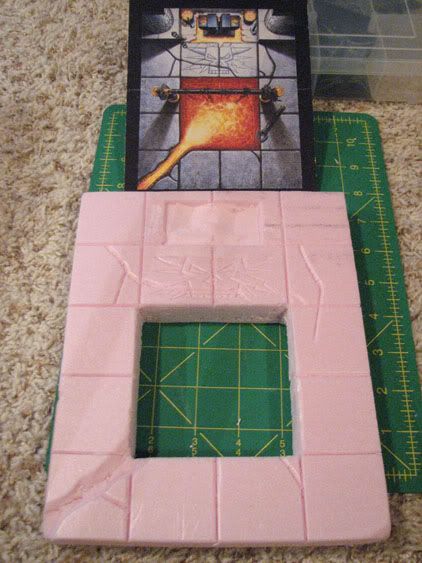
I’ve decided I want the 2x2 section in the centre to be completely gone. I don’t like cutting big things like this on funny angles to try and make clever depth perception tricks like the 2D tile. We’re working in 3D, so there’s no need, first of all, and second, they just never work the way you want.
So we start cutting out the 2x2 space in the middle. No ruler needed as you can follow the bottom of the V-shaped trough easily enough. I get it started with my sharper tool:
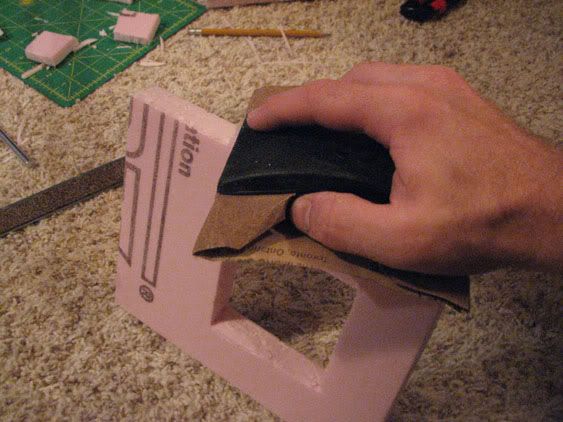
Then switch to the big gun:

With all that done you can stop cutting for a little bit and start cleaning up some of your edges by sanding them down and making it look more smooth. You’ll want to do this with the inside edges of the 2x2 section that was cut out as well. Note: Just a word of warning, go slow and don’t use too much pressure, and don’t fold the sand paper in half and sand with the folded edge … unless you want to sand harsh grooves into the edges of things. Slow even and long passes across will have it looking MUCH better.
Now we can start carving up the surface details. The area shown doesn’t have to look pretty. We’re going to be pouring in acrylic paint mixed with PVC glue later on to represent the lava, and nobody will ever see the bottom of what you’ve cut out. Just don’t cut too deep or you’re going to need to pour a lot more into it to fill it close to the surface of the tiles (but more on that at a much later stage)…
After some more carving, this is what we end up with:
Stay tuned for more updates on the furnace… or better yet, start your own piece! It’ll make a great setting for a diorama on its own 
~N
Nicodemus:
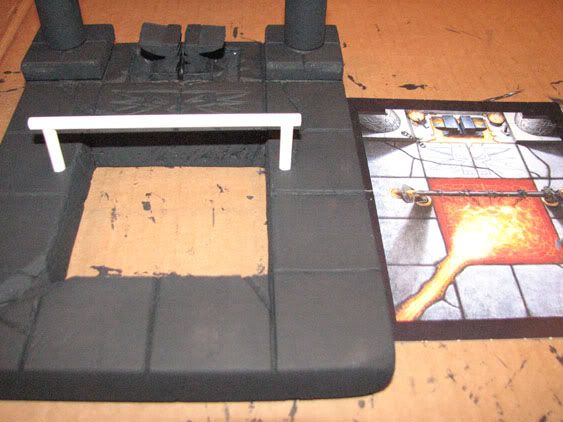
The Furnace of Hashut (continued)…
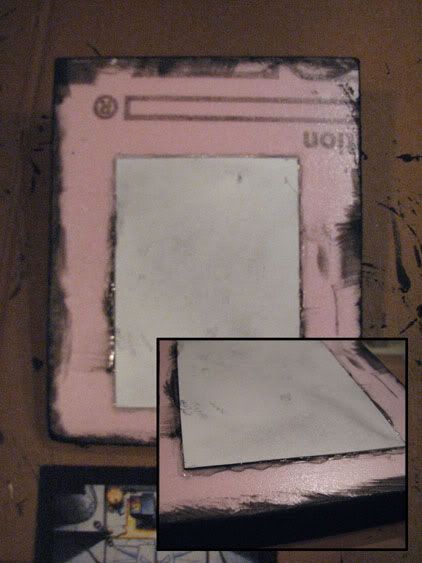
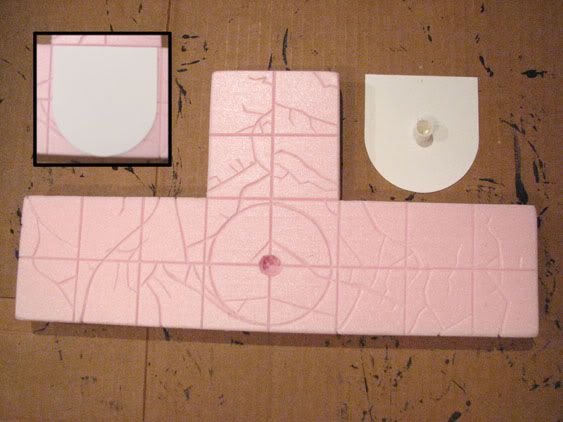
With the space for the pit cut out we need a new flat bottom to go in. I use Plasticard for this (thin sheets of plastic, sold at most hobby places).
You want the plastic sheet larger than the opening so that you can glue it on easily.
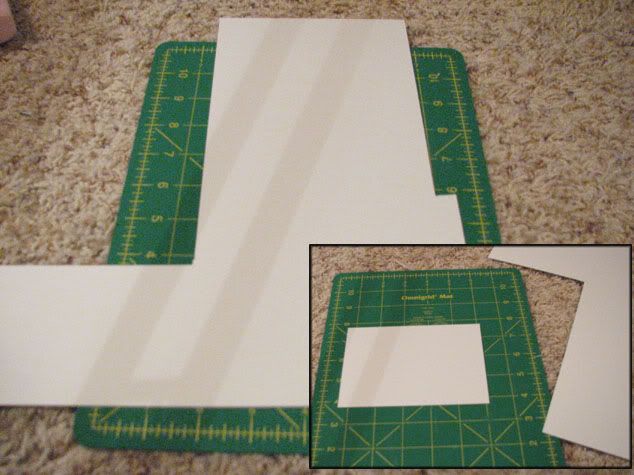
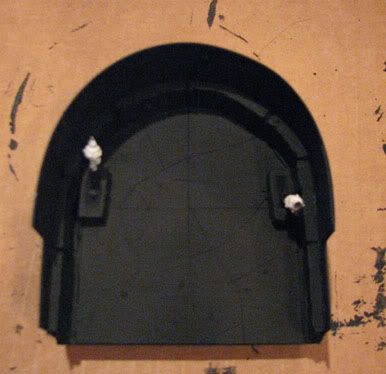
Here’s what it should look like - Note that this is not yet glued! The plastic won’t hold the acrylic paints, so you’ll need to spray it with primer separately. Depending on your brand of primer, it will likely dissolve your foam if you spray it on directly. Although you can spray primer over a foam board that has had a few under coats of acrylic paint, I still wouldn’t do it. One small area that’s a little thin on paint and the solvent in the primer will just eat away at your board section like the acid in the Alien movies. (As an aside, I generally use The Armory Spray Primer, from Dork Tower… the black colour one). I’ve sprayed it directly on foam intentionally while priming plastic pieces and it looks like it could work as a good foam primer, albeit an expensive one!).
Starting the first undercoat of black to prime the board. I start by applying a liberal amount of black into all the cracks and spaces (note that everything else you see on top of the board has been glued down with a hot glue gun).
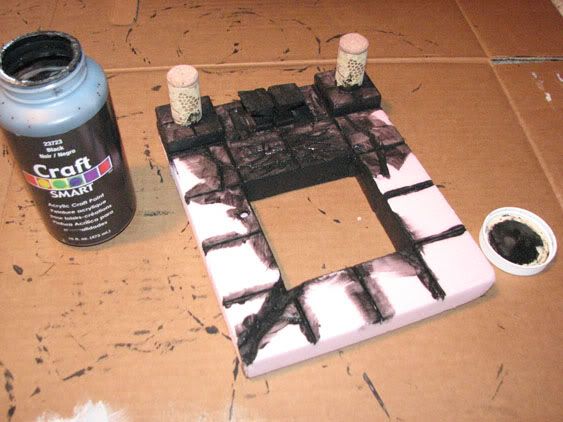
*The Anvil above is just a hand-cut piece of foam. I cut the outside shape on the anvil first, then cut it in half in the zig-zag pattern indicated on the tile.
Then finish applying the first coat. If you’re impatient like me, you’ll want a fan beside your painting area so that you can turn it on and have your pieces dry faster…
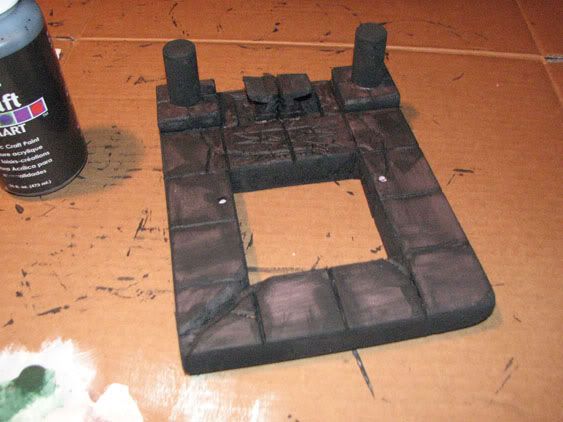
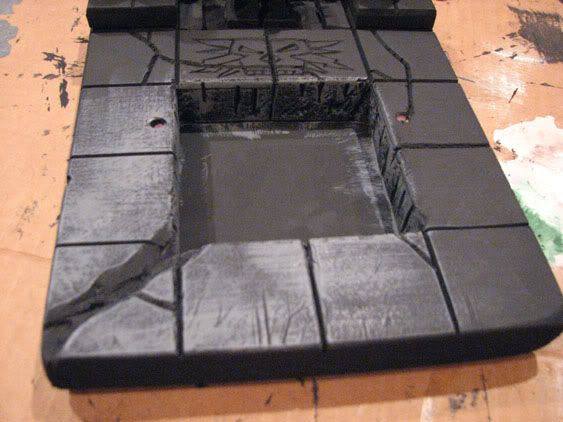
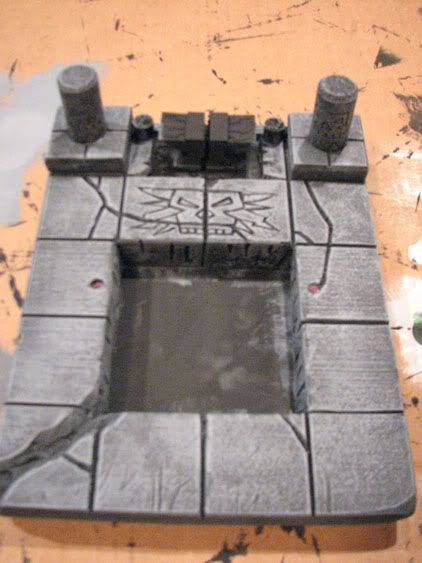
After the second undercoat of black (including applying more paint to all the cracks and board edges) you should have something that looks like this. Oh, and the base of the anvil doesn’t look like it’s coated well, but that’s because there is a lot of exposed glue from the hot glue gun I used to join all the foam bits. This actually doesn’t matter because the light colour you can see will eventually be covered over by lava (paint mixed with PVC glue). You can also see I started two holes for the support posts of the pulley and winch system.
After all the paint is dry the bottom of the pit/furnace is primed and then glued down. I use a continuous bead of glue all the way around the opening on the bottom of the board, as well as an extra continuous bead around the edge of the piece. The reason for this is that later on we’ll pour a mix of paint and PVC glue into the pit to get a smoother texture for the furnace bottom, but if there are any gaps, then chances are the glue and paint will leak out the bottom, and there will be some bad words.
Now it’s time to start thinking of all the extra bits and pieces…
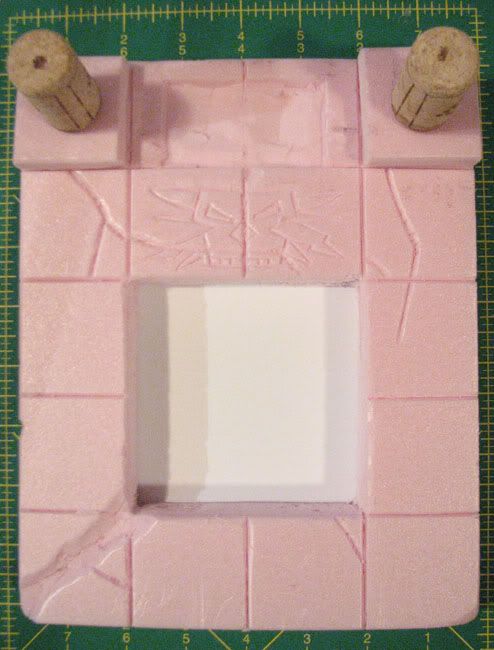
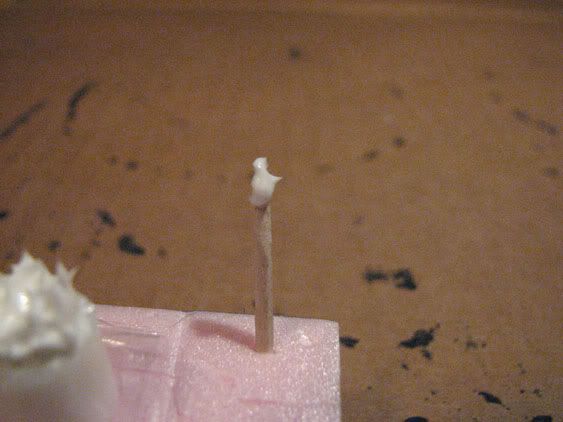
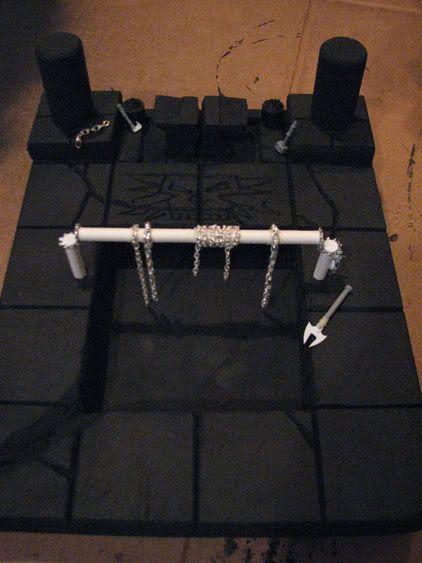
The most obvious thing on the tile, besides the anvil, is the pulley and winch system setup over the furnace/pit. I used large paper sticks, like the kind used for making homemade suckers. I cut two shorter pieces for the support posts and shortened one to use at the top part of the pulley. You can see in the photo after this one that there’s more detail to the winch system, including a hand-spun winch with gears for turning the pulley. We’ll get to that in a later post.
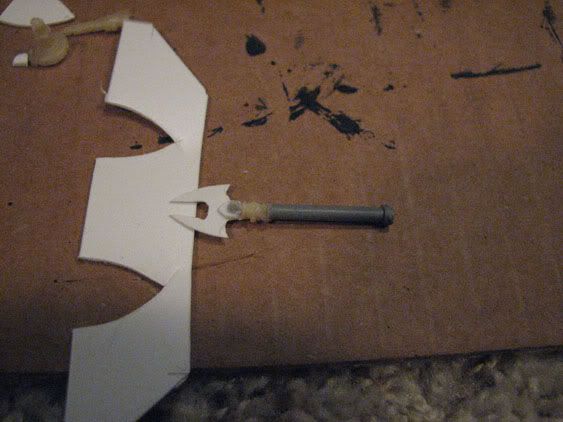
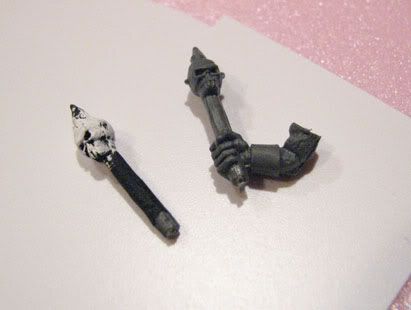
Another bit of trim for the tile is this great item, I’m guessing it’s used to grasp hot things as they come out of the furnace, and it looks suitably ‘Chaos Dwarfy’. I’m going to use the standard bearer’s arm from a Chaos Warrior and some spare scraps of plasticard.
After some clipping and trimming and gluing I ended up with the piece below. The tan-coloured piece in the middle fit nicely with the one drawn on the tile. It’s a resin recast of the central bit of a candlestick from HeroQuest (from the Sorcerer’s Bench). I also carefully shaved off the small skull from the back of the standard bearer’s glove to attach to where the bolt of the tool would go. It’s not exact, but darn if it isn’t close… close enough for me. You can hide a lot with a good paint job too :hat off
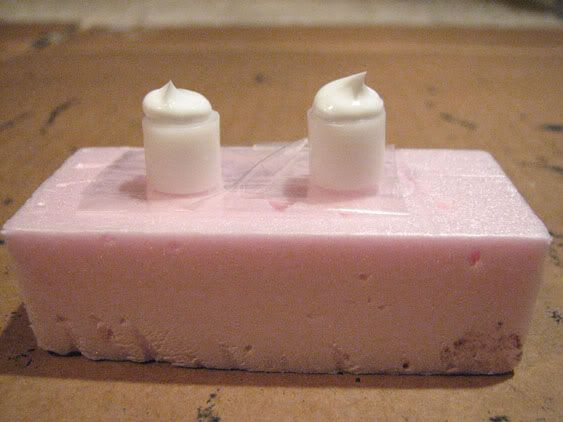
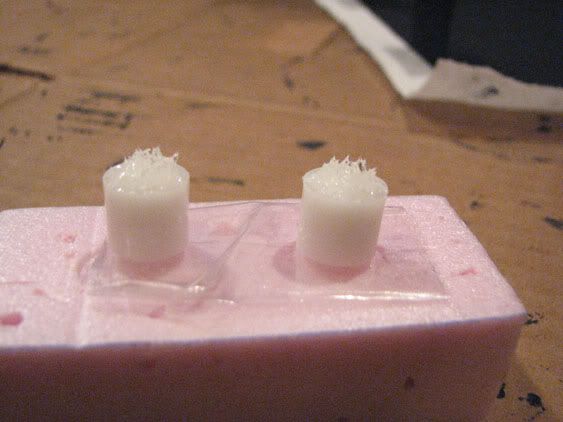
Lastly, for today, are the flaming braziers on either side of the anvil.
I started with two small hollow, cylindrical tubes, held down by some two-sided tape. Actually it’s regular packing tape rolled inside out. This allows the pieces to gently stick so that they don’t slide around, but not stick so hard that you might ruin your work.
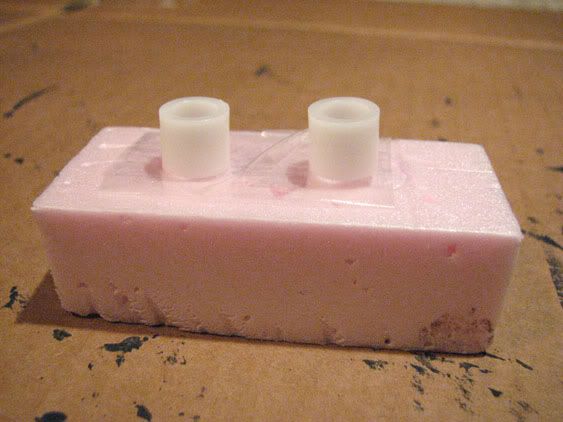
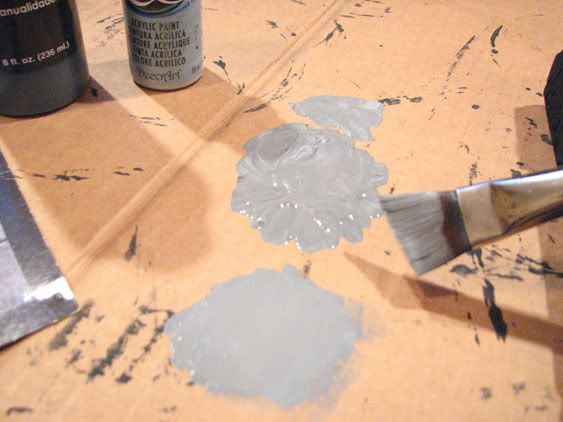
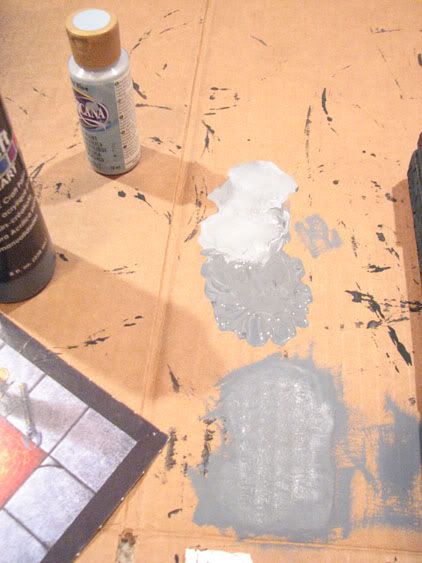
As usual, I like a quick and easy solution, so I’m using the thick and formable “Water Effects” product. It looks like a super thick PVC glue, except it’s hardly sticky at all and doesn’t run.
Using the tip of a toothpick you can just dip it into the material slightly and pull up, and it drags some of the material with it. For flames I start in the middle, generally pulling straight up, but not quite, there needs to be a little variation in there.
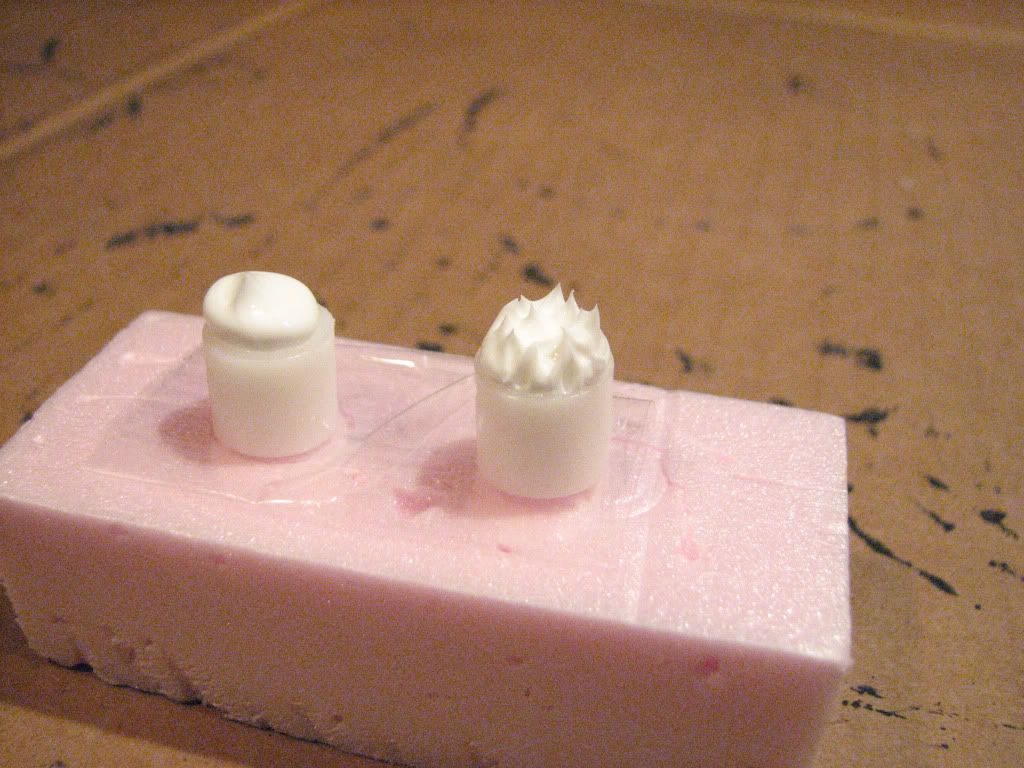
Then you can start working your way toward the outer edge. When you get to the outside you might want to start drawing the material upwards at a bit of an angle, like 20-30 degrees, but no longer straight up.
As you’re working the material will build up a little on the tip of the toothpick and your little whisps of flame won’t pull up quite as far, instead you’ll just be mashing a glob of the stuff into another glob. So wipe off the tip after you get 1/3 or 1/2 way through.
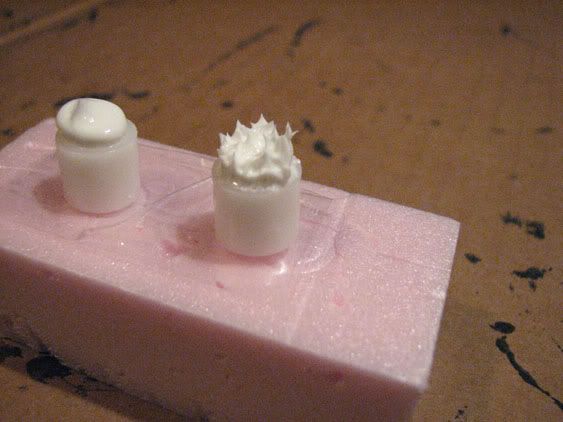
And here’s the second one finished as well.
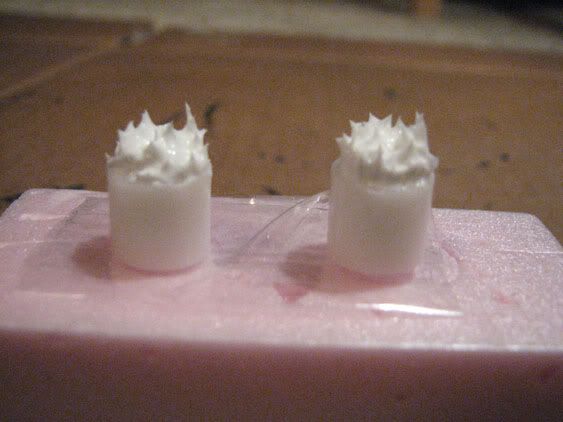
That’s it for now. The Water Effects material takes at least 24 hours to dry, and you can’t rush it. I usually wait 30+ hours, as I don’t like repeating things when I’ve messed them up. It shrinks a tiny bit as it dries I find, and if you spray it with primer too soon the primer will look warped and ripply.
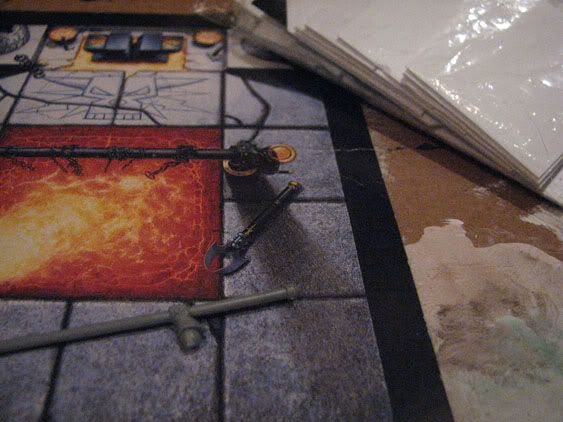
As for the rest of the trimmings in the next stage: Of course the chains and skulls on the tile will be the easy bits so there’s no point showing them yet. The hammer next to the anvil will be easy as well as I could either cut a piece of sprue into the head of the hammer, or better still, just take one of the hammer weapons from the dwarf warrior in BFSP, or modify one of the current Chaos Warrior weapons (which I also have a few of).
I also have some ideas for the pulley and winch system as I don’t want to just put the top bar across the two supports and just leave it at that.
So, more updates to come… time permitting.
~N
clam:
It’s looking as good as the rest of your stuff!
Glad, you take the time to let us follow you - step by step - on the ‘how to …’. There is so many good advices in here - that the thread should be ‘stickied’ - in the ideas and advice sub section as well 
Keep it up.
And a question:
The Chaos Dwarf icon in the floor - is that done with a knife, too?
Nicodemus:
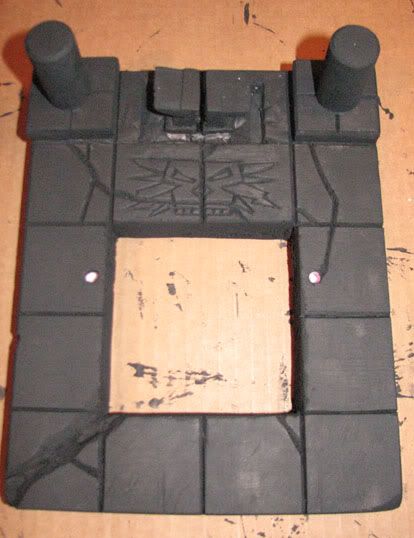
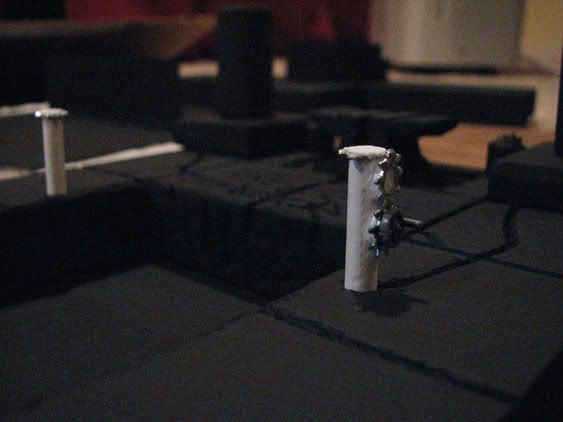
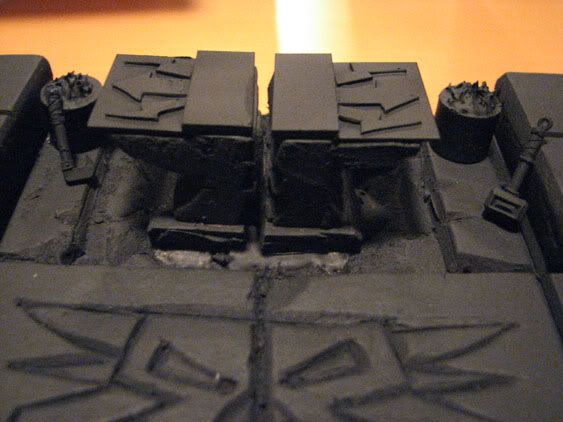
The Chaos Dwarf icon in the floor - is that done with a knife, too?If you mean the face that's in front of the anvil, then yes. I just used the same technique I used for carving the V-shaped spaces between the tiles, except in the case of the icon I just did it free hand... and it was done without much thought. If I were to do it again (and better) I'd probably draw a grid of squares on those two tiles in pencil and then make the same grid overlaid on the image in Photoshop on my laptop, then just go one at a time from one small square to the next, copying the pattern from the whole grid until I had it matching the original. (Photobucket is down for maintenance, so see the attached image, sorry for the blur).
clam
Kera foehunter:
That is so cool!! thanks so much for the wip great painting on it too
Nicodemus:
The rain is thundering down here tonight (started before supper time), so there won’t be any WIP photos on the Furnace of Hashut until later, after I can spray some primer on some bits.
In the interim, I’ve fianlly started on a couple of the last official Warhammer Quest tiles, those of the Pits and Traps expansion. Very difficult to come by, but there are some pdfs floating around with scans.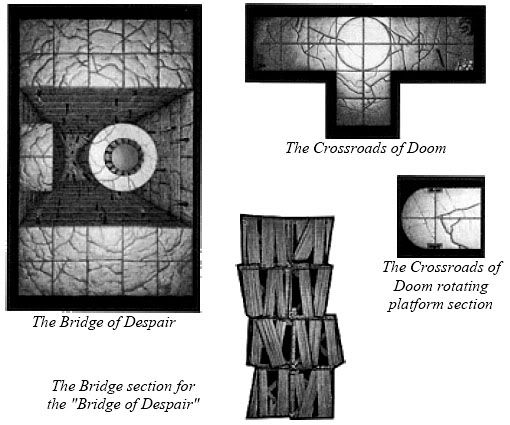
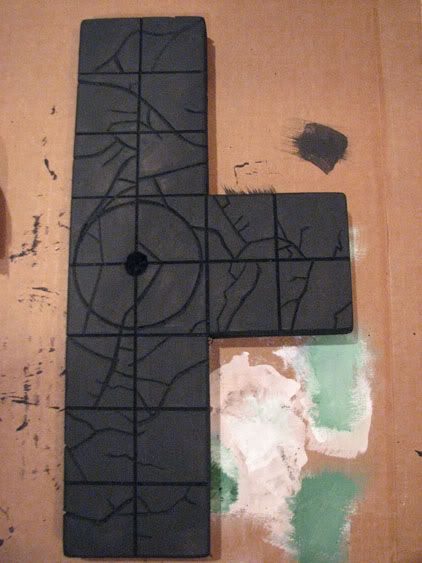
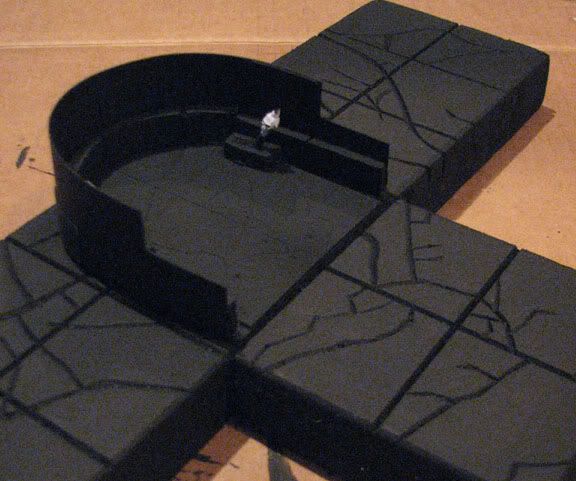
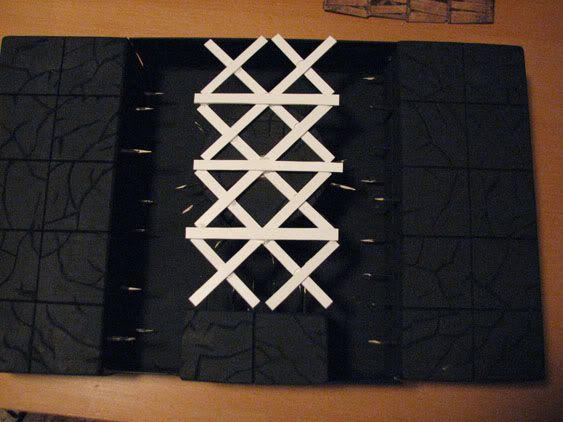
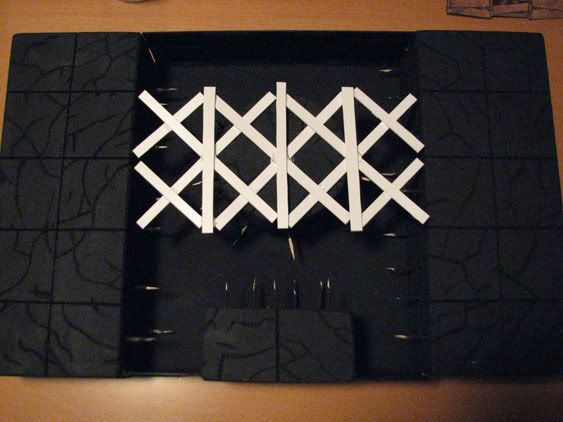
Here’s the basic layout of the Bridge of Despair
And the Crossroads of Doom has been carved up and the black under coat is drying right now…
I decided I wanted the rotating platform for the Crossroads of Doom to be a little more “fixed”, so that the rotating piece doesn’t just float freely (as it usually slides around and off the 2D tile). To address this I used a small cylindical tube glued in the centre of the rotating piece. I also cut a hole into the board in the centre of where the piece is set to rotate. It’s important to measure twice, glue and cut once
Luckily I did it right and it does rotate easily and still lines up exactly with the edges of the adjacent tiles. I haven’t decided if I want a partial wall on the back and sides so it feels enclosed.
On the actual rotating tile section there are levers which are used to control rotation of the piece.
These would be easy enough to do with pins or rods, but I wanted to go with something a little more interesting and “dungeony” for them. I decided to use a bit from the Skaven Clan Rats. Cutting off the arm and shaving off the fingers it looks a little better.
Once these boards are done the last tile to finish to have all of them will be the 2x2 spiral staircase tile… which I think I finally have some ideas for making it :cheers
Don’t worry about Hashut’s Furnace, it’s coming!
~N
tjub:
This is an awesome blog, keep up the good work! 
Nicodemus:
First things first - WIP on the Pits and Traps tiles…
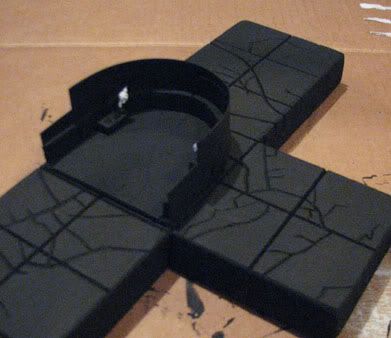
The Crossroads of Doom undercoated x2
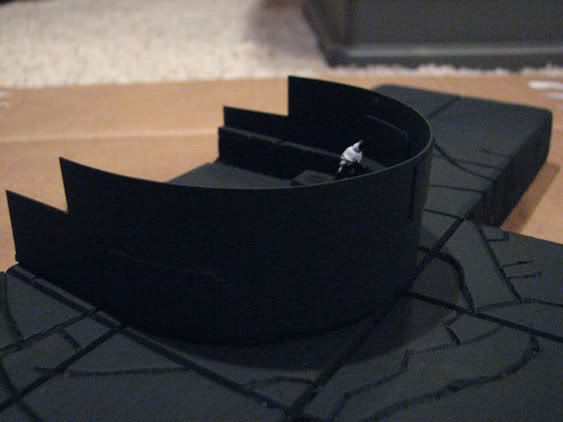
I decided the rotating platform needed walls. Seeing as the board is 3D, there’s no reason not to, although in general I’ve tried to shy away from putting in walls unless it’s necessary (like the Fighting Pit Objective room). In this case the rotating platform is only accessible from one side, hence the need to rotate. In 3D, without the wall, it just looked incomplete. The wall isn’t overly done, but it’s enough to get the point across while still allow easy access to the squares for moving units around.
The rotation works better than I planned. Super smooth, no sticking or catching and goes with just one finger.
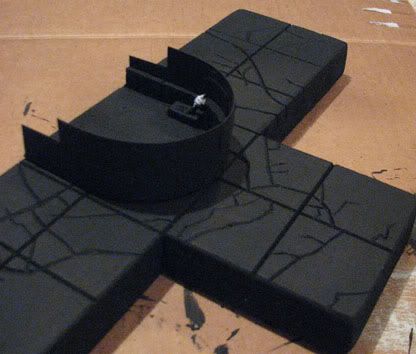
Because the “wall” on the rotating platform is thin plasticard (more on that in a moment) it will look very flat and uninteresting, even once painted. I just used the old trick of putting on a couple of faux-bricks so that there is the implied surface of a brick wall when it’s complete. To do that I cut extra rectangles of thin plasticard and cut the corners off (looks better this way).
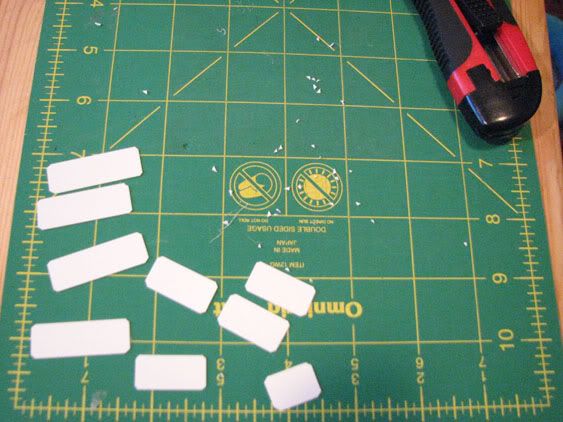
A few of these are on the outside as well as the inside of the wall.
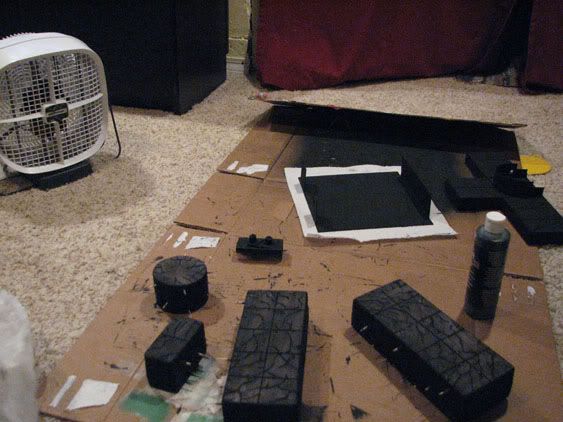
As for the Bridge of Despair, all I can say is: it’s coming along. The plasticard base and walls have been carefully glued using a glue gun so that it’s free-standing, and the rest of the board sections have just had their second undercoat of black applied (which is drying). Haven’t built the bridge section yet, but that’s easy stuff. Here’s what it looked like a few hours ago:

This is the work area with the fan setup to speed drying which I’ve mentioned before. This is important later for dry brushing too as you have to let things dry in between coats of paint.
A brief note on the plasticard I’m using:
I buy them in 12"x24" sheets, which is pretty standard. For the rounded wall and the “bricks” above, that’s plasticard which is 0.02 thickness (so relatively thin, actually, and easily bent).
For floor tiles, such as the rotating platform base, and the four tiles on top of that, I used 0.03 thickness pieces. That extra bit does make quite a bit of difference in terms of rigidity.
The walls for the bridge of despair are also 0.03 thickness, just enough that they won’t flex easily at their current size. Of course larger pieces will flex more easily than these smaller ones.
For the base of the bridge of despair board I used 0.06 thickness. It’s very rigid, which is what I want for such a large piece, and also because it’s the base of a larger board that’s going to have foam glued down on it, I don’t want there to be any tendency to flex or bend. Although these will be sitting on a table or in a box, and there’s not a lot of opportunity to bed, moving them around during play can put a lot of stress on them, and a thin base will probably mean it’s going to come apart. My previous Fire Chasm Objective room and the Sewer tile both used 0.06 thickness as well. The furnace of Hashut only used 0.03 thickness because we don’t need the support.
So now, back to The Furnace of Hashut…
I find after getting the foam cut and everything organized up to the priming and undercoat painting stage things can slow down. Preparing all of the extra bits and trim takes a while. Some times several days.
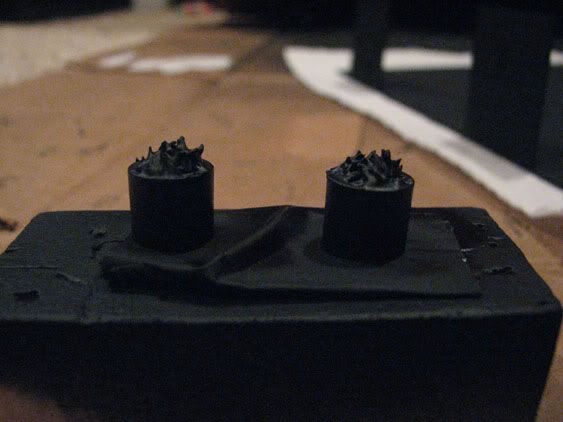
Here’s the dried Water Effects flames I made… the whisps of flame aren’t big (you can make them bigger initially or add more at this stage and work it up higher). The tile doesn’t imply large flames, and is much more reminiscent of hot coals anyway…
And the same bits primed.
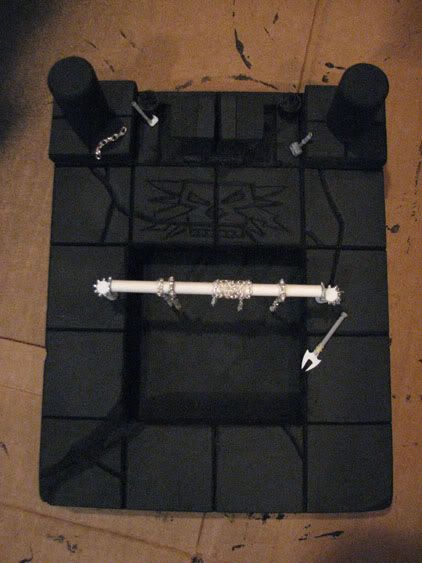
Here’s one of the support posts, I’m using a hand crank from the Dwarf Miners, it’s supposed to go on a drilling machine. The “gears” are from a hardware store. I just browsed through their bins of small washers and nuts and bolts. I’m not sure what these are called exactly, but I believe you use them like washers, when you tighten they should give some grip as the ‘teeth’ are slightly angled. Anyway, they made good gears.
So the whole thing isn’t going to be exact, but I got annoyed with the pulley/winch system, especially the separate pulley wheel that’s on the left in the original picture, I couldn’t see what purpose it served, and for all the extra work it would take to cut it I didn’t feel it added anything to the piece at this stage. If I put much more work into this I’d be close to something that would actually work to turn
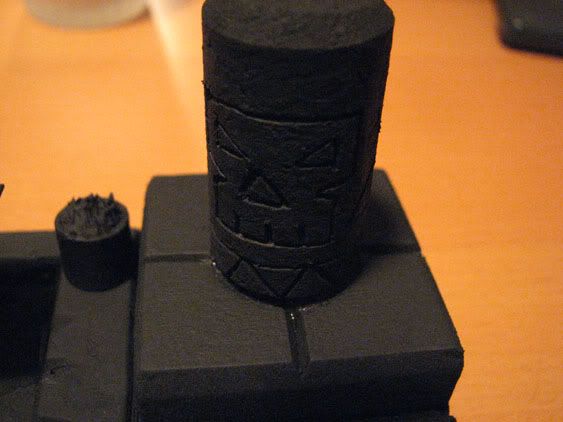
Not sure I’m going to try putting the faces onto the pillars, unless perhaps it’s at the painting stage. The pillars are cork and won’t be as easy to make a chiseled pattern in like the floor.
~N
Kera foehunter:
Once again this is like a glass of fresh air !! you have help me so much on the how to work the pink foam !! My hobby skills have double ! thanks NIcodemus!!!
Thommy H:
This is a really impressive blog. I’m jealous of anyone with access to Warhammer Quest and it’s tiles, but a 3D version? That just takes the mick 
wallacer:
Amazing stuff, keep it coming.
Nicodemus:
OK, so I was happy with where things were going with this project, and then I saw this guy’s modular Mordheim setup that makes me want to pack it all in…
BvB: Wolfgangs Mortheim
Seriously… I mean… seriously! Take the time to scroll through (don’t miss the arrows at the bottom of the thumbnails for more pics). This is nuts. A lot of it is foam, but still, look at it. He pwns the foam! And I thought publishing was going slowly just with my little projects here ;P I’d need a wealthy benefactor, no other job and we’d probably need to postpone baby #2 indefinitely to seriously tackle something like this. It’d be my luck that after starting a project like this GW would discontinue Mordheim and I’d lose all interest
I’ve never played Mordheim, but from what I’ve seen and read you can’t play it solo… the guys that I game with have zero interest in branching out to try anything else besides Warhammer Quest, and will only game with my stuff anyway, not buy their own (well, one guy has 3-4 heroes, but that’s it out of the group).
Anyway, this is my ode to what it might be like to meet up with some gamers to play Mordheim for the first time with this setup:
Lock eyes from across the room
Fondle my dice as the big nerds loom
Shake their hands, skip the names
I’m only here to play some games
Make our way to the basement (where we’re allowed)
I can’t f**ing believe one guy is wearing a shroud
Step a little away, the nerd meter is high
Clap my eyes on the games table and the angels cry
It takes forever to start, one won’t shut up, another’s a bore
Two others are still paining, what could be more
A whole night of gaming, what we’ve got in store
Finally we start rolling some dice and prepare for war
And I jzz in my pants
… you get the idea
~N
Nicodemus:
Pits and Traps tile Bridge of Despair is undercoated x2:
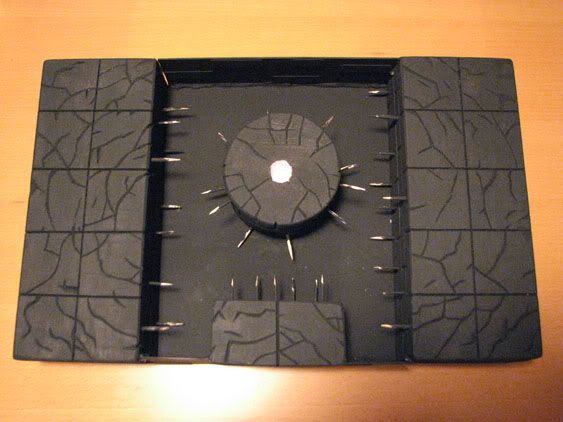
Laying out the bridge (under-support is thick plasticard). Here I’m just lining things up based on the 2x4 block of tiles. Note the hole that’s been cut as well as the plastic cylinder that will act as the pivot point.

Using the hot glue gun to get a quick piece with things set in the right spots I can test it out. Things line up more or less.
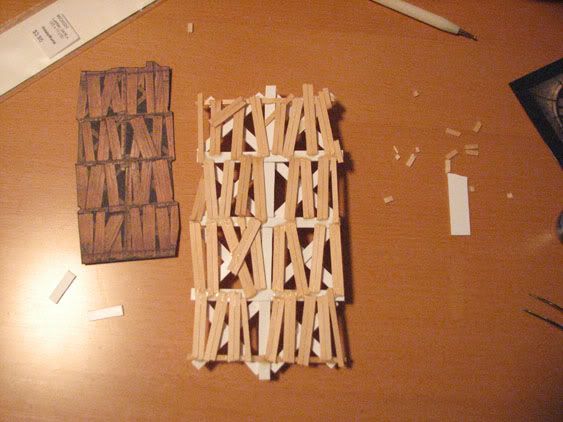
Final touches is to use the stylus/embossing tool (see earlier post) to make indentations into the plastic framework so that later it will look like rivets underneath. Now adding some wood it’s looking more like the Bridge of Despair. Note that I didn’t care to reproduce the bridge exactly, I just went for a similar effect. I’ve also decided that the amount of rope that’s implied in the original for lashing everything together isn’t worth the effort on this piece… partly because I know this board section sees play only seldomly
Back to The Furnace of Hashut
Final designs on the Anvil of Doom (I believe it’s called… I may be wrong).

Plastic on the anvil primed…
… and finally ready for some paint
~N
Nicodemus:
Changed my mind about the pillars for the Furnace of Hashut board section… There’s no excuse for not carving up the cork: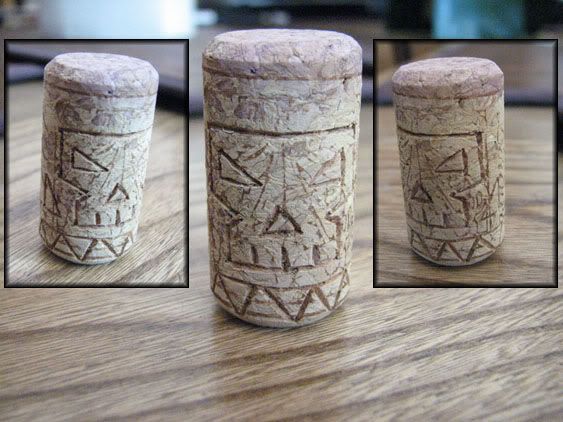
~N
wallacer:
Those corks came out well. I would have thought cork would be a damned hard thing to carve.
Kera foehunter:
Thanks for the paint and where to get it !!
Michael Rules in my book !!
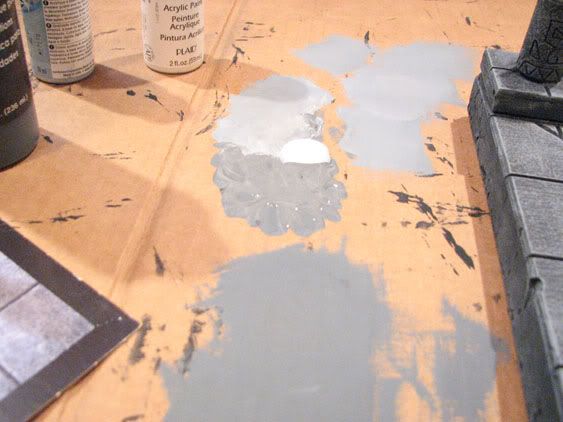
Nicodemus:
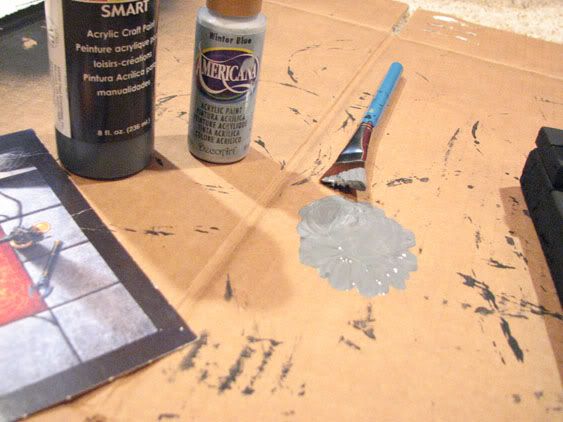
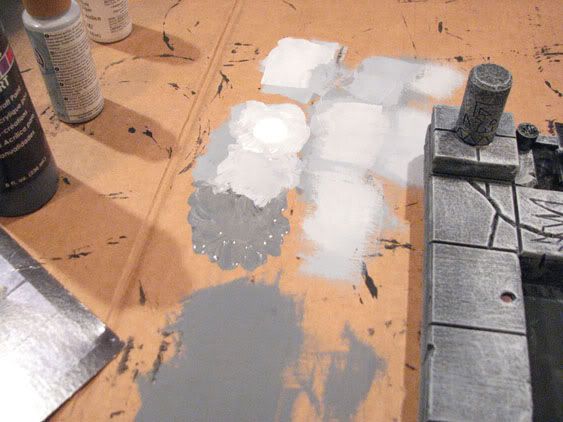
Starting out with the base coat (yes, there is some blue in the tile, so we’re starting with a low-contrast blue mixed with black).

And dry brushing
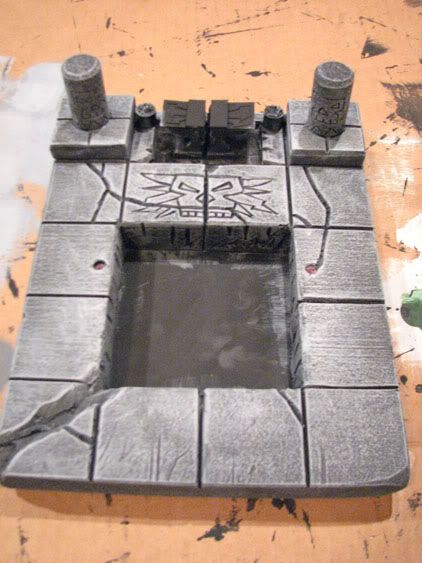
First layer (still lots of black showing)

More blue (next lighter layer)
Next lighter, again
Starting to mix in some white.
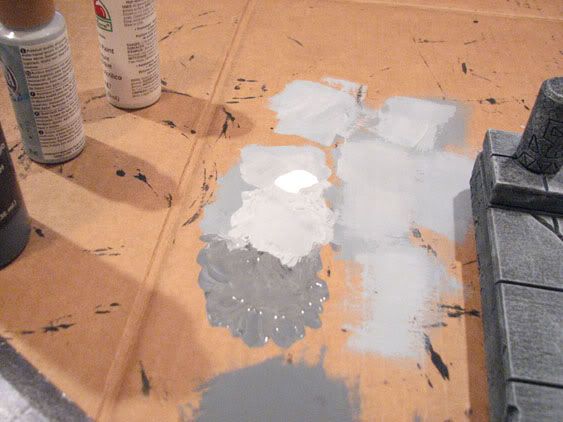
It’s important if you start mixing white in early (I think this is early, I really should have done lighter with just less of the dark mixed with the light blue) that you start dry brushing with a very dry dry brush and very little pressure on the brush. One trick for starting dry brushing is to start on some part that’s not important. I always do the edges of the board section as opposed to the surface.
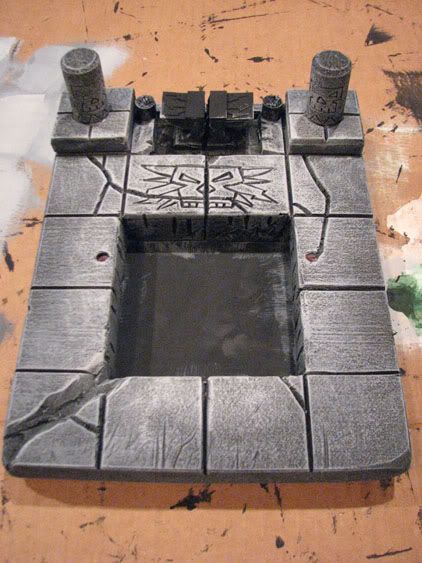
Lighter still (lots of white)
But still using light brush strokes so that the white isn’t over-powering
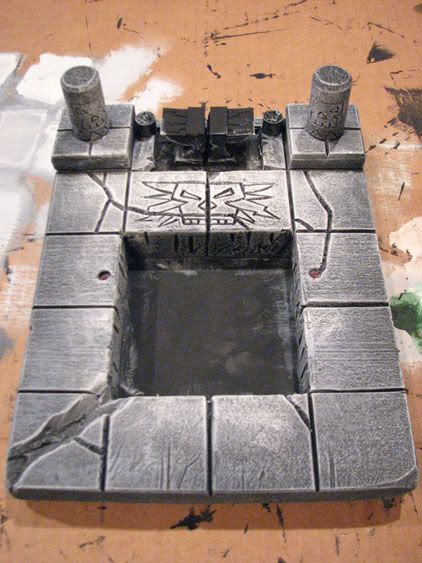
If you look at the original tile there’s almost a spackled pattern of colour on the floor. To do this I’m using an old toothbrush. You just load up a decent amount of paint (not too much or drips will land on your work) and then flick the bristles. 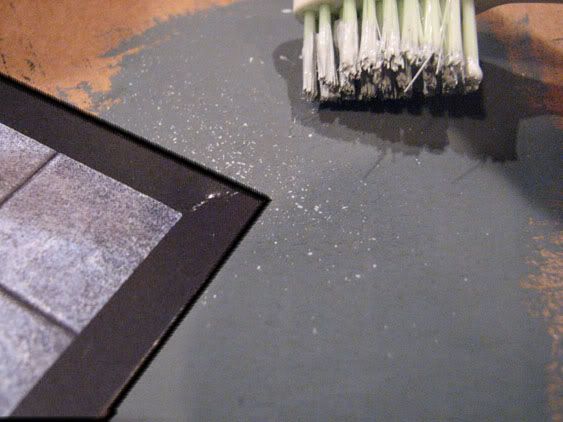
I sprayed the medium-intensity colour around most of the surface, only encroaching a tiny bit on the lightest spots, then I went back to the darkest base colour and put it in around the border of the surface. The effect is that transitions and the whole colour surface looks smoother. The real tile also now has that spackled pattern, not sure it shows up well here.
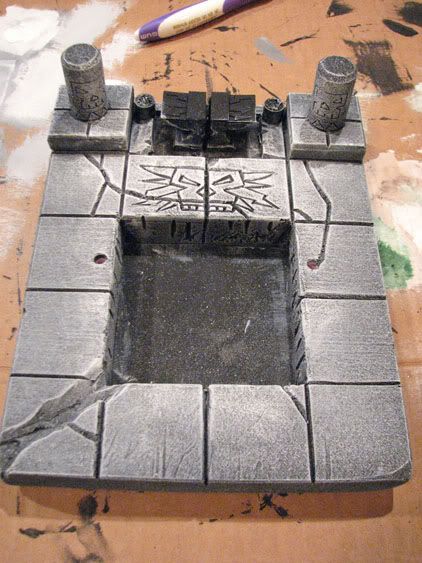
That’s all for now. Need to think about what I want to work on next.
~N
Kera foehunter:
Nice painting tips !! and great paint job
Nicodemus:
Glad some people are still getting something out of the WIP…
Just a quick update which will have to tide people over for a while. Grant writing season started early this year… the chance of doubling my salary for the next 3 years takes priority
Dry brushing the insides of the lava pit. I went from dark red to light red and then a very small amount of orange just half way up from the bottom.
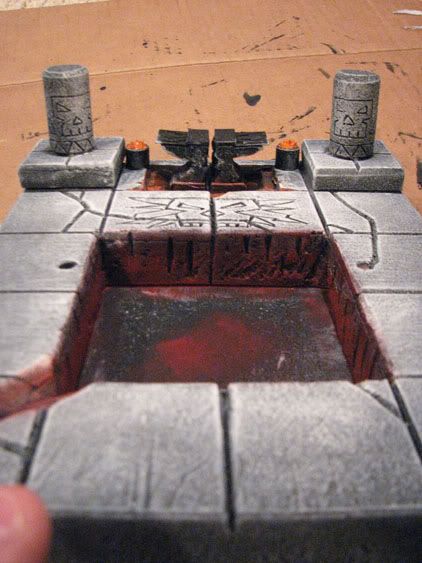
For any of the liquids like lava or water I mix acrylic paint with PVC glue (aka white glue), but I also mix some of the Water Effects stuff into it. I don’t add much, but just enough to make it more viscous. This way I can almost paint the lava on.
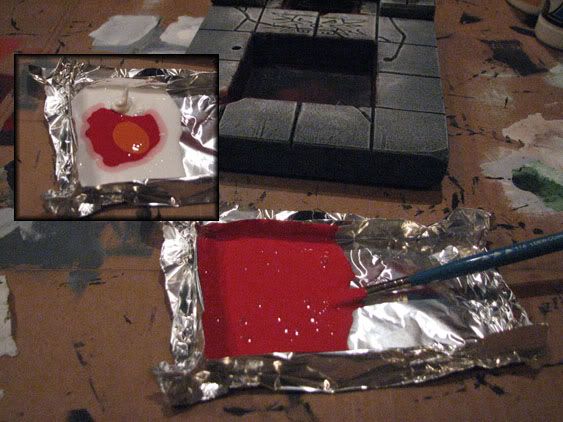
Doing it this way - It does even itself out and settle a little, but it’s viscous enough that it can’t break surface tension and spread out to places you haven’t painted it on. This let me paint the lava into the channel at the bottom corner of the board without needing to put putty there to stop it.
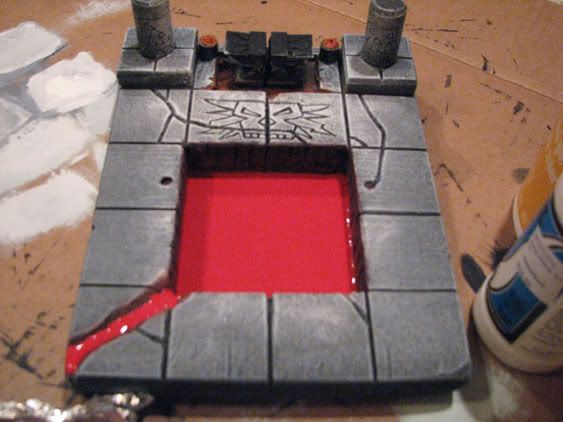
Now there’s no way I’m going to try to duplicate someone’s random lava pattern so I just did my own thing. The lava around the Anvil of Doom is almost totally yellow on the reference tile, so I didn’t start with nearly as dark a base coat, and went with orange instead.
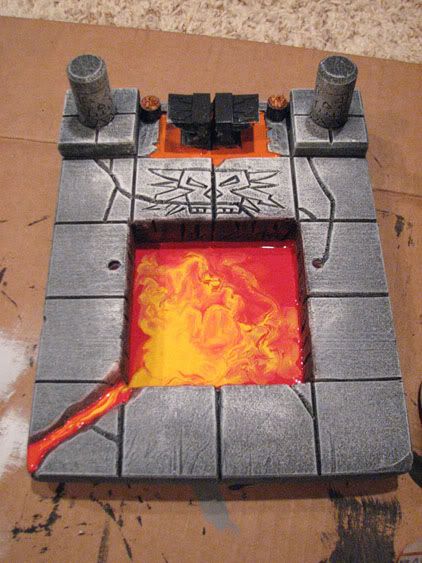
Before I make any more changes or alterations to the lava I’m going to let it dry. FYI: I find 24 hours isn’t enough a lot of the time either… so if you try this don’t stick your finger into it to test it the next day thinking you gave it long enough :P … and don’t ask how I know that :mad
~N